A text prompt describes what to make. A reference image can describe how it should look. IPAdapter feeds an image into the model alongside the prompt, so a new generation picks up its style, materials or pose. Here I take one of my old 3D sculpts and transfer its look onto a dog, then combine two and three images into one result.
IPAdapter comes from the paper IP-Adapter: Text Compatible Image Prompt Adapter for Text-to-Image Diffusion Models (Ye et al., 2023). In ComfyUI it’s implemented by the IPAdapter Plus node pack by Matteo (cubiq).
In short
- Install: IPAdapter Plus, ComfyUI Essentials, a CLIP Vision model and the SD 1.5 IPAdapter model, all through the ComfyUI Manager.
- One image: IPAdapter Advanced between the checkpoint and the KSampler, with a Unified Loader, CLIP Vision, and the image resized to 512 × 512.
- Weight: 1.0 copies the reference; about 0.55 lets the prompt in. Weak input keeps the reference from overpowering the subject.
- Several images: one IPAdapter Encoder per image into Combine Embeds, method add, then balance with encoder weights. Up to three images stay controllable.
If you’re new to ComfyUI, start with ComfyUI node basics and text-to-image. The finished workflow is a free download on my Patreon; load it and install missing nodes from the Manager.
Install the nodes and models
- Manager → Custom Nodes Manager, search IPAdapter, and install ComfyUI IPAdapter plus (Matteo’s, version 2). Pick the latest version and restart.
- Manager → Model Manager, search CLIP Vision and install the CLIP-ViT-H-14 model. Some people also recommend a second CLIP Vision model listed below it; it never worked for me.
- In the Custom Nodes Manager, install ComfyUI Essentials. It adds nodes the standard ComfyUI is missing, including Image Resize.
- In the Model Manager, search IPAdapter and install the IPAdapter for Stable Diffusion 1.5 model. SDXL versions exist too, but they’re heavier and slower. While you’re learning and testing, SD 1.5 is much faster and the results are pretty good.
- Click Update All and update ComfyUI, then restart, so everything is current.
The IPAdapter model files are also on Hugging Face, if you prefer to download them by hand.
The basic one-image setup
Start from the basic image generation template. I use epiCPhotoGasm, an SD 1.5 checkpoint.
- Add IPAdapter Advanced. This is the main node. Its model input takes the checkpoint’s model, and its MODEL output goes to the KSampler.
- From its ipadapter input, add an IPAdapter Model Loader and set it to the SD 1.5 model (not the face model).
- From its clip_vision input, add Load CLIP Vision with the model you installed. This is a bit confusing, since the prompts already go through a CLIP encoder. But IPAdapter needs this extra step to convert the image into a form it can use; without it, it doesn’t work.
- From its image input, add Load Image. I used a sculpt I made a few years ago.
Press Ctrl+Enter to run, and Q to open the queue panel with your results on the left.
Getting the prompt through
With the prompt “dog” and the weight at 1.0, nothing happened: the result was just the sculpt. The weight has to come down quite a lot. Below 0.5 it only makes a dog; somewhere around 0.55 you get the transfer. Even then it took a few runs. Putting head, face, male, female in the negative prompt helped a little.
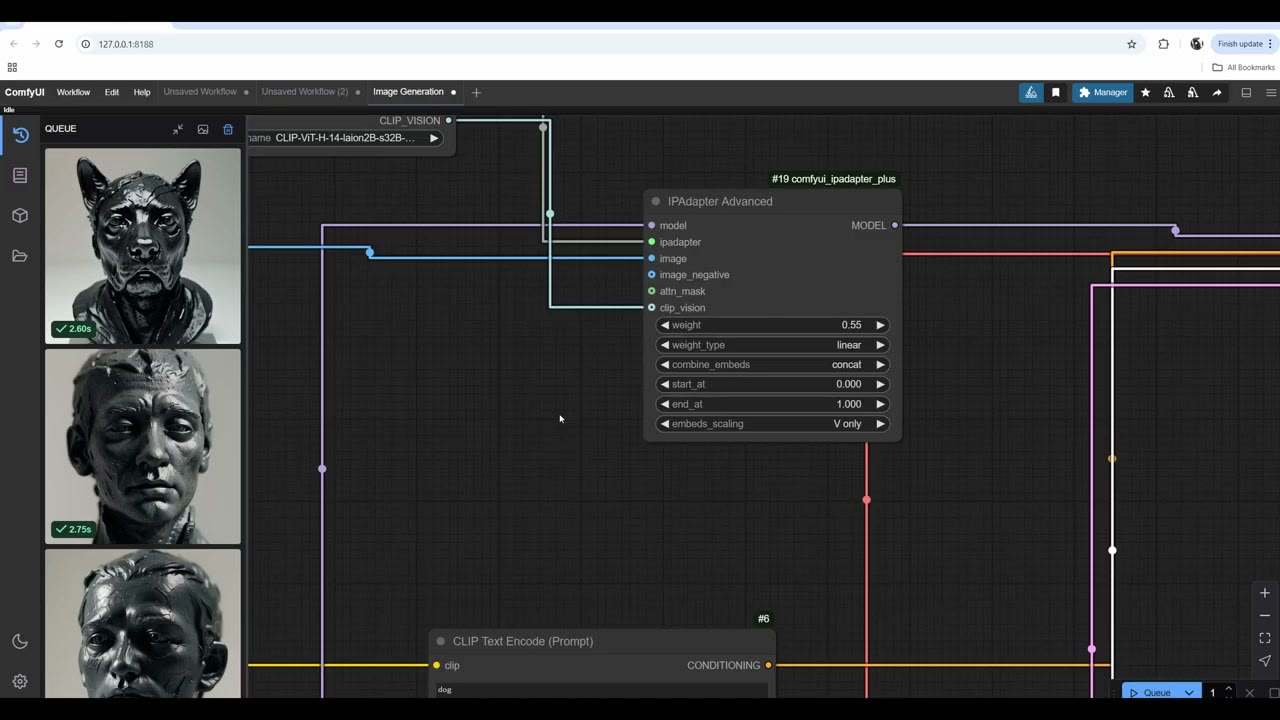
Weight type
- Linear applies the reference evenly.
- Ease in leans towards the reference image: mostly the sculpted face.
- Ease out leans towards the prompt: just a dog, with nothing from the reference.
- Weak input / weak output are fairly self-explanatory. I wanted weak input, so the face doesn’t overpower the dog but the look and style still transfer.
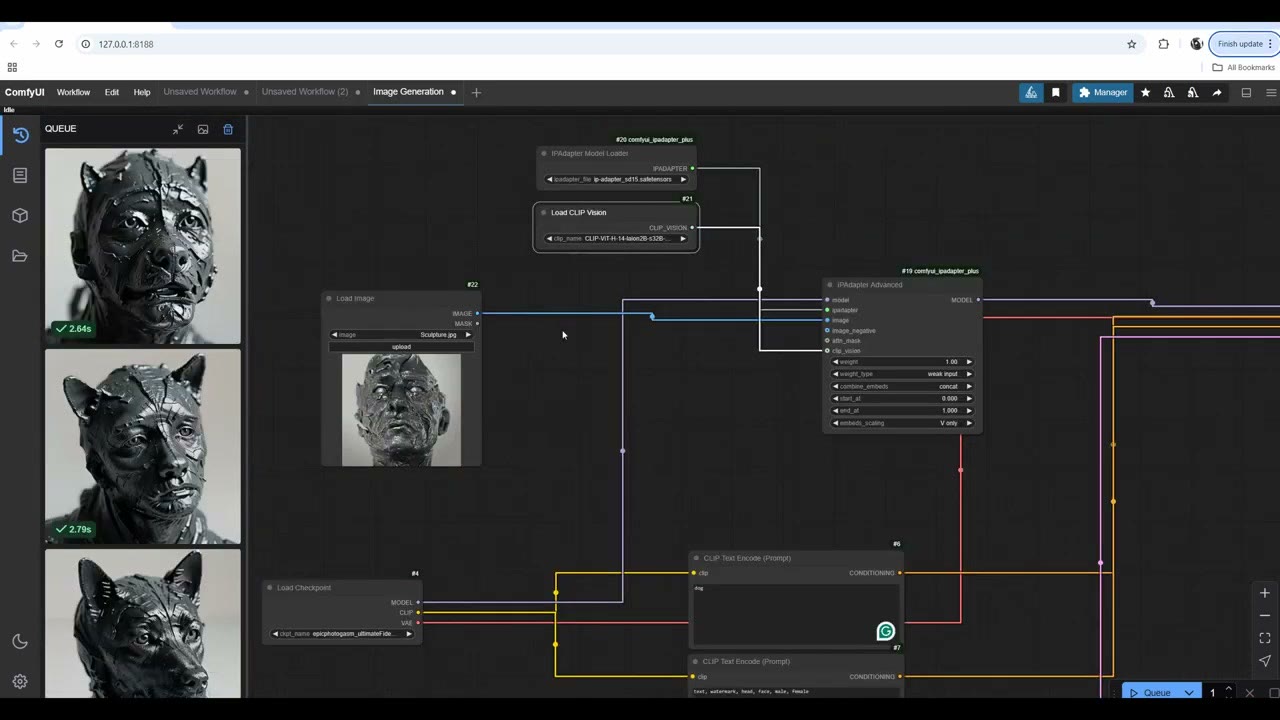
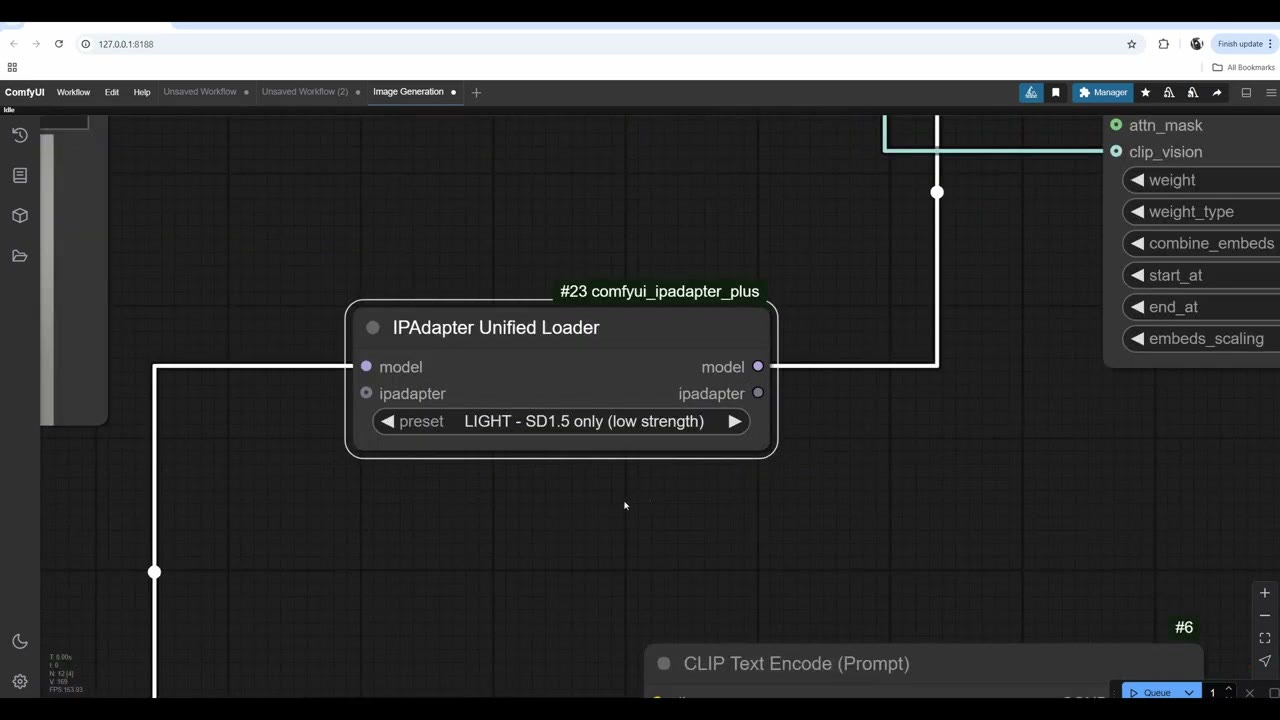
Supporting nodes
Three additions make the setup clearer and give better results:
- IPAdapter Unified Loader: plug the checkpoint’s model into it, and its outputs into IPAdapter Advanced’s model and ipadapter inputs. Its preset list (for example “LIGHT – SD1.5 only (low strength)”) is easier to understand than picking model files. The presets produce different results; I can’t say which is better, and I tend to run low strengths and do most of the tuning in the Advanced node.
- Image Resize (from Essentials): SD 1.5 works best at 512 × 512.
- Prep Image for ClipVision: between the resize and IPAdapter’s image input. It prepares the image in a form IPAdapter understands better.
For more stylized results I used an image I made about ten years ago, with “biker” as the prompt. With weak input at weight 0.55 I got a cool black-and-white 3D-sculpt look. At weight 1, linear, the results became really stylized. There’s a lot to change here; try it, again and again, and you’ll build an intuition for how IPAdapter behaves.
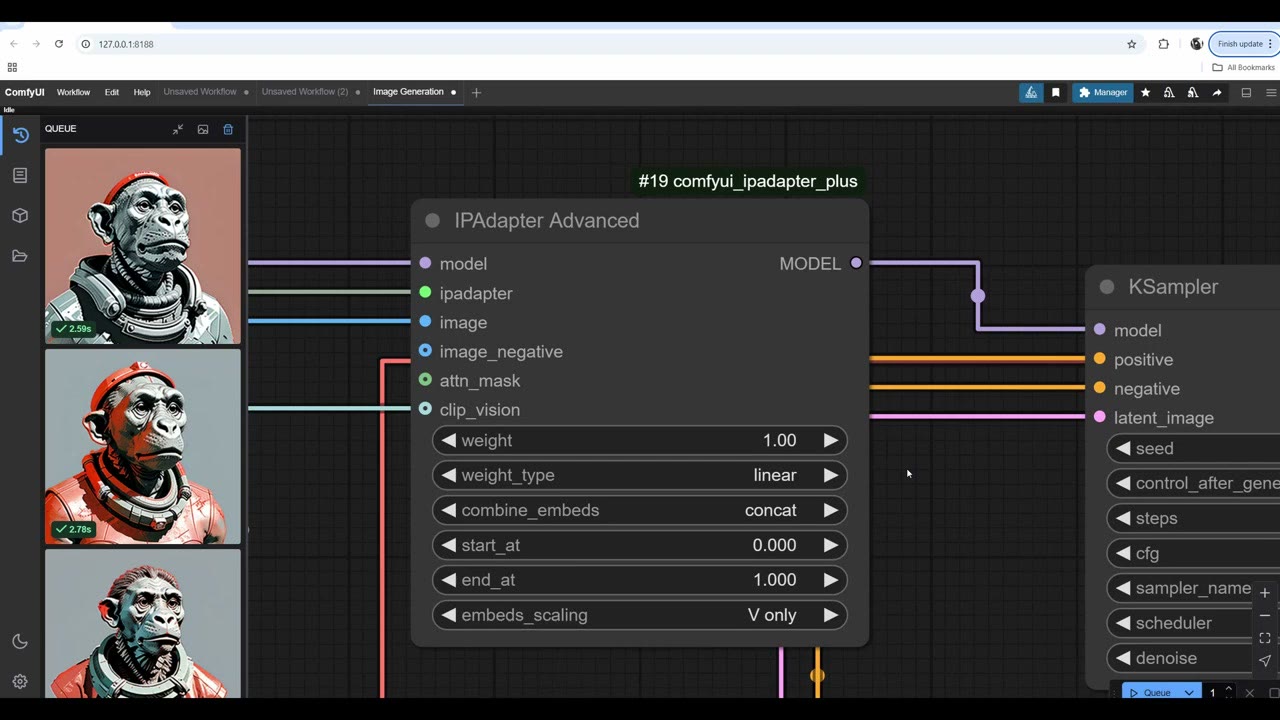
Combining two images
This is my favourite way to use IPAdapter. Copy the image branch (Ctrl+C, then Ctrl+Shift+V to paste with connections) and load a second image; I used a selfie. Then:
- Replace IPAdapter Advanced with IPAdapter Embeds, and reconnect the model and its output.
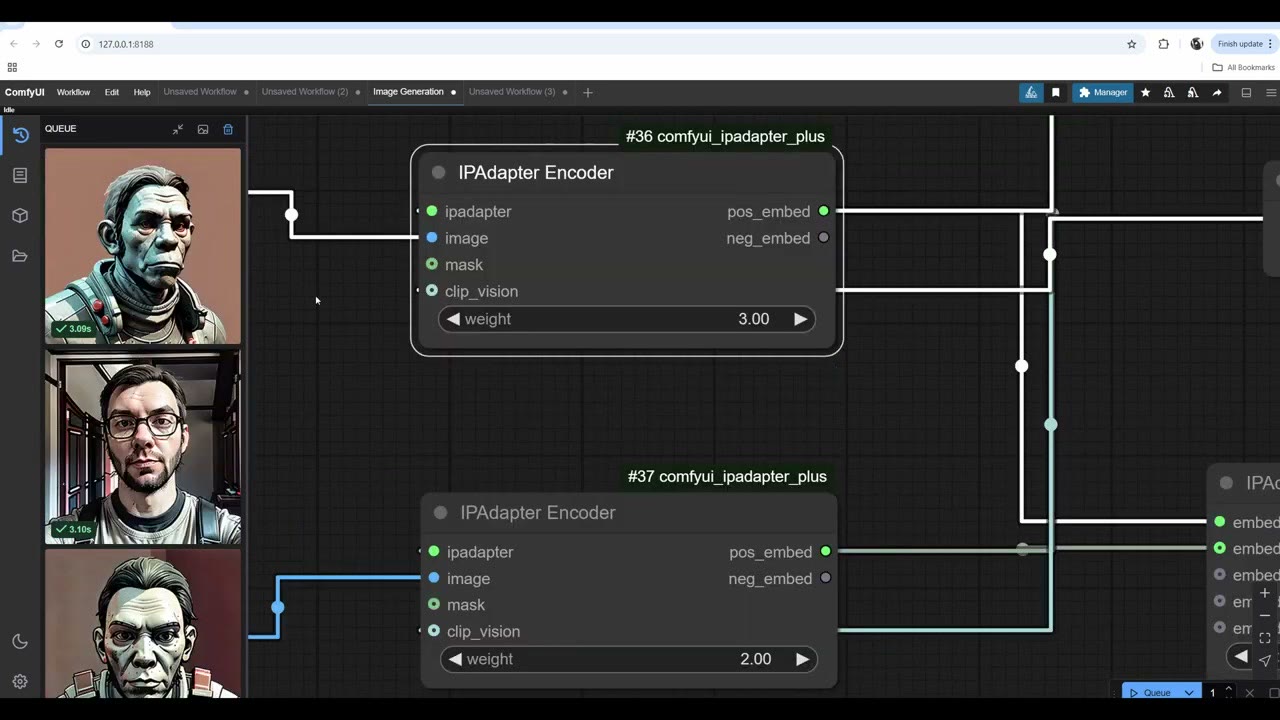
- Add an IPAdapter Encoder for each image. Connect each encoder’s ipadapter and clip_vision inputs; it’s easy to forget these.
- Add IPAdapter Combine Embeds. Each encoder’s pos_embed goes into embed1, embed2 and so on, and the combined EMBEDS go to the Embeds node’s positive input.
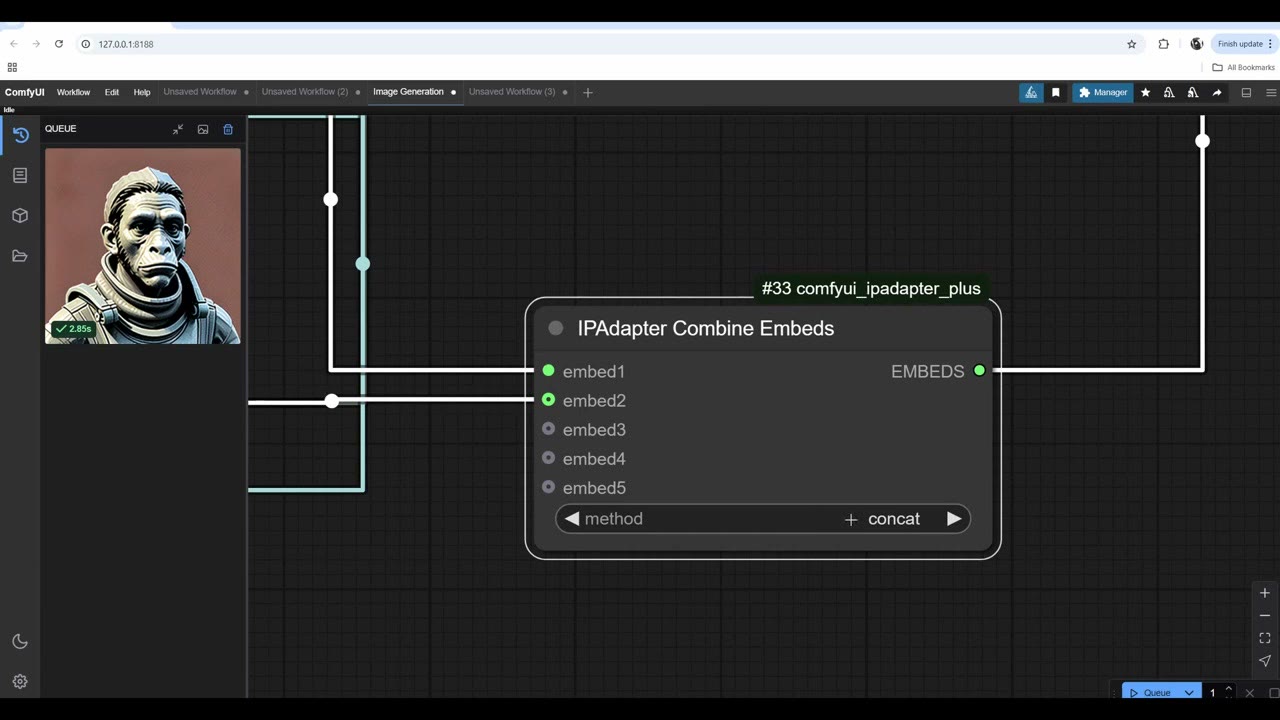
The method matters. With concat, which puts one image after the other, I got mostly monkey and little of me. Add averages them (average does something similar), and the monkey got more human features. With add it also took my pose: I was facing forward and the monkey was looking to the side, and the result copied my pose while applying the monkey’s style and hair.
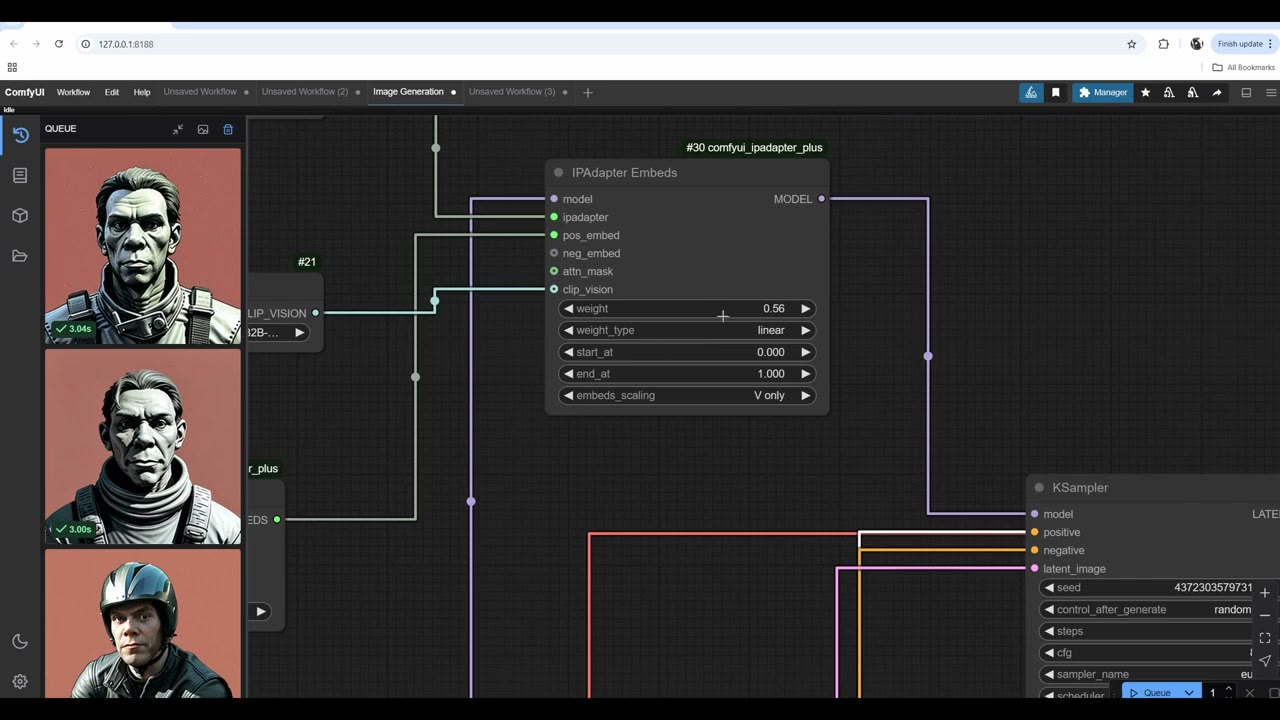
Balance with the encoder weights. Set my face’s encoder to 2 and it takes over. Set the monkey’s to 3 and the monkey gets stronger and takes over the pose too, turning to a three-quarter view.
At this stage the prompt (“biker”) was completely ignored; only the embedded images counted. Lowering IPAdapter’s weight brought back a biker with a red background and some biker clothing, but nothing to do with either image. That gets unpredictable and hard to control. I’d rather use no prompt at all and let the images be the guiding rails; the results are more predictable.
Combining three images
Three images can still be combined and controlled; above three it gets tricky. My third image was a crop from the white marine cliffs and sand photo pack on Fotoref, where I’m a co-founder.
- Crop the reference to a square, 512 × 512. A rectangular image gets squashed by the resize, which carries an ugly effect through to the result.
- Connect its encoder’s positive embed, ipadapter and clip_vision.
- I used encoder weights of 1, 1.5 and 2.
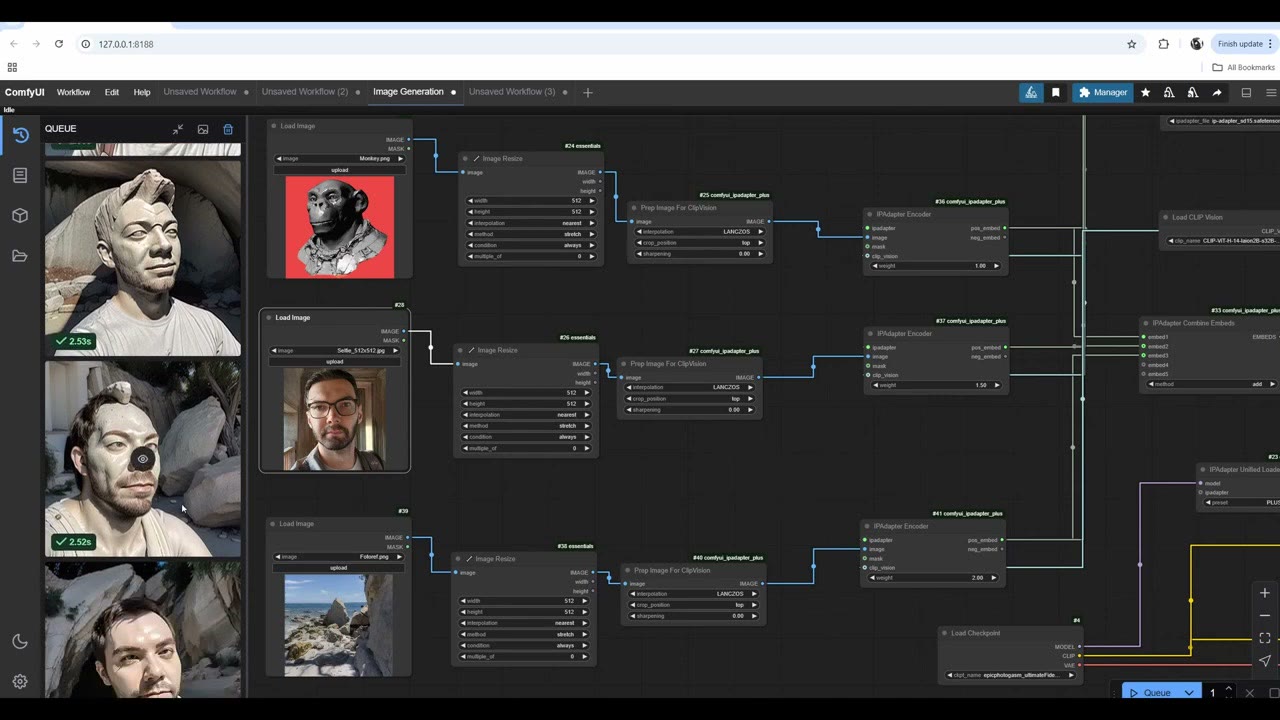
Not every run was good, but I liked what came through: rocks from the landscape, my glasses (now sunglasses), the three-quarter face position from the monkey, and a balding head. Some runs took on a clay look, which I think comes from the cliffs more than the monkey.
I also tried the DreamShaper model, which gave a slightly more stylized look. Either way, you have to run variations until you get something you like.
Next steps
To focus IPAdapter on one part of the image, combine it with a mask; see masking anything with Florence 2. To sharpen results like these, see free AI upscaling with SD 1.5. For a style the model learns permanently, train a LoRA.
Watch the video version (9:32)
Everything above is in the video too, if you'd rather follow along on screen.
FAQ
Why does IPAdapter ignore my prompt?
At weight 1.0 the reference image dominates. Lower the weight: in this test the prompt only started to show at about 0.55, and below 0.5 the reference was mostly gone. When you combine several images with Combine Embeds, the prompt is largely ignored.
Which combine method should I use for two images?
Concat puts the images one after another and one tends to dominate. Add (or average) blends them; in my test it also took the pose from the second image. Then balance them with the encoder weights.
How many images can IPAdapter combine?
Three is still controllable. Above three it gets tricky.
Should I use the SD 1.5 or SDXL IPAdapter models?
SDXL models exist, but they are heavier and slower. For learning and testing workflows, SD 1.5 is much faster and the results are good.

Anton Tenitsky is a 3D artist with 15+ years in computer graphics, working with Nickelodeon, Gameloft, Marvel Rivals and many other clients. More about me