Type “t-shirt” and you get a mask of the t-shirt. Type “face”, “bookshelf” or “wall” and you get those. Florence 2 is a vision model from Microsoft that can find objects from a text description, and in ComfyUI it turns that into a mask you can inpaint. It’s quite unbelievable what it can do, but it has caveats, and I’ll cover those too.
Florence 2 is described in the paper Florence-2: Advancing a Unified Representation for a Variety of Vision Tasks (Xiao et al., 2023). It’s a research model for many tasks (captioning, object detection, segmentation and more); here I only use it for masks.
In short
- Nodes: ComfyUI-Florence2 (Kijai’s), ComfyUI Essentials, Universal Styler for text output, rgthree for comparing.
- Model: Florence-2-large for the best masks; base as a fallback.
- Task:
referring_expression_segmentation, then type what to mask. - Inpaint: InpaintModelConditioning with the original image and the mask; denoise around 0.5–0.62.
- Masks combine: Mask Composite (add) joins two masks; Grow Mask plus multiply makes a border.
New to ComfyUI? Start with ComfyUI node basics and text-to-image and installing the ComfyUI Manager. The finished workflow is free on my Patreon: drag in the JSON and install the missing nodes from the Manager.
Install the nodes
In Manager → Custom Nodes Manager, install:
- ComfyUI Essentials, a basic collection of nodes you really need (Mask Preview, Image Resize and more).
- ComfyUI Universal Styler, which helps get text out (its Get Text node shows Florence’s captions).
- Florence 2. There are two packages, by Kijai and by spacepxl. Kijai’s has more stars and is updated more recently. The two are very similar, but I had to rewrite part of spacepxl’s code to run it on the latest ComfyUI. Stick with Kijai’s.
Restart ComfyUI after installing.
Build the Florence 2 part
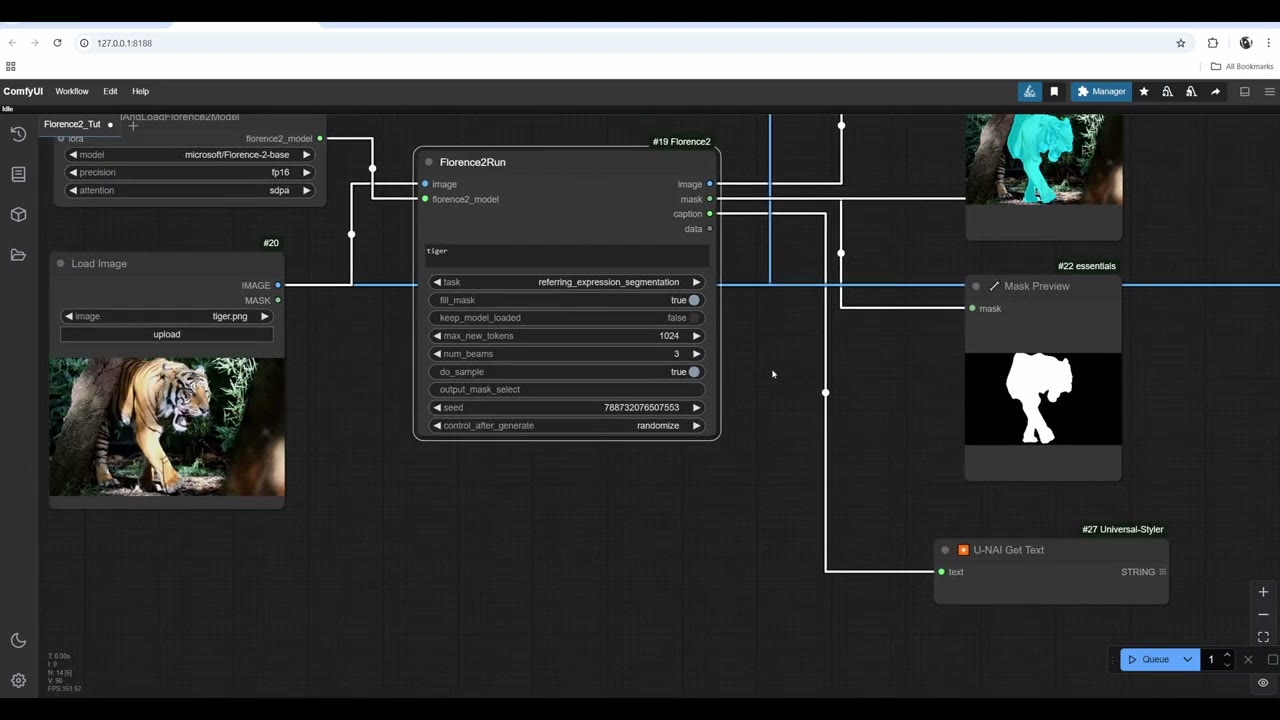
- Add DownloadAndLoadFlorence2Model. It downloads the model automatically the first time it runs, so there’s no git clone and no hunting for model folders.
- Add Florence2Run and connect the model.
- Add Load Image with your picture, into Florence2Run’s image input.
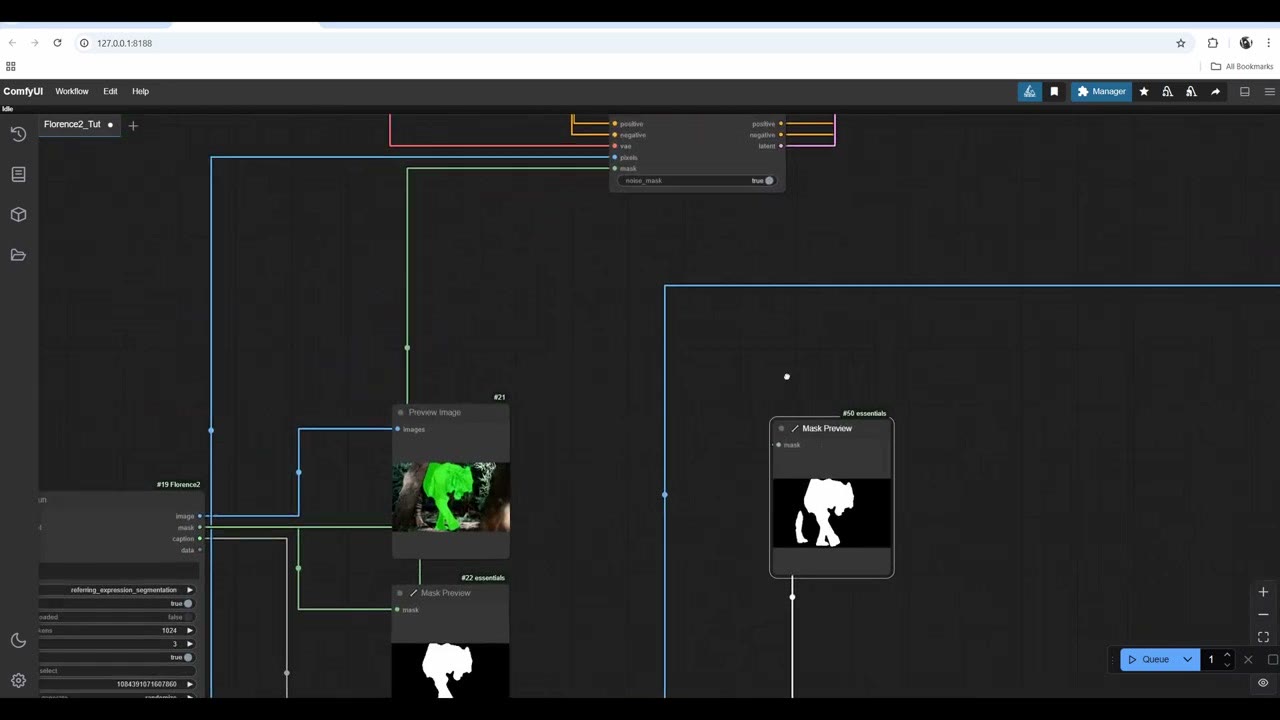
- Connect all the outputs: a Preview Image for the image, a Mask Preview (from Essentials) for the mask, and a Get Text node for the caption. If an output isn’t connected, the network won’t run, and the model won’t download.
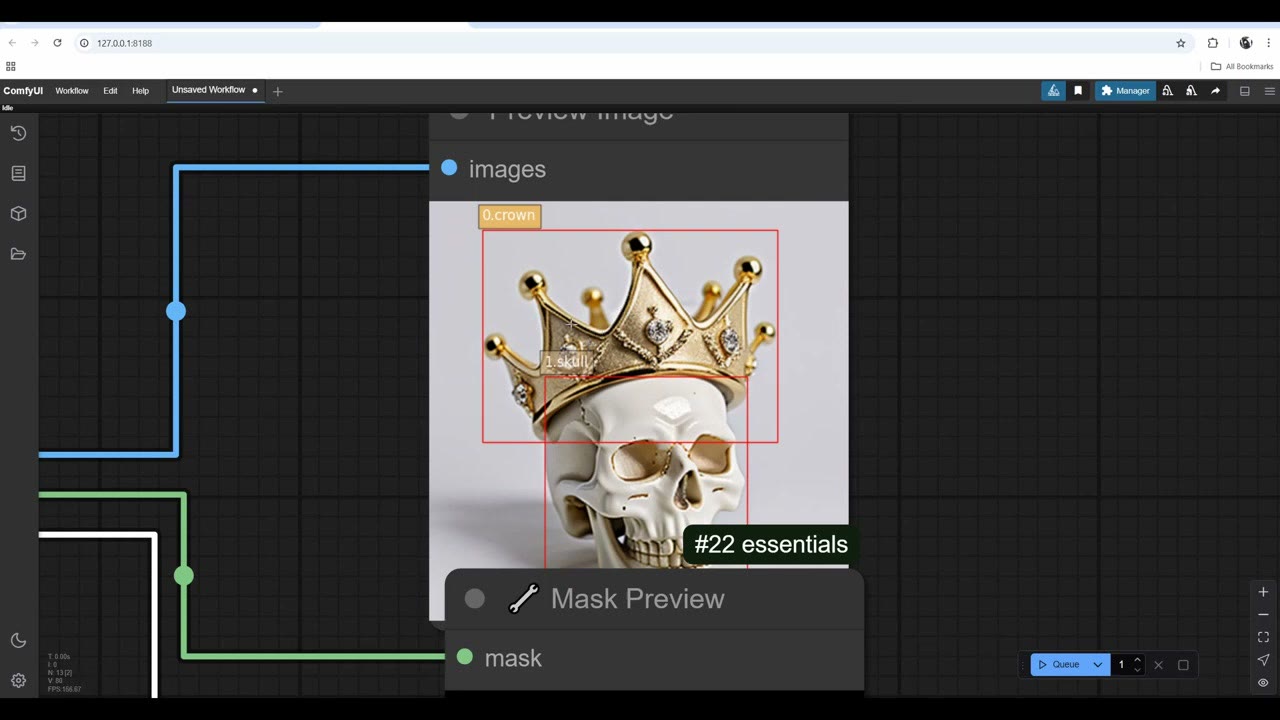
Click Queue. The first run downloads the model, which can take a few minutes or more depending on your connection; you can watch it in the command window. The default task finds the objects in the image and draws a bounding box around each (here: a crown and a skull). Bounding boxes aren’t that useful for this; proper masks are.
Choose the model
- Florence-2-base: the default.
- Florence-2-base-ft / large-ft: “ft” means fine-tuned for specific purposes. I don’t recommend them; they gave worse results than base.
- Florence-2-large: highly recommended. It takes quite a bit longer per image but makes much better masks.
Choose the task
The task list is the most important setting. Set it to caption and it describes the image; for me the text didn’t show in the Get Text node on this machine, though it appeared in the command window and worked on another machine. Captions aren’t the goal here anyway.
The task you’ll use almost all the time is referring_expression_segmentation. Type what you want in the text field, run, and you get a mask.
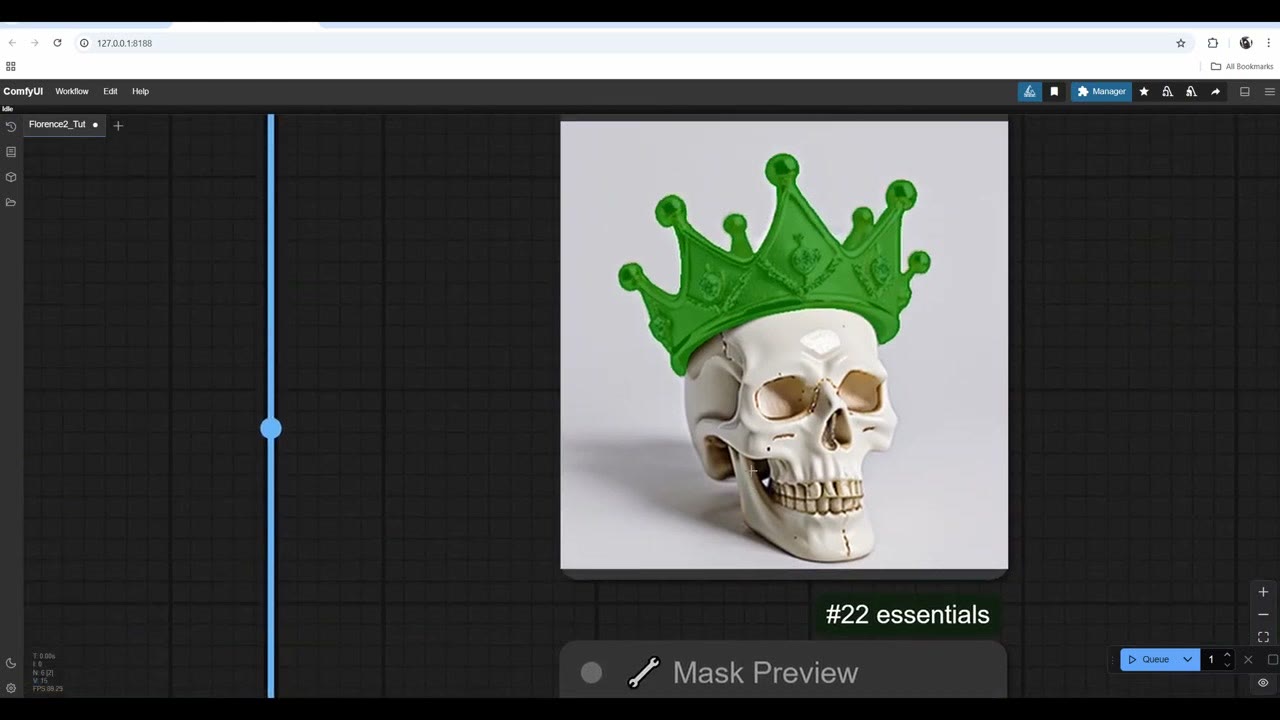
“Skull” gave a nice mask straight away. “Crown” didn’t, at first: AI models aren’t perfect and this will happen from time to time. When I switched from large back to base and ran the same prompt, I got a good crown mask. Swapping models every now and then is part of the process.
Inpaint the masked area
- Add InpaintModelConditioning. Connect the mask from Florence2Run, and the image from your original Load Image, not from Florence2Run: Florence’s image output has the coloured mask painted on it.
- Build a standard text-to-image chain: Load Checkpoint (I use epiCPhotoGasm), a positive and a negative CLIP Text Encode (I colour them green and red), a KSampler, VAE Decode and Save Image.
- Route the prompts through InpaintModelConditioning first, then into the KSampler. Connect the VAE to InpaintModelConditioning, and its latent output to the KSampler’s latent input.
- Type the change you want (“silver” for the crown) and set denoise to about 0.62. Denoise controls the mix between the prompt and the original image, and it’s the most important value here.
If it complains about a missing VAE connection, drag one across. The result:
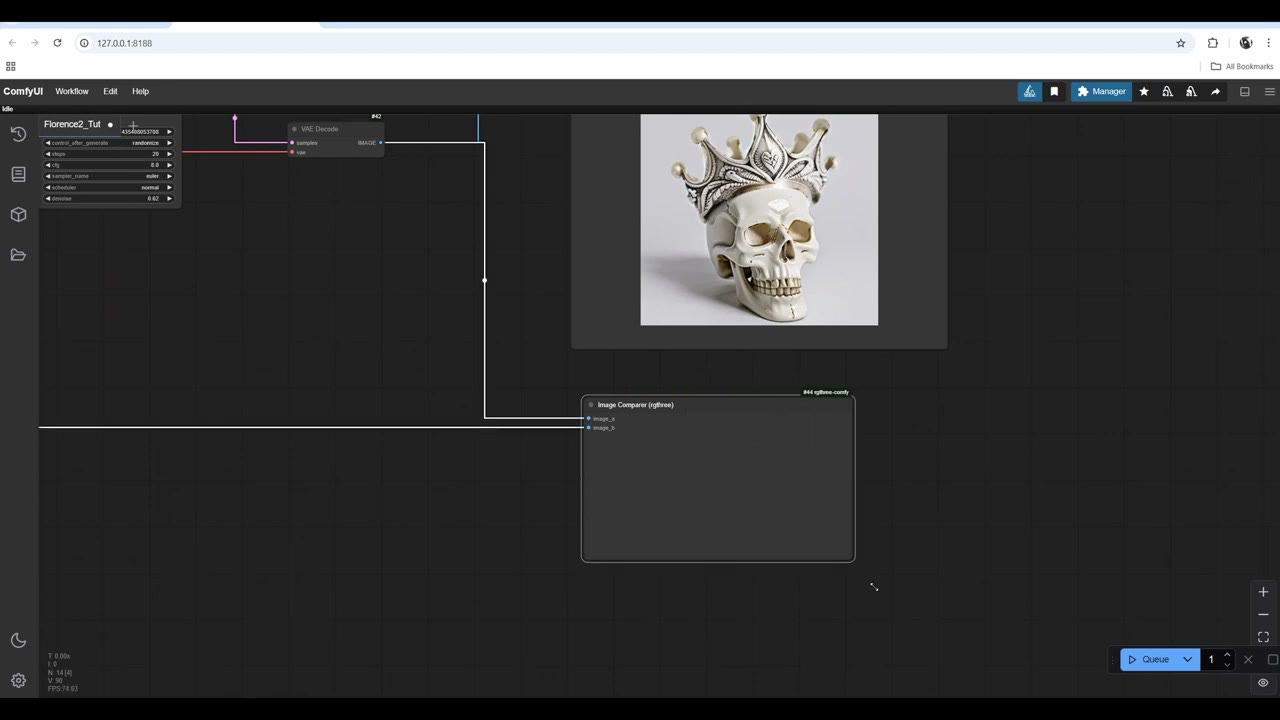
To compare, add an Image Comparer from rgthree, with the new image as A and the original as B. You’ll need to run again to activate it, which gives a different result.
Combine two masks: the whole tiger
On a Fotoref tiger photo (the photo stock I co-founded), “tiger” masked the front of the body but missed the back leg. Bypass the inpainting nodes (select them and press Ctrl+B) while you test masks.
- Copy the Florence branch with Ctrl+C, Ctrl+Shift+V, which keeps the connections. Give it the same output nodes (preview, mask preview, Get Text); without them it won’t run, even if you don’t use them.
- Try prompts for the missing part. “Tiger back leg” didn’t work. With the large model and a more creative prompt, “tiger black stripes front and back”, I got the back leg. I tried about ten prompts to get there.
- Add Mask Composite: one mask into destination, the other into source (they should really just be called A and B), operation add, since you’re adding white to white. Multiply would remove everything.
- Preview the combined mask: the full tiger.
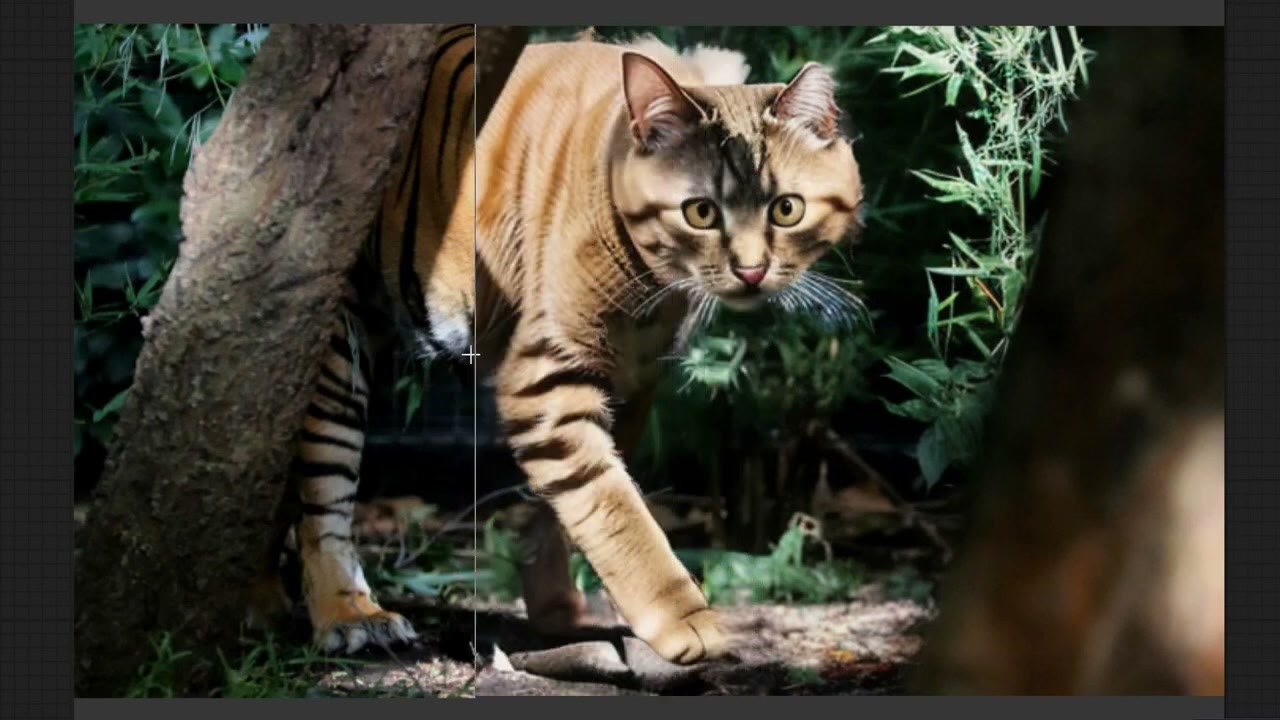
Un-bypass the inpainting nodes and connect the composite mask to InpaintModelConditioning. I forgot to change the prompt and got a silver tiger. With “cat” it made a cat, and it blended in well: it replaced the bottom of the body with nearby vegetation and put a rock under one paw. It’s not far from a great generation; it needs more runs.
Faces
On one of my 3D sculpts, “face” gave a mask of the face. With the prompt “male” it inpainted a different person’s face. At denoise 0.25 the result looked more like the original, although it struggled with the odd anatomy I’d sculpted (horns, a piercing at the bottom) and replaced it with a beard, which is to be expected.
Tip: Florence2Run has a seed. Change control_after_generate from randomize to fixed, so the mask doesn’t regenerate every time you try a new prompt.
Turn a mask into a border
On a selfie, “glasses” gave a pretty decent mask. But I wanted to change only the frames, and they’re too thin for Florence to mask from a prompt. Classic masking nodes can do it instead:
- Invert Mask (a core node) on the glasses mask.
- Grow Mask by 10 pixels. On the inverted mask, the white grows and the black shrinks.
- Mask Composite with the grown mask as destination and the original mask as source, operation multiply. That subtracts one from the other and leaves the border of the frames.
- Add Mask Preview nodes along the way to see each step.
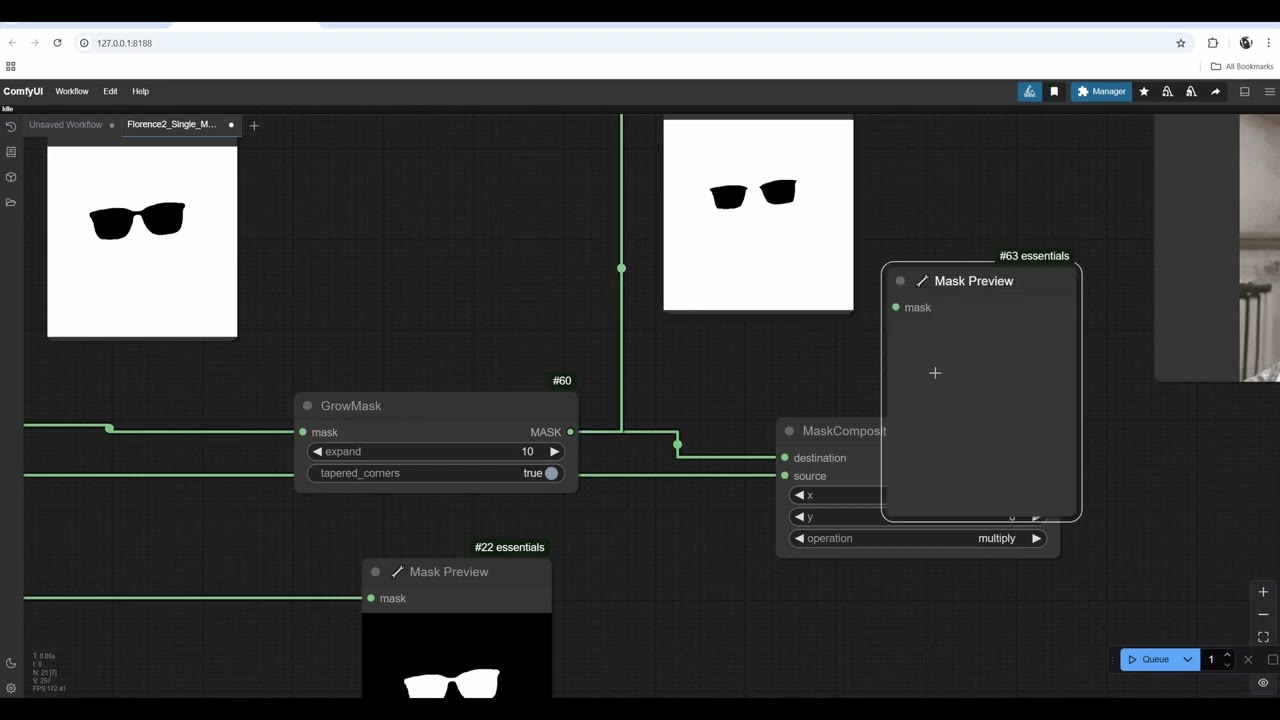
I connected that border to InpaintModelConditioning with “silver” as the prompt at denoise 0.5. Honestly, I didn’t get a really good result here, despite trying different denoise values and prompts. The point is the technique: get a mask from a prompt, then apply the same grow-and-subtract tricks you’d use in any VFX or compositing app.
Next steps
For heavier inpainting with a stronger model, see inpainting with Flux. For fixing faces and hands without drawing masks at all, see fixing AI faces and hands automatically. Masks also help IPAdapter style transfer focus on one subject.
Watch the video version (15:54)
Everything above is in the video too, if you'd rather follow along on screen.
FAQ
Which Florence 2 model should I use for masks?
Florence-2-large gives much better masks than base but takes longer. The fine-tuned (ft) versions gave worse results than base in my tests. When large misses something, try base with the same prompt; sometimes it gets it.
Which Florence 2 task makes masks from a text prompt?
referring_expression_segmentation. Type what you want to mask in the text field of the Florence2Run node.
Florence 2 only masked part of the object. What can I do?
Mask the missing part with a second prompt (or a different model), then join the two masks with a Mask Composite node set to add.
Why does the mask change every time I run?
Florence2Run has its own seed. Set control_after_generate from randomize to fixed, so the mask stays the same while you try different inpainting prompts.

Anton Tenitsky is a 3D artist with 15+ years in computer graphics, working with Nickelodeon, Gameloft, Marvel Rivals and many other clients. More about me