This guide covers two things: installing the ComfyUI Manager, the add-on you’ll use in almost every other guide on this site, and image-to-image, where a picture replaces the empty canvas. The example merges a skull prompt with a teapot I generated earlier, and after some tuning it produced a skull teapot.
If you’re new to ComfyUI, start with ComfyUI node basics and text-to-image.
In short
- Manager: install git, then
git cloneComfyUI-Manager intoComfyUI/custom_nodes, and restart. - Image-to-image: Load Image → Image Resize (512 × 512) → VAE Encode → KSampler’s latent input, replacing Empty Latent Image.
- Denoise sets the mix: 1 = only the prompt, 0 = only the image. The merge lives in a narrow band in the middle.
- Expect many runs. The good one came after about six; the failures are fun too.
Install the ComfyUI Manager
The Manager handles all the add-ons workflows use. You can update the nodes you have, and when you bring in someone else’s workflow it installs the missing nodes automatically. I do that all the time; it’s basically mandatory.
- Install git. The Manager is installed with git. Download the 64-bit Git for Windows setup and run it; it’s straightforward.
- Open the custom nodes folder. In File Explorer, go to
ComfyUI/custom_nodesinside your ComfyUI folder and copy the path (Ctrl+C). - Open a command line with Win+R, type
cmdand press Enter. Change to that folder:cd C:\path\to\ComfyUI\custom_nodes - Clone the Manager with the command from its README:
Paste it as one line, with no line breaks.git clone https://github.com/ltdrdata/ComfyUI-Manager comfyui-manager - Restart ComfyUI. A Manager button appears in the top bar.
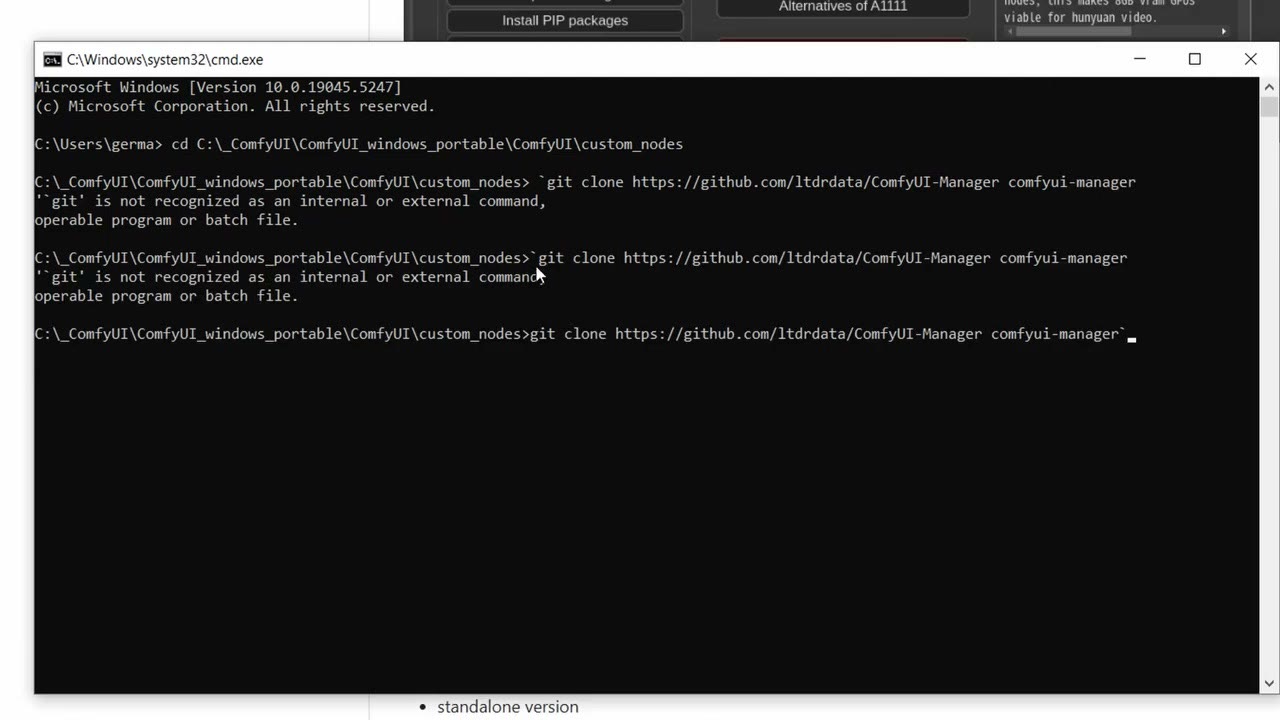
custom_nodes, then clone the Manager.The README also lists a one-click batch file for the portable version of ComfyUI and an install through comfy-cli.
Image-to-image: start from a picture
I generated a new skull, centred and isolated on a plain background, and wanted to merge it with the teapot from my previous video.
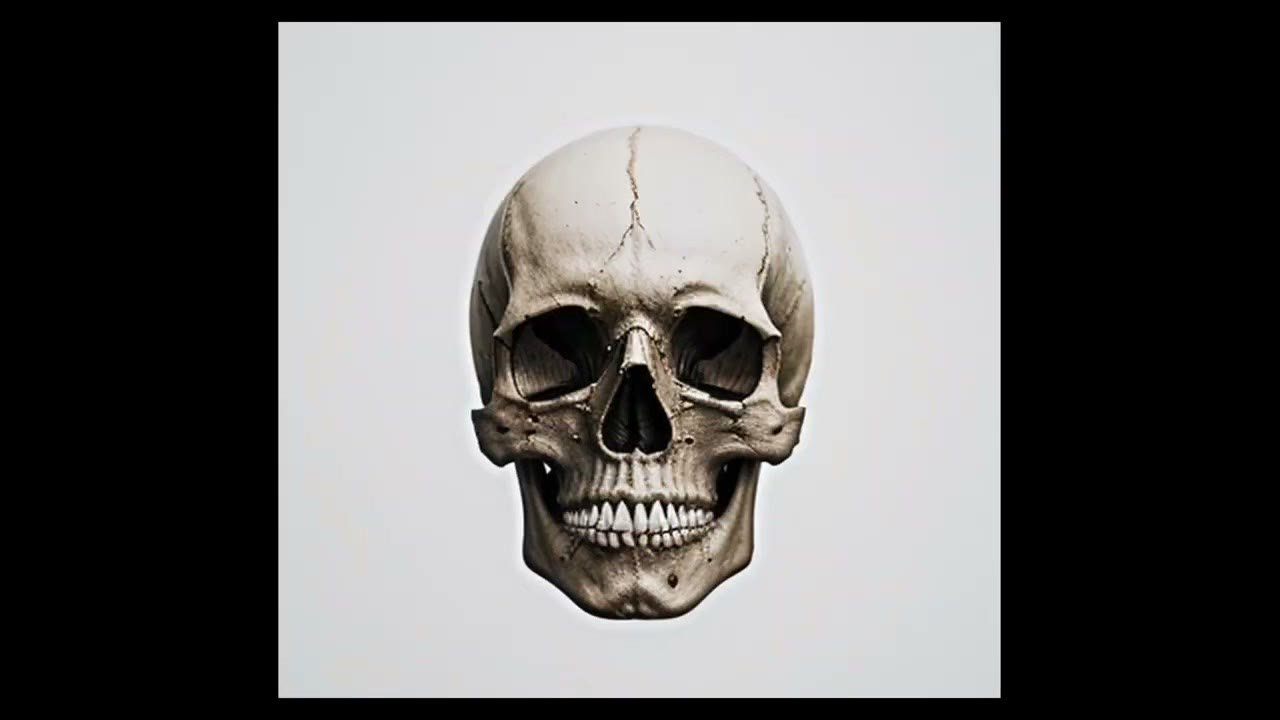
- Double-click the empty canvas and add Load Image with the teapot.
- Add VAE Encode. It encodes the image into the latent space. Connect the image to its pixels input and the checkpoint’s VAE to its vae input.
- Connect its LATENT output to the KSampler’s latent_image. The Empty Latent Image node is no longer needed.
Denoise: the mixing control
Denoise on the KSampler sets how much the new image is driven by the prompt versus the original picture.
- 1.0: the prompt only. You get a skull, ignoring the teapot.
- 0: the image only. You get the teapot, with no combination.
- In between: a merge.
Press Ctrl+Enter to run.
Add a resize node (your first custom node)
There’s one thing missing. The Empty Latent Image node controlled the resolution, and without it there’s no control. That matters: if you bring in a photo that’s 3000 pixels on one side, it can crash your computer.
ComfyUI’s core nodes didn’t include the resize I wanted, so this is the Manager’s first job. Manager → Custom Nodes Manager, search resize. There are many; Various ComfyUI Nodes by Type by jamesWalker55 works fine. Install it and restart ComfyUI.
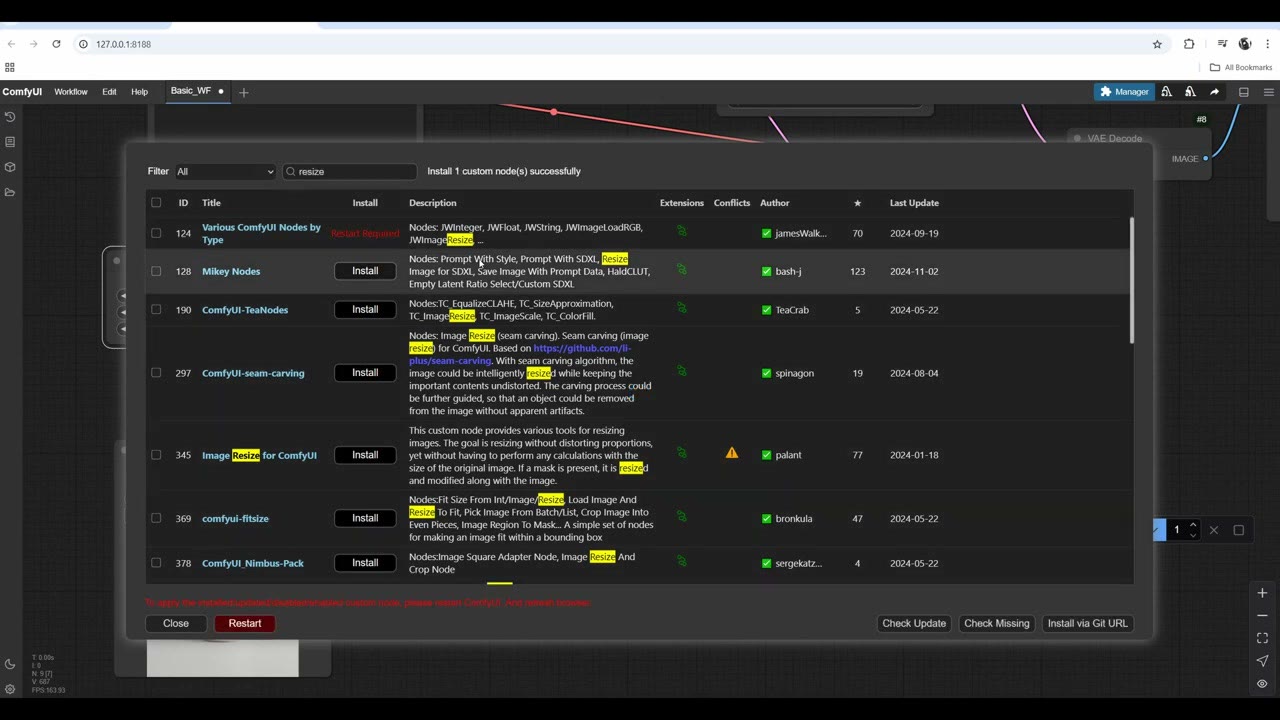
Then add Image Resize between Load Image and VAE Encode, set to 512 × 512.
Tuning the merge
My first run did nothing visible. From experience, very high values don’t work; it has to be right in the middle. And the changes are tiny: moving denoise by a single hundredth gave a completely different picture.
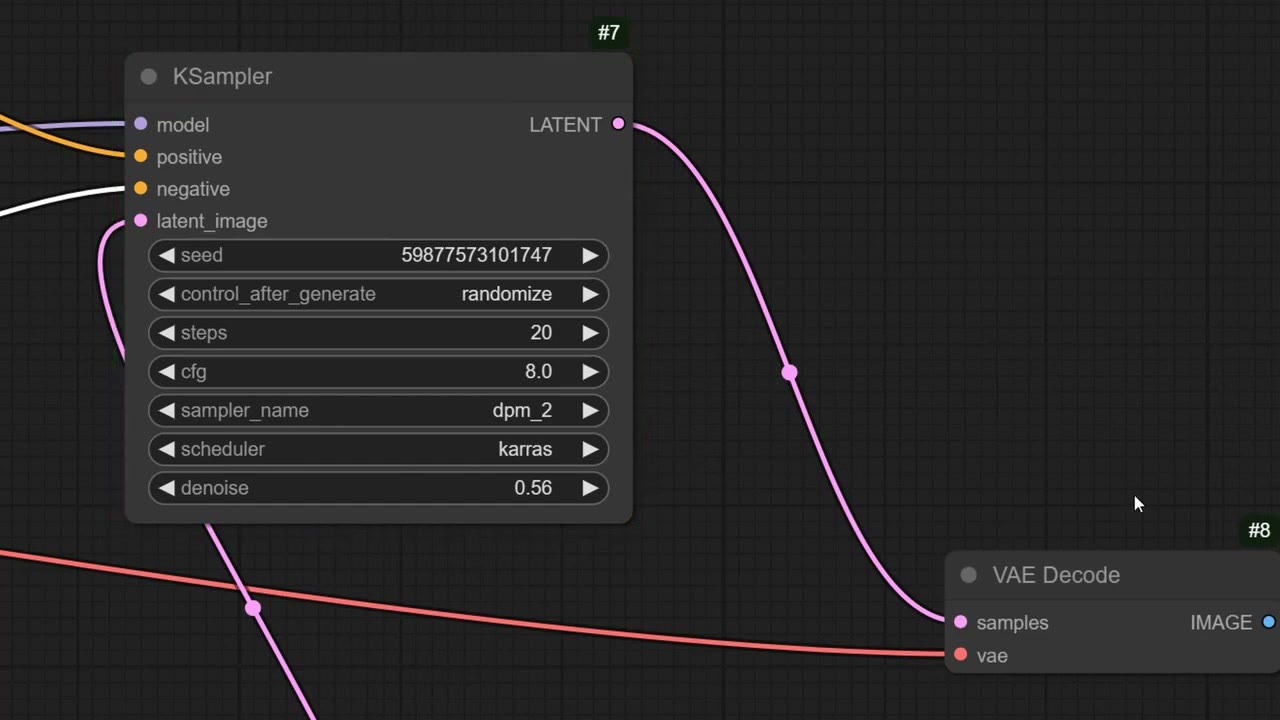
At 512 × 512 each run is fast, so just keep running. After about six iterations of skulls and glitches, I got this:
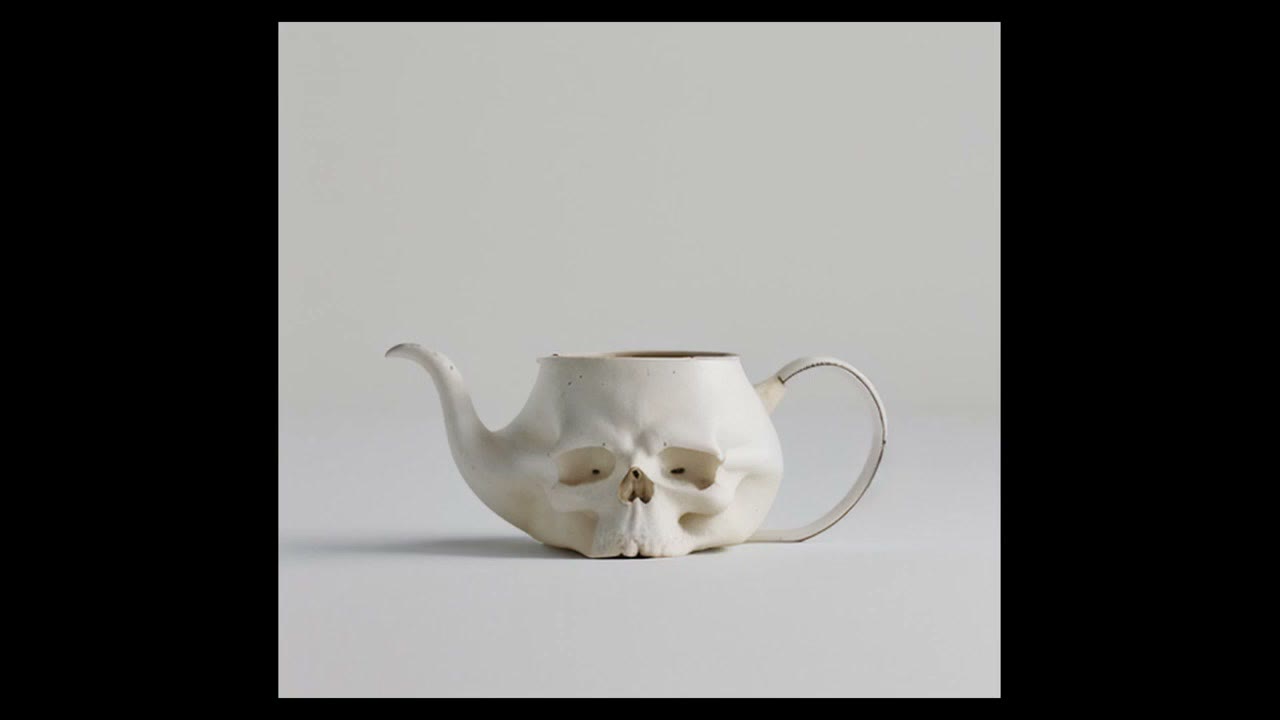
It’s only 512 px. To make it big and sharp, see free AI upscaling with SD 1.5, where this same teapot goes to 8K.
The failed generations
The misses are worth a look. Some were very subtle; one was something like an elephant skull painted on a cup. Others were a sculptural cup, wood growing around the skull, a wire wrapped around it, or a broken skull with a teapot handle.
At one point it kept adding candles, so I put candle in the negative prompt and it stopped.
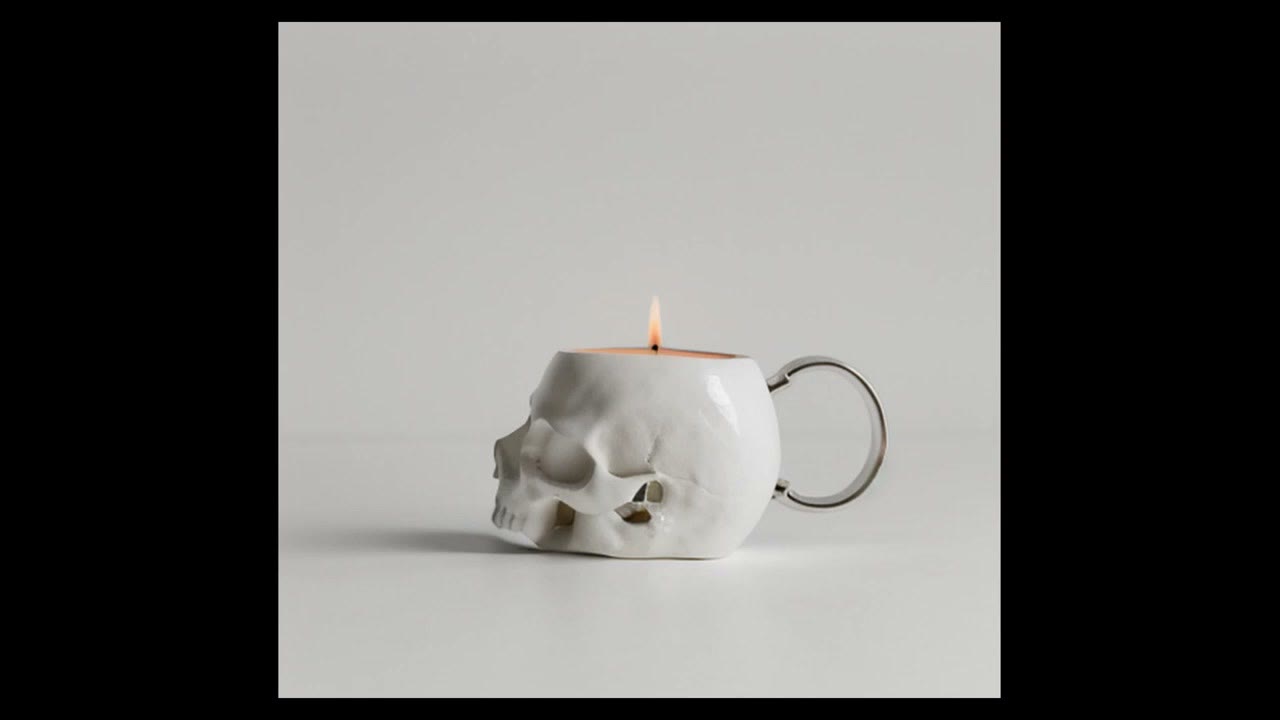
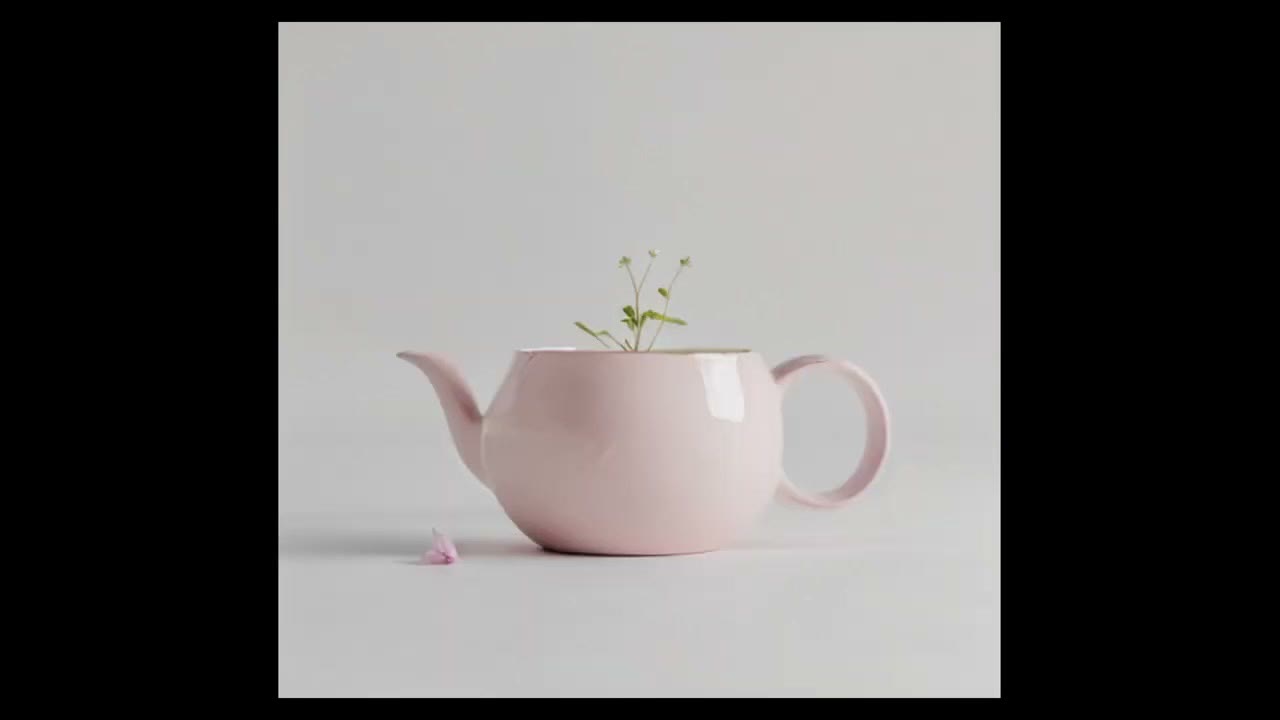
I also tried other ideas. A teapot with a human face, before deciding the skull was cooler. Teapots with flowers: the flower was pink, so it painted the teapot pink too, which is colour bleeding in action.
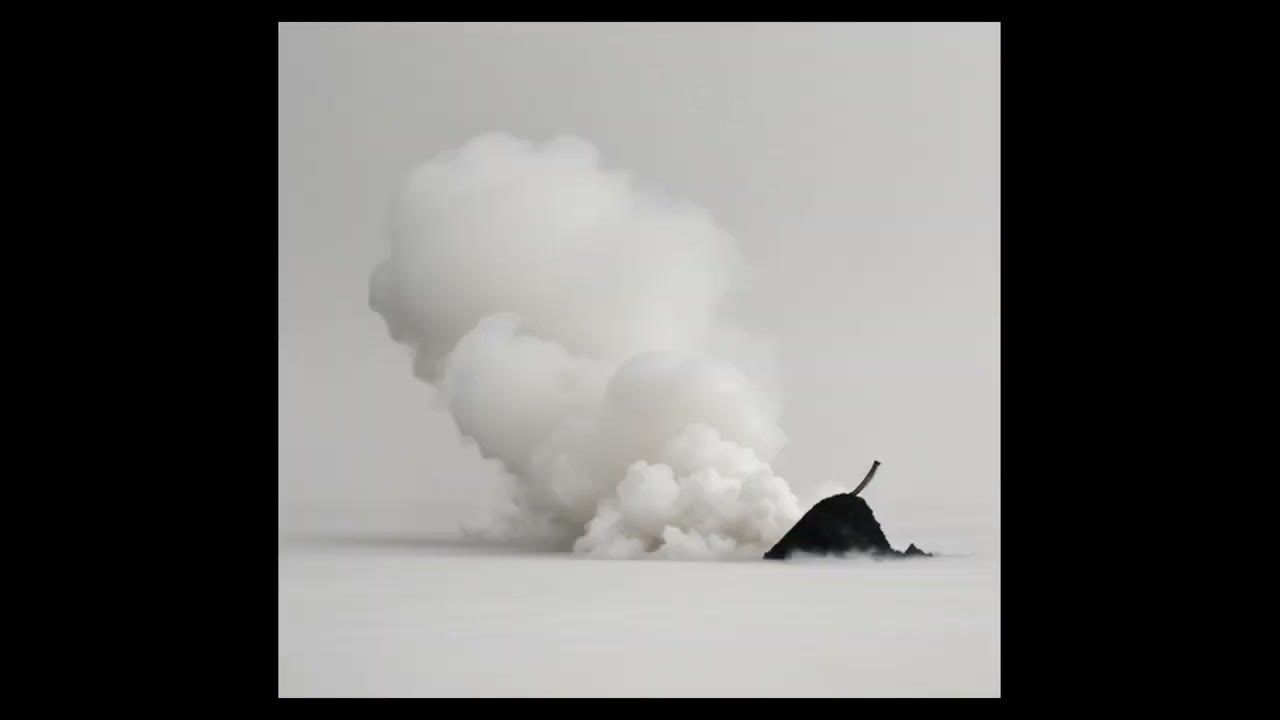
With “smoke”, denoise mattered again: a bit too high and everything became smoke; around 0.56 it added smoke on top; at 0.7 it was just smoke. Ice cream inside the teapot worked just fine.
Watch the video version (6:54)
Everything above is in the video too, if you'd rather follow along on screen.
FAQ
Why do I need the ComfyUI Manager?
It installs, updates, disables and removes custom nodes, and when you open someone else’s workflow it can install all the missing nodes automatically. It’s basically mandatory.
What denoise value merges two images in image-to-image?
At 1.0 you get only the prompt; at 0 only the input image. The merge happens in a narrow band around the middle (around 0.56 here), and changing it by a single hundredth can give a completely different picture.
Why resize the input image before encoding it?
Without an Empty Latent Image you lose control over the resolution. A 3000-pixel photo can crash your computer. Resize to 512 × 512 for SD 1.5.

Anton Tenitsky is a 3D artist with 15+ years in computer graphics, working with Nickelodeon, Gameloft, Marvel Rivals and many other clients. More about me