I ran ComfyUI on my own RTX A5000 for over a year. Then I sold the card, for more than I paid thanks to the GPU shortage, and moved everything to RunPod. This guide covers why, what it costs, which GPU I use for which job, and the exact setup from an empty account to a first render.
This page contains RunPod referral links. If you sign up through one, you get $5–$500 in credit after your first $10, and I get a small commission. The setup is the same either way.
Why I moved off my own GPU
My A5000 has 24 GB of VRAM, which is plenty for images. It stopped being enough when I started on video and 3D. Five seconds of video at the lowest quality could take five to ten minutes, and the result often wasn’t usable. And once you work with clients who need things fast, one card at home becomes the bottleneck.
Four things made the cloud worth it:
- Scale when I need it. I build a workflow on the cheapest GPU available, then run the same setup on an RTX 5090, an H100 or a B200 for the real render.
- A sandbox for custom nodes. ComfyUI custom nodes are code written by strangers, and you rarely know what’s inside. On a pod they run in a container, not on my computer.
- Private client work. Files sit on my own network volume, which can be encrypted, instead of being uploaded to a chatbot.
- Shareable setups. I can package a workflow as a template that you open in one click, instead of spending hours fixing dependencies. Anyone who has used ComfyUI for a while knows how much time that saves.
I tried other services. RunPod was the most cost-effective for this kind of work, and it’s where all my current guides run.
What it costs
You pay by the hour while a pod is running, plus storage for the network volume that holds your models. These are RunPod’s list prices for the GPUs I use, checked in October 2026:
| GPU | VRAM | Price | What I use it for |
|---|---|---|---|
| RTX A5000 | 24 GB | $0.27/hr | Installing, building workflows, cheap overnight batches |
| RTX 5090 | 32 GB | $1.19/hr | Most image and video work, Flux 2 |
| B200 | 180 GB | $7.99/hr | Long video renders when speed matters |
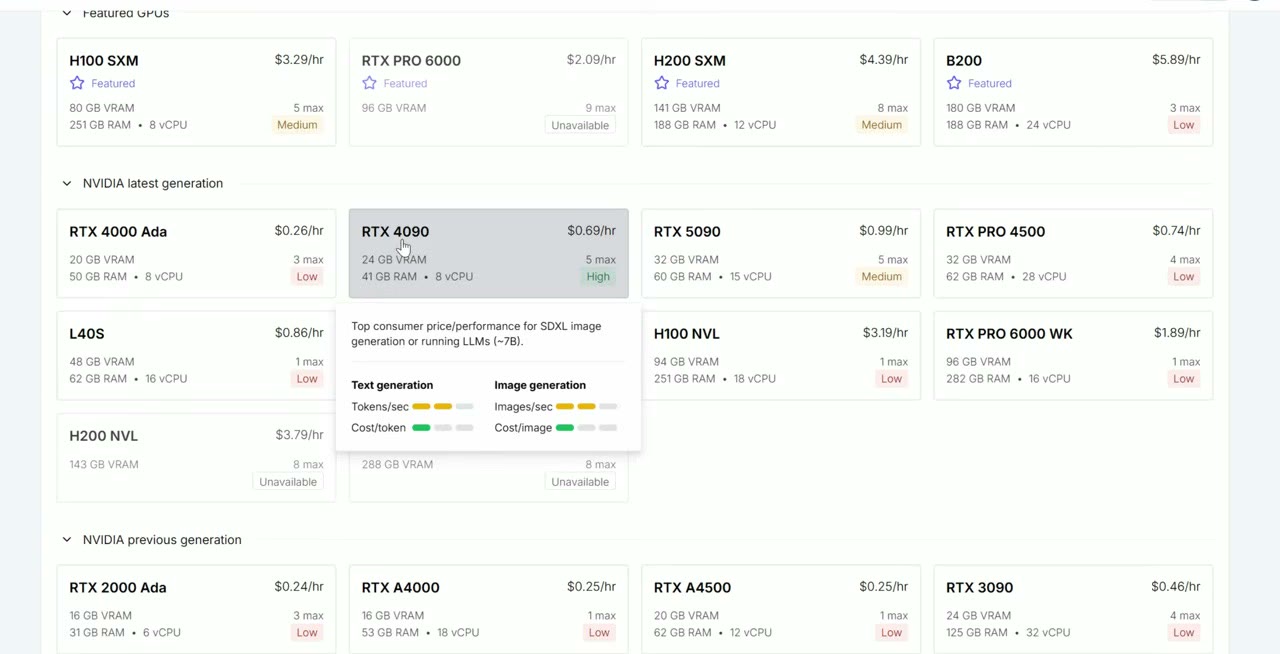
Network volume storage costs $0.07 per GB per month on standard storage, or $0.14 on high-performance storage. A 100 GB volume is $7 a month on standard storage, billed for as long as the volume exists.
A real example: twenty minutes of finished talking-avatar video with MiniMax H3 took about 2.2 hours on an RTX 5090, roughly $2.60 of GPU time. The same job is about $1.50 on an A5000 if you can wait 5.4 hours. The full numbers are in my MiniMax H3 video.
Which GPU for which job
- Installing ComfyUI and models: the cheapest GPU available. You’re only downloading software, so don’t pay for a 5090 to wait. You could even do it on a CPU pod.
- Images (Z-Image, SDXL, Flux 1): 24 GB is fine.
- Flux 2 and video models: 32 GB. In my test, Flux 2 wouldn’t run on the 24 GB card.
- When the deadline matters: a B200 renders about twice as fast as a 5090 on my avatar workflow, but costs nearly seven times as much per hour.
The setup, step by step
1. Create a network volume first
Go to Storage → New network volume. If you deploy a GPU without one, the pod gets a container disk, and everything you install is gone when the pod is deleted. The volume keeps ComfyUI, your models and your outputs between sessions.
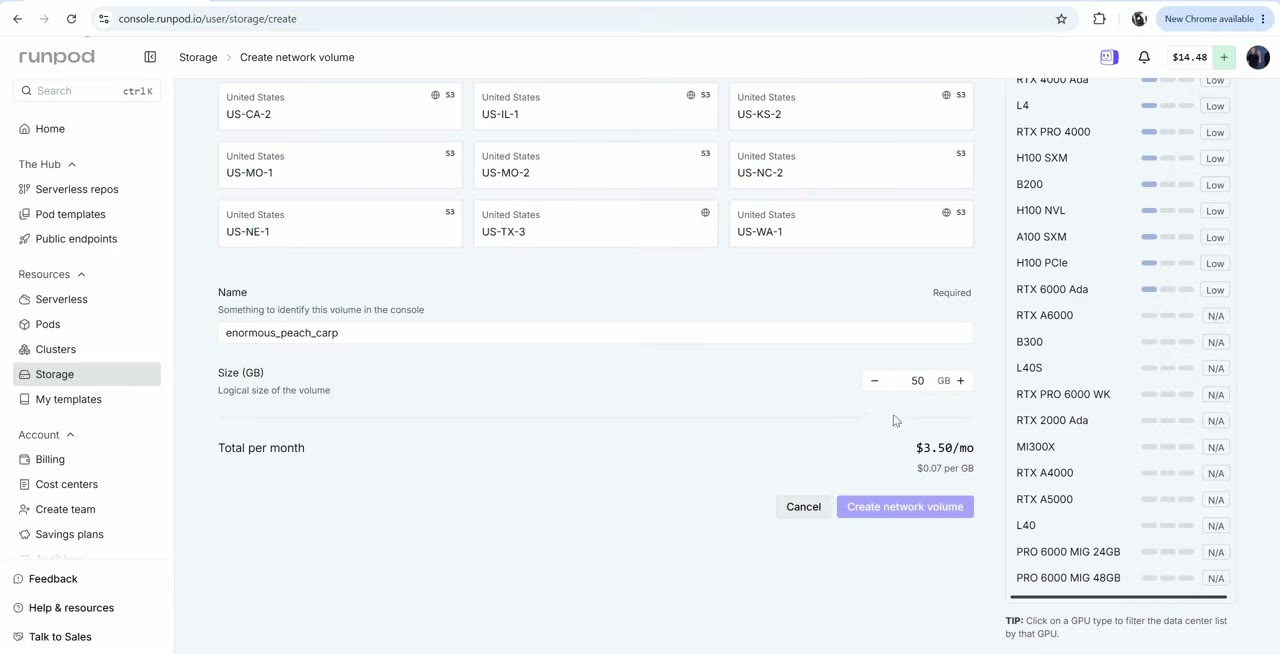
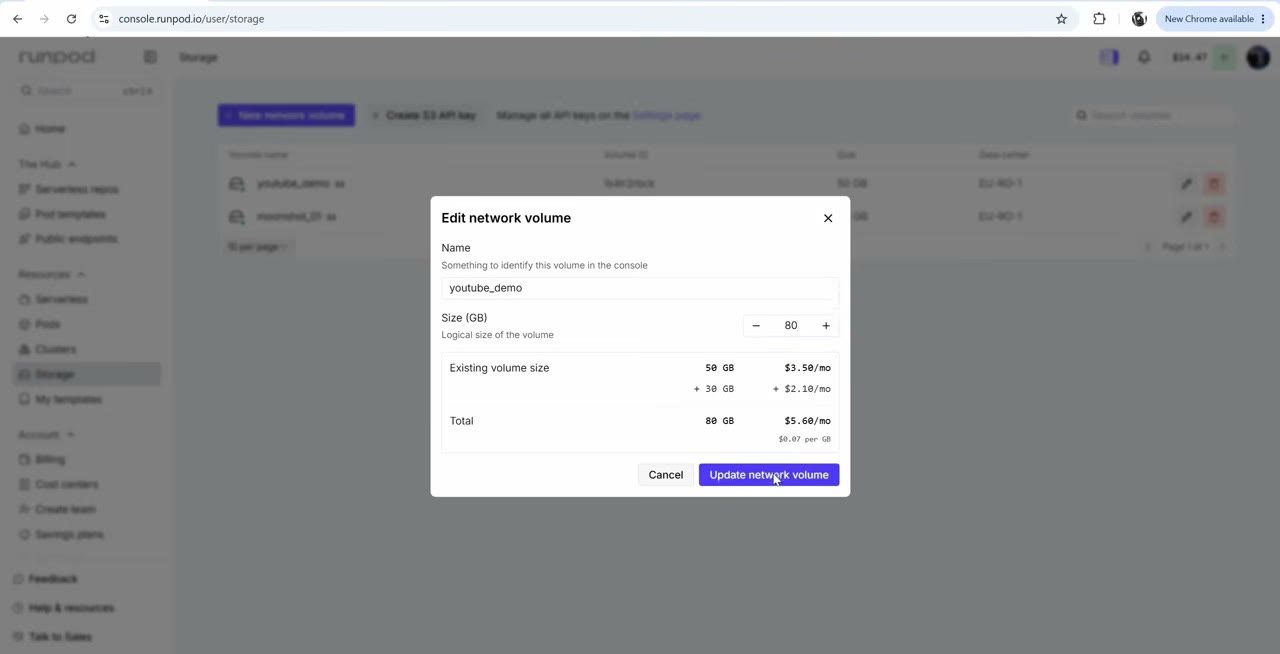
- Size: you can make a volume bigger later but never smaller. I started at 80 GB for Flux. Most of my templates recommend 100 GB.
- Data center: pick one that has both cheap and expensive GPUs available, so you can switch between them on the same volume. I usually use one in Europe.
2. Deploy the cheapest GPU with the ComfyUI template
From Pods → Deploy, attach your volume, pick a cheap GPU (I used an RTX A4000 for this step) and change the template.
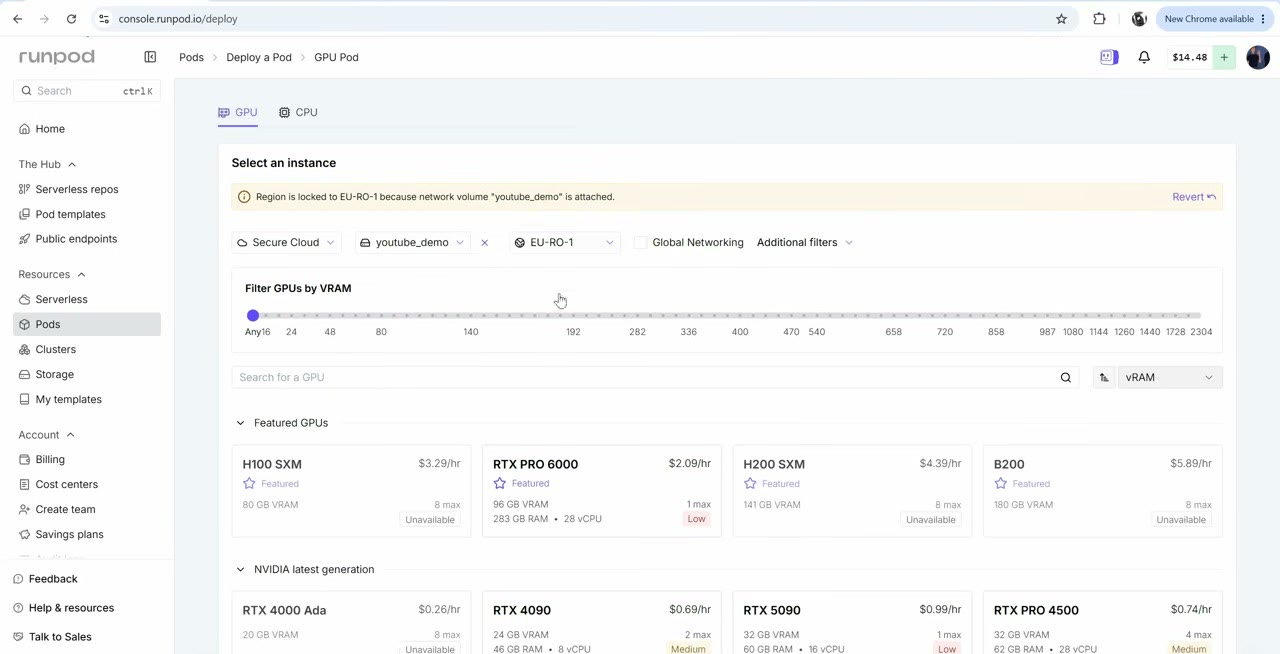
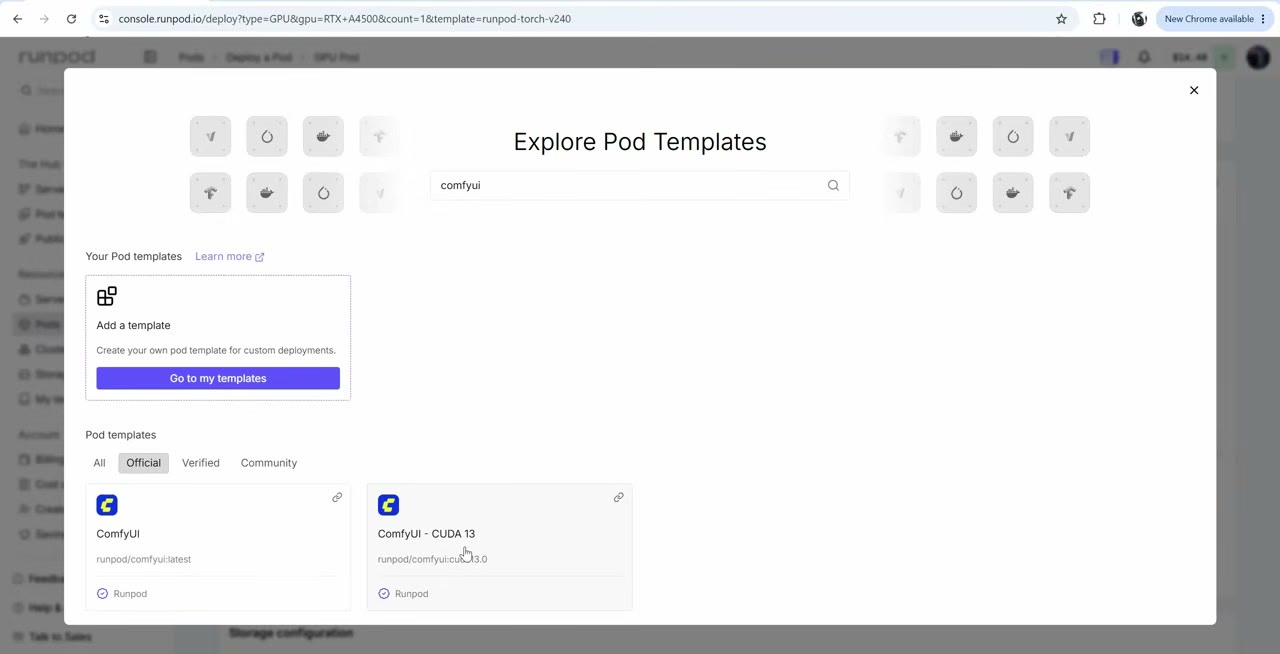
Search the templates for ComfyUI. The official one gives you a clean, current ComfyUI. There’s also a CUDA 13 version for Blackwell cards like the RTX 5090; I use the regular version because some custom nodes don’t work with CUDA 13 yet.
3. Wait for the first install
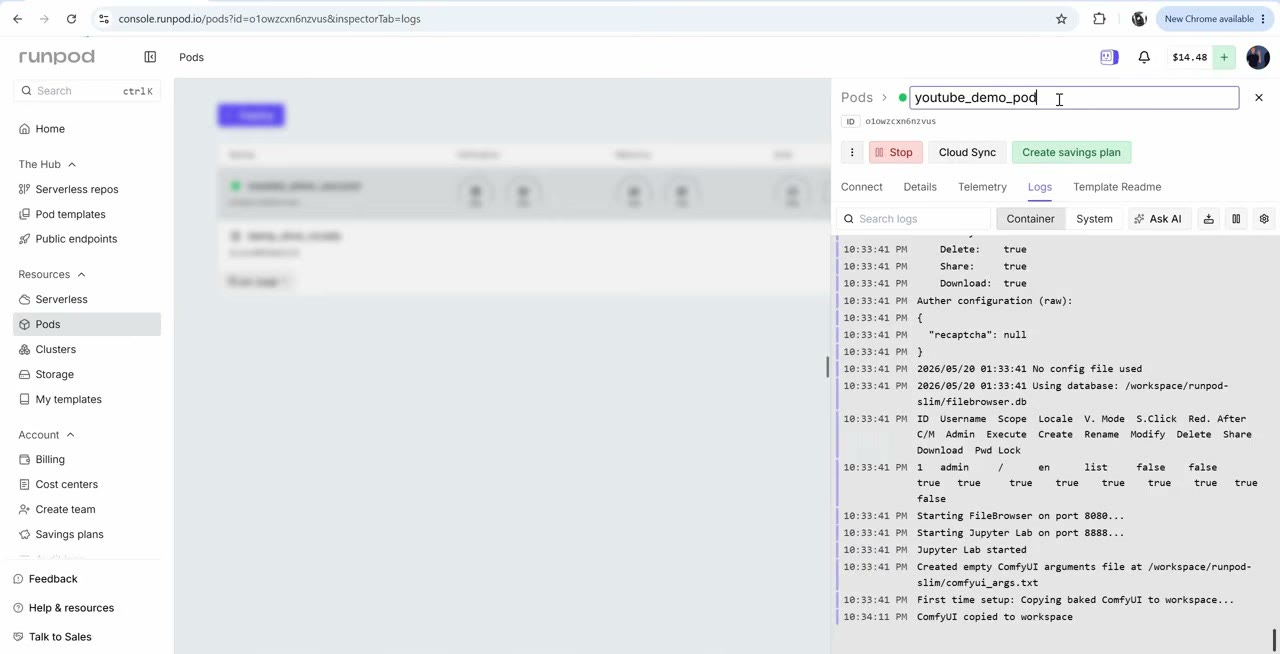
The first boot takes five to ten minutes while ComfyUI installs onto the volume, and you’re paying for that time. That’s why step 2 uses the cheapest GPU. You can follow progress in the pod’s logs. Next time, a pod on the same volume only has to start ComfyUI.
4. Connect to JupyterLab and ComfyUI
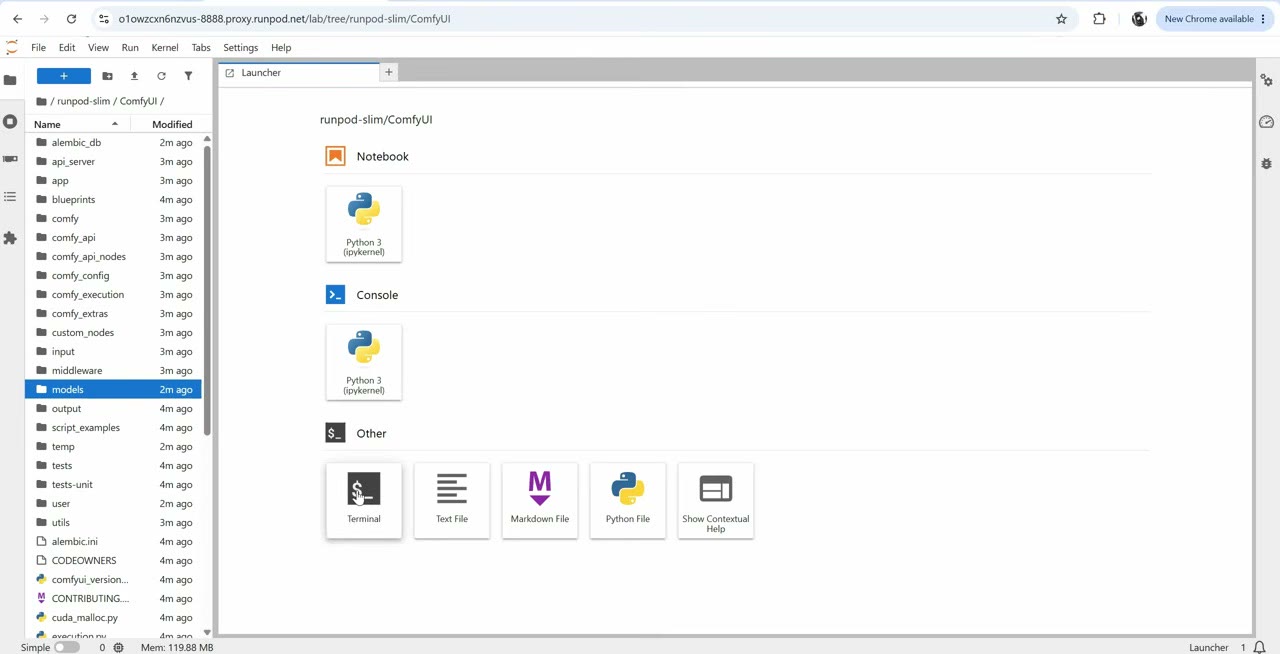
Under Connect you get the two things you’ll use constantly: ComfyUI itself, and JupyterLab, a file browser and terminal for the pod. Use JupyterLab to upload inputs, move models around and download results. Once you work with custom setups, you’ll spend a lot of time in it.
5. Download models straight to the pod
Open a workflow from ComfyUI’s templates and let it download the missing models. Datacenter bandwidth is much faster than most home connections.
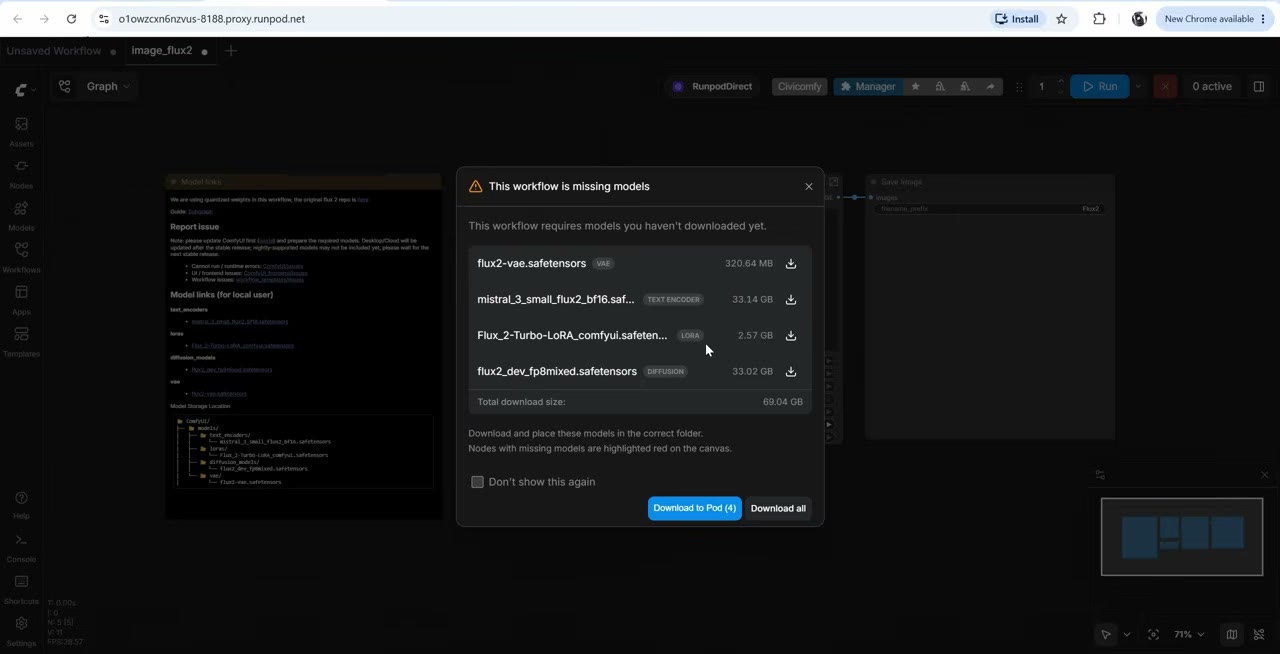
If the volume is too small for the models, go back to Storage, edit the volume and increase the size. It takes seconds.
6. Switch to a bigger GPU for the real work
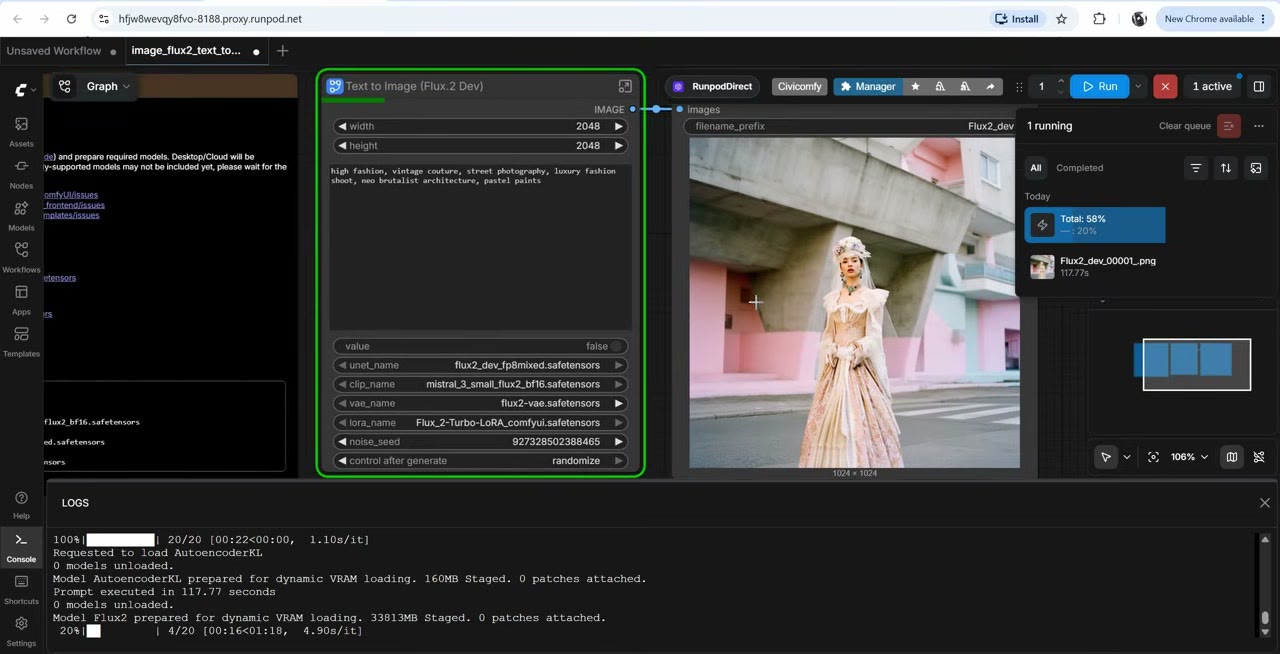
Stop the cheap pod, then deploy a new one on the same volume with an RTX 5090 or a B200. Everything you installed is already there, and this time the pod was ready in about a minute. Your images are saved to ComfyUI/output on the volume, where you can download them through JupyterLab.
Or skip steps 2–5 with a template
My templates boot ComfyUI with the models, custom nodes and workflows for a specific job already installed: talking avatars, voiceovers, sound effects, image-to-3D and fast image generation. They’re free on GitHub, and you only pay for the GPU. See the full list, or start with the Qwen3-TTS voiceover template.
How not to waste money
- Stop pods when you’re done. A running pod keeps billing whether you use it or not.
- Delete volumes you no longer need. Storage bills every month the volume exists.
- Test on draft settings before a long batch: lower resolution and fewer steps first.
- Check model licences against the data center. Some open models exclude certain regions, and that includes where your pod runs.
Getting started
To follow my guides on the same setup, create an account through my RunPod referral link. Sign up with Google: according to RunPod’s referral terms, the referral credit only applies to Google sign-ups. Then come back and pick a guide.
Watch the video version (9:14)
Everything above is in the video too, if you'd rather follow along on screen.
FAQ
Is RunPod cheaper than buying a GPU?
For most people, yes. At $1.19 an hour, the RTX 5090’s $1,999 list price buys about 1,700 hours of cloud rendering, with no power bill, and you can switch to a bigger GPU for a single job.
Do I lose my work when I stop a pod?
Not if it lives on a network volume. Stopping or deleting the pod leaves the volume, and everything on it, in place.
Which ComfyUI template should I start with?
The official ComfyUI template on the regular CUDA build, or one of my templates if you want a specific workflow ready to go.
How big should my network volume be?
About 80–100 GB for Flux or video models. You can make a volume bigger later, but never smaller.

Anton Tenitsky is a 3D artist with 15+ years in computer graphics, working with Nickelodeon, Gameloft, Marvel Rivals and many other clients. More about me