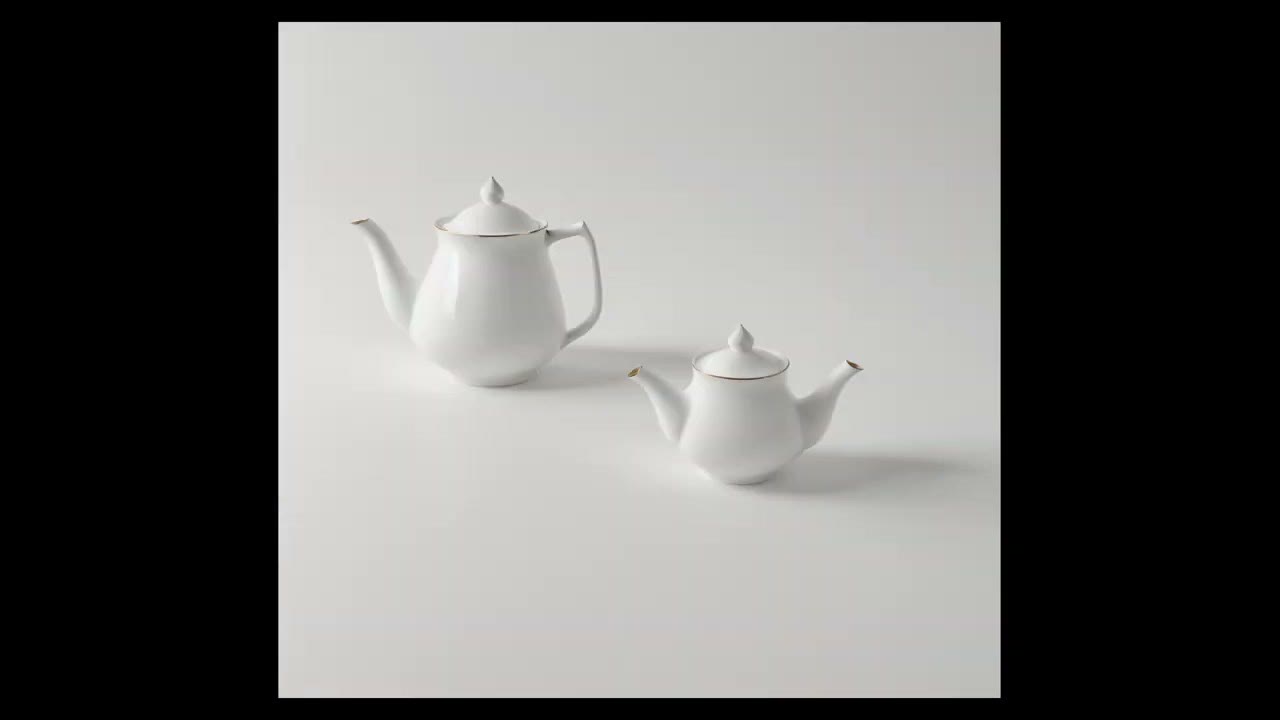
ComfyUI is a node-based interface for running AI image models. It’s very advanced, and in some ways more capable than paid web tools: it doesn’t always give better quality, but it runs locally, it’s free, and you can make it do very specific things that no web tool will. This is the first step: installing it and building the most basic text-to-image graph from scratch, so you understand what every node does. The first generations are teapots.
In short
- Install: download the portable build from the ComfyUI GitHub page, unzip, run
run_nvidia_gpu.bat. - Model: Stable Diffusion 1.5 (
v1-5-pruned-emaonly.safetensors) intoComfyUI/models/checkpoints. - The graph: Empty Latent Image → Load Checkpoint → two CLIP Text Encode prompts → KSampler → VAE Decode → Save Image.
- Defaults that work: 20 steps, CFG 8, sampler dpm_2, scheduler karras for photoreal images.
Install ComfyUI
Python
I installed Python 3.11.5 from python.org, a version that’s compatible with ComfyUI. Brand-new Python versions might cause compatibility issues, or might not; it’s hard to know for sure. Download the Windows installer and click through the basic steps. (The portable ComfyUI build below also ships with its own embedded Python.)
ComfyUI portable
The ComfyUI GitHub page has the files, the documentation and a useful list of keyboard shortcuts, worth coming back to and memorising.
- On Windows, use the portable version: the direct download link gives you a zip. (Installation for other systems is further down that page.)
- Unzip it, open the folder and double-click
run_nvidia_gpu.bat. With no usable GPU, use the CPU version instead. - The first start downloads the modules ComfyUI needs; give it 5–10 minutes. It then opens in your browser.
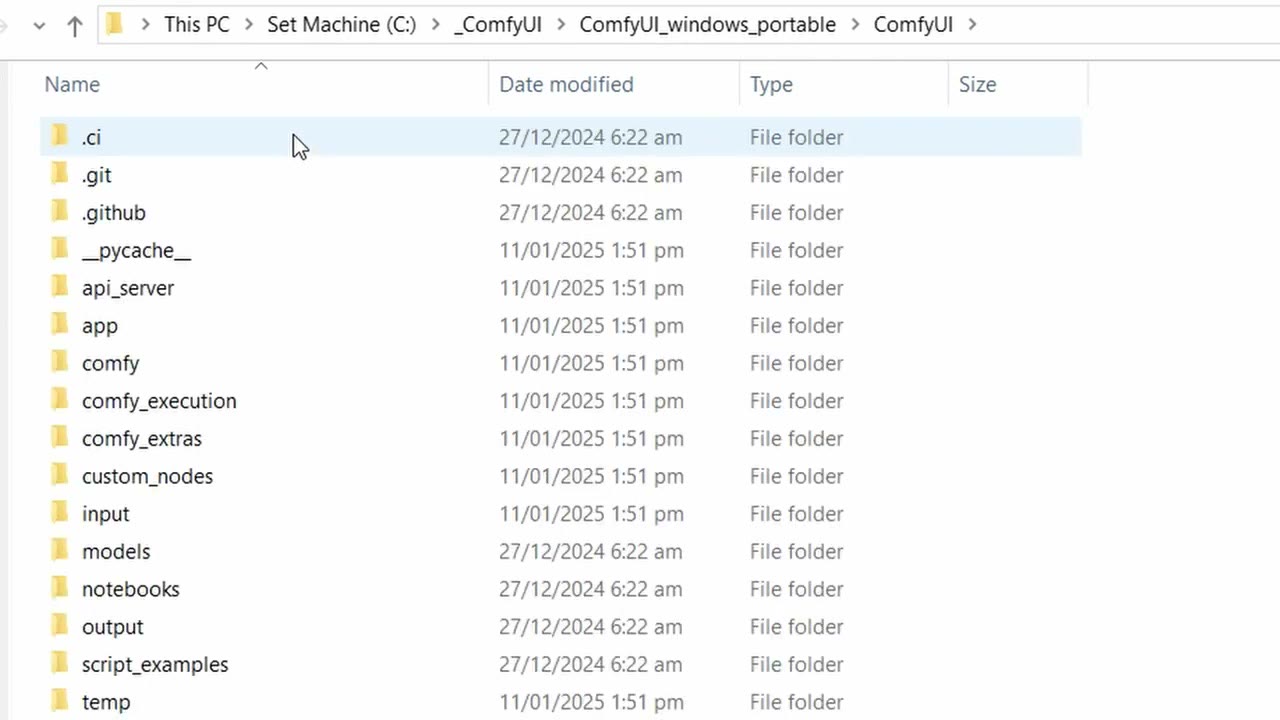
models, your renders land in output.If it doesn’t open with a workflow already loaded, go to Workflow → Browse Templates and choose Image Generation, the most basic template. Click Queue and it tells you there’s no model yet.
Download a model
Stable Diffusion 1.5
Get Stable Diffusion 1.5 from Hugging Face: open Files and versions and download v1-5-pruned-emaonly.safetensors. Put it in ComfyUI/models/checkpoints.
Prefer .safetensors to .ckpt. A .ckpt file is a Python pickle, which can contain code that runs when it’s loaded; safetensors is a format that holds only the model’s numbers. That matters most when you download models from community sites.
Why 1.5 and not a newer model
There’s a lot of confusion for beginners: Stable Diffusion 3.5, 2.1, SDXL, Flux, 1.5. Start with 1.5:
- It’s well tried. The power of ComfyUI is that you can drag someone else’s workflow in and it works, and many custom nodes, plugins and workflows need a 1.5 model (or SDXL), less often 3.5 or Flux.
- It’s fast. While you’re learning, you want lots of iterations, and quality matters less at this stage.
SD 1.5 is a base model. People fine-tune it with extra datasets, and those models give much better results. I sometimes play with the plain one, but more often I use a fine-tuned model like epiCPhotoGasm.
Fine-tuned models on Civitai
Civitai has a huge number of fine-tuned models for SD 1.5, SDXL, Flux and more. Search for a style (anime, stylised, a classical painter like Rembrandt, anything) and check the base model listed on each page. For good photorealism I picked epiCPhotoGasm, an SD 1.5 model. It goes in the same checkpoints folder.
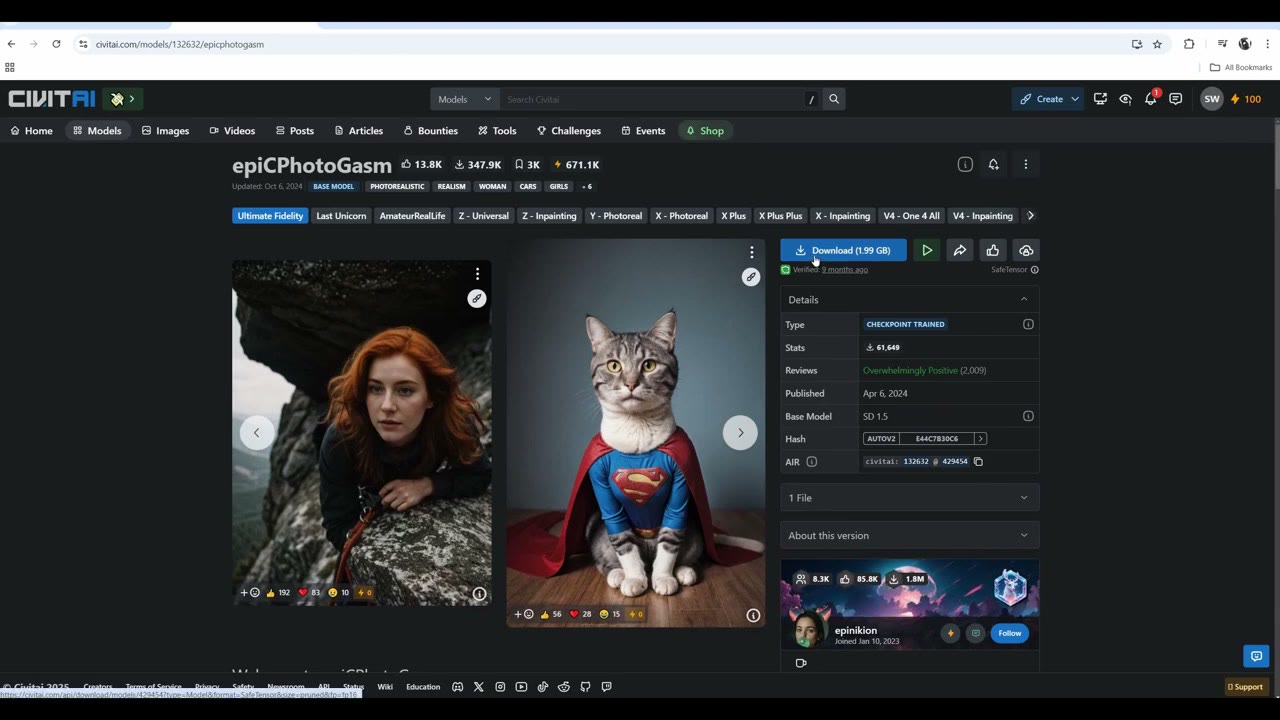
Back in ComfyUI, Edit → Refresh Node Definitions finds the new files. For bigger changes you sometimes need to restart ComfyUI completely.
Your first image
Pick a model in Load Checkpoint and click Queue. Keep the command window open: it shows errors and how long each image takes.
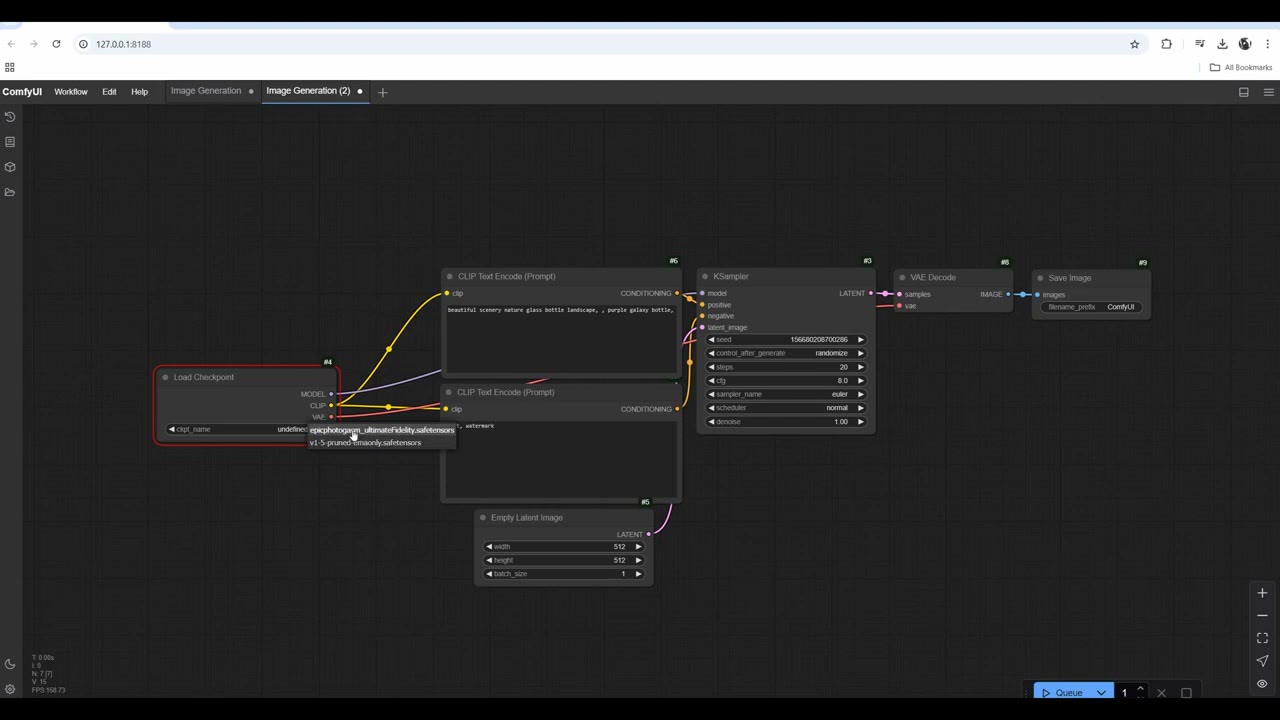
The interface itself is simple: save and export, undo and redo, help and documentation, a node library to search nodes, a model library, and your workflow files. Click a sidebar icon again to hide its panel.
Build the graph yourself
Start from a blank page: Workflow → New. Double-click the empty canvas to search for a node by name.
1. Empty Latent Image: the canvas
Add Empty Latent Image. It sets the resolution and the batch size, the number of images per run (the batch count next to the Queue button does a similar job).
It’s a blank canvas in latent space: an encoded, noisy representation the model works in, stored as a tensor (a multi-dimensional array of numbers). I’m not a mathematician; the useful idea is that you manipulate that latent by feeding it information: a text prompt, another image, a style guide, or noise.
2. Load Checkpoint: the model
Add Load Checkpoint (“checkpoint” means model) and choose SD 1.5. It has three outputs:
- MODEL tells ComfyUI which model is used throughout the process.
- CLIP handles the inputs that steer the image, such as your text prompt.
- VAE, a variational autoencoder, encodes an image into latent space and decodes it back. Many checkpoints include one; you can also load a different VAE for a different look.
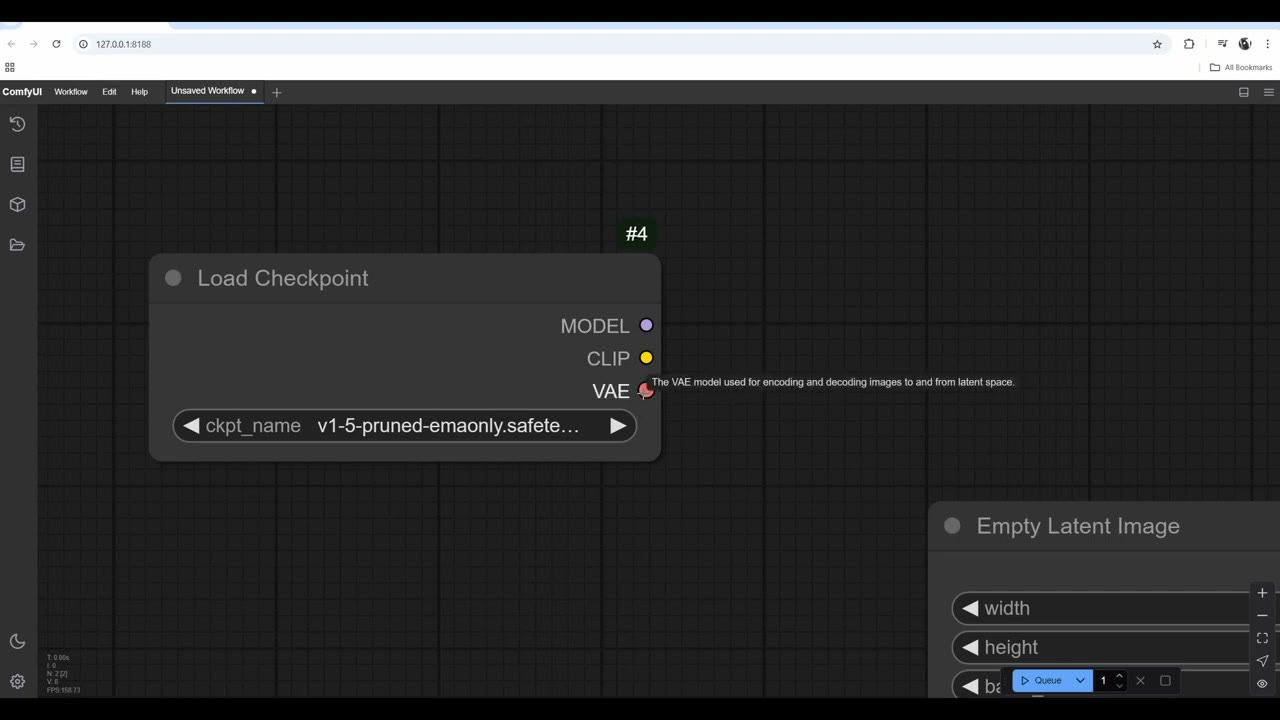
3. Two prompts
Drag from the CLIP output and release; ComfyUI offers matching nodes. Choose CLIP Text Encode (Prompt). Copy it (Ctrl+C, Ctrl+V) and connect the copy too. You usually work with two prompts: a positive one for what you want and a negative one for what you don’t. Double-click a node’s title to rename it.
4. KSampler: where it all comes together
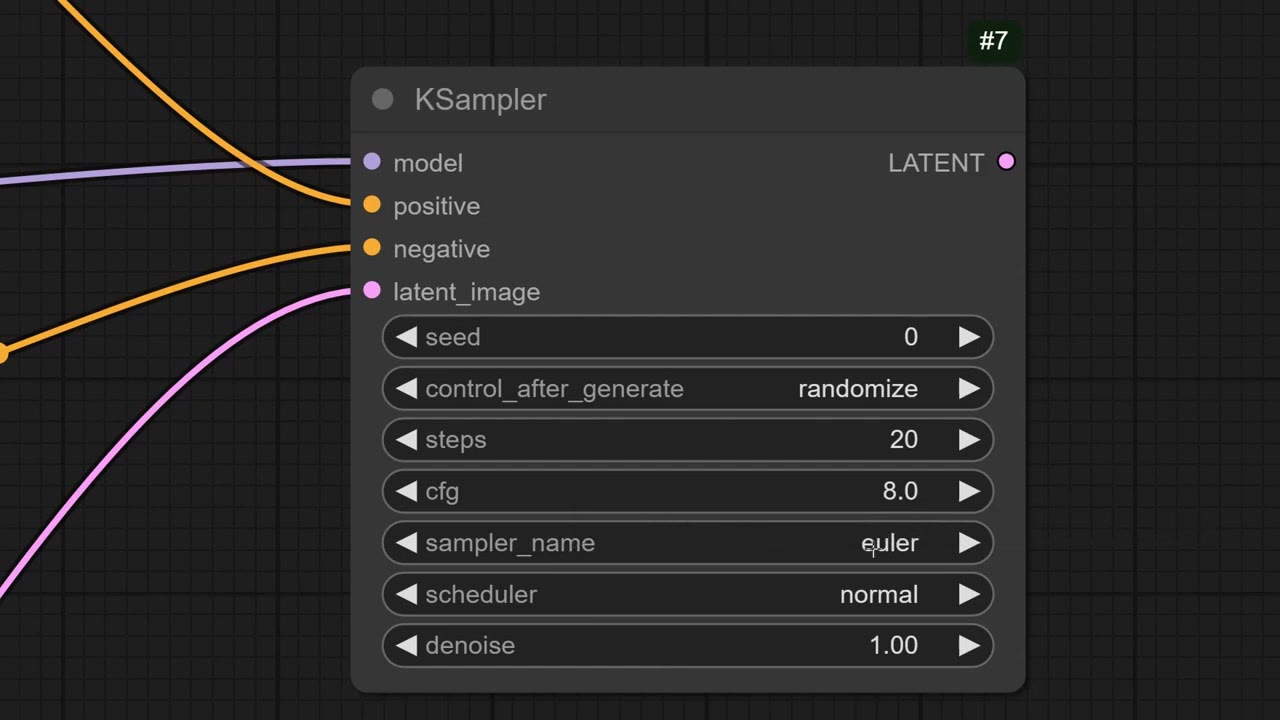
Drag from MODEL and choose KSampler, the node that solves the image. Connect the positive prompt, the negative prompt and the empty latent. Its settings:
- Seed with control_after_generate: fixed repeats the same image, increment counts 1, 2, 3 so you can trace back changes, randomize makes every run new.
- Steps: more steps, higher quality, longer renders. Two steps look ugly; 80 look finer but take much longer. Some models work best with a specific number, so read their documentation.
- CFG (classifier-free guidance): lower values give the model more freedom. At 1–2 you get noise or a blank image; at 12, 15 or 20 it adheres to the prompt much harder and can glitch. 8 is the standard and a good default; experiment between about 4 and 10.
- Sampler: the algorithm that creates the image. Some suit stylised output, others photorealism; some are faster. I used dpm_2 for photoreal images.
- Scheduler: the pattern of noise added during sampling. karras suits realistic images.
- Denoise: how far the result moves from the input latent. With an empty latent it has no effect here; it matters for image-to-image.
5. VAE Decode and Save Image
VAE Decode turns the latent (the array of numbers) into a real image. Connect the KSampler’s output and the checkpoint’s VAE. Then add Save Image. Results are saved in ComfyUI/output.
Type “teapot” into the positive prompt and run. ComfyUI highlights the node that’s currently running in green.
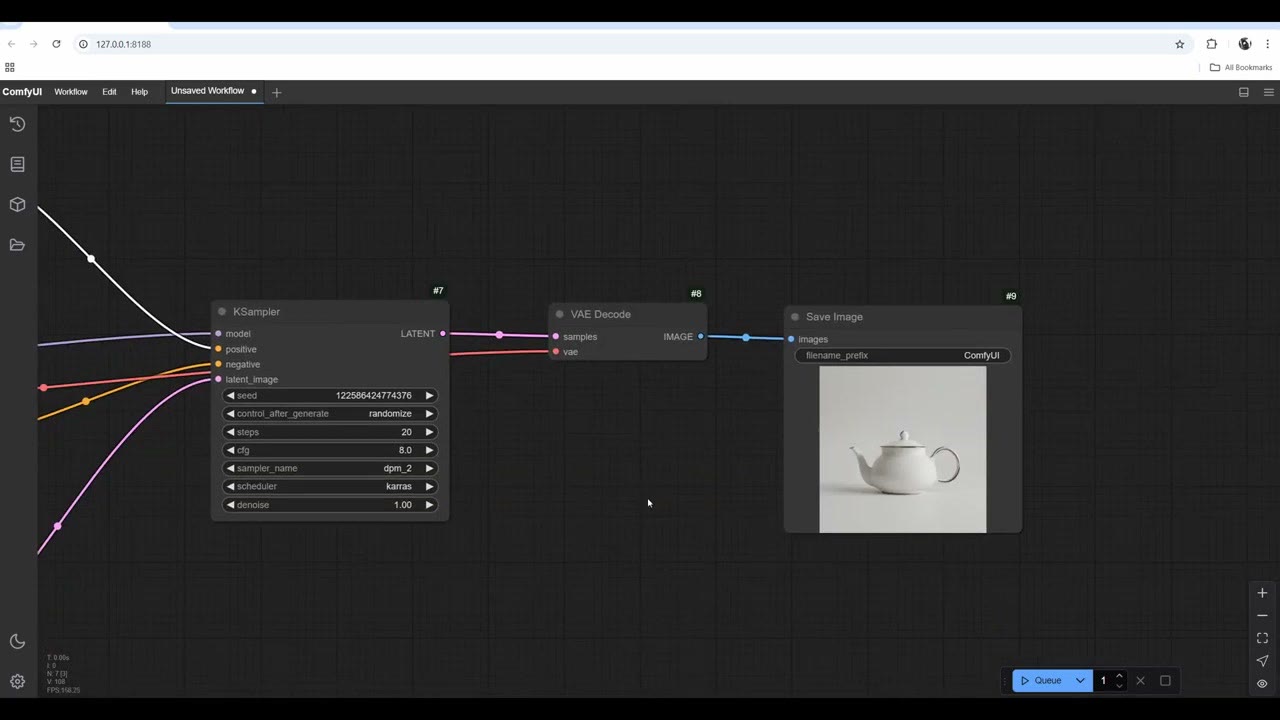
Improving the result
The first teapot wasn’t that nice. What helped:
- Better wording: “white background, isolated, centered”.
- A negative prompt: it sometimes made anime or stylised images, so I put those words in the negative prompt.
- A better model: switching from plain SD 1.5 to epiCPhotoGasm.
Then I raised the resolution to 1024 × 1024. Four times the pixels took about four times longer: from 5 to 23 seconds. At that size it kept making several teapots, so I added “single teapot” to the prompt. Saying “white background” also tended to make the teapot white; you can ask for a black teapot on a white background if you want one. It still glitches now and then. I queued four and went to make some tea.
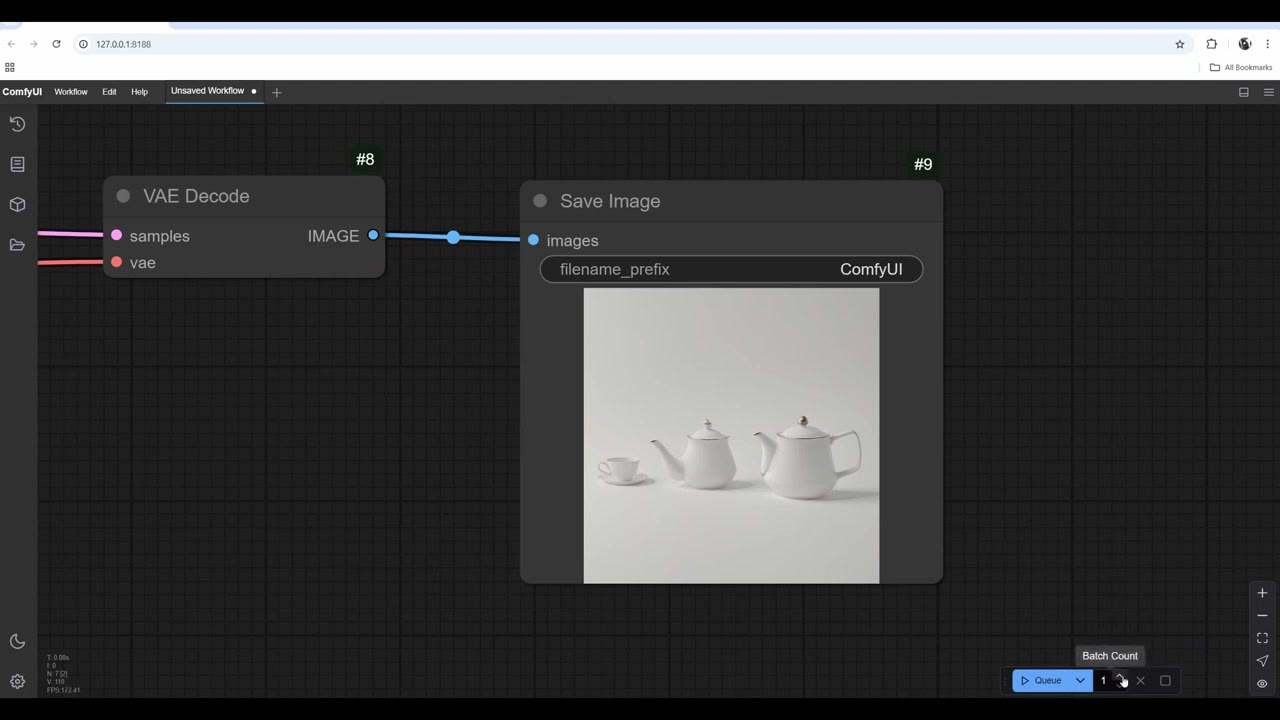
This is a very basic setup that only scratches the surface. Build some experience by changing prompts and values and watching what changes; that’s how you get a feel for the software. Next: install the ComfyUI Manager and try image-to-image.
Running it without a strong GPU
SD 1.5 runs on modest cards. For heavier models like SDXL and Flux, or long batches, I now rent GPUs instead; see my introduction to RunPod.
Watch the video version (19:22)
Everything above is in the video too, if you'd rather follow along on screen.
FAQ
Which Stable Diffusion model should a beginner start with in ComfyUI?
Stable Diffusion 1.5. It’s fast, and a lot of shared workflows, custom nodes and plugins are built for it (or for SDXL). For better images, use a fine-tuned SD 1.5 model from Civitai, such as epiCPhotoGasm.
Where do I put model files in ComfyUI?
Checkpoints go in ComfyUI/models/checkpoints. Then use Edit → Refresh Node Definitions (or restart ComfyUI) so they appear in the Load Checkpoint list.
What CFG and steps should I use?
CFG 8 is a good default; 4–10 is worth experimenting with. Very low values give noise, very high values follow the prompt too hard and glitch. More steps mean higher quality but longer renders; around 20 is a normal start.
Why is denoise doing nothing in my text-to-image workflow?
Denoise controls how far the result moves away from the input latent. With an empty latent there’s nothing to move away from, so it has no effect. It matters in image-to-image.

Anton Tenitsky is a 3D artist with 15+ years in computer graphics, working with Nickelodeon, Gameloft, Marvel Rivals and many other clients. More about me