AI images often come out with broken hands and odd faces, especially full-body shots. Fixing them one by one doesn’t work when you have hundreds. This workflow does it in batch: it goes through a folder, finds the hands (and faces) by description, re-renders just those areas with Flux at higher resolution, and saves the fixed image.
It needs Flux, so at least 12 GB of VRAM. If you only need to fix the odd image by hand, my simpler inpainting workflow for hands also runs in the cloud.
In short
- Find: Florence 2 masks “hands” or “face” from a text description.
- Fix: the Impact Pack’s SEGS detailer crops that area, renders it at 512 px and pastes it back.
- Settings: 20 steps, denoise 0.65–0.7.
- Expect to rerun: plenty of attempts aren’t good; keep the best.
- Cascade: fix the hands, then feed that image into a second detailer for the face.
Why hands go wrong, and how this fixes it
Hands usually break because of resolution, not because the model can’t draw them. Render a close-up portrait with a hand by the face, and the hand fills plenty of pixels and comes out fine. In a full-figure image, the same hand gets only a few pixels, and that’s where the extra fingers come from. In my test image the face was good and the hands weren’t.
So the workflow does what a retoucher would: crop the problem area, enlarge it, redraw it in detail, and put it back.
Workflow 1: Fix one element across a folder
Load the folder
Load Image Batch with the folder path pasted in and the mode set to incremental image, so each run picks up the next image. A preview node shows which image it’s on.
Find the hands with Florence 2
The ComfyUI-Florence2 pack provides the model loader; the model downloads automatically the first time you run it. I used large (fine-tuned); base is faster and also gave good results, so I’d try that next time.
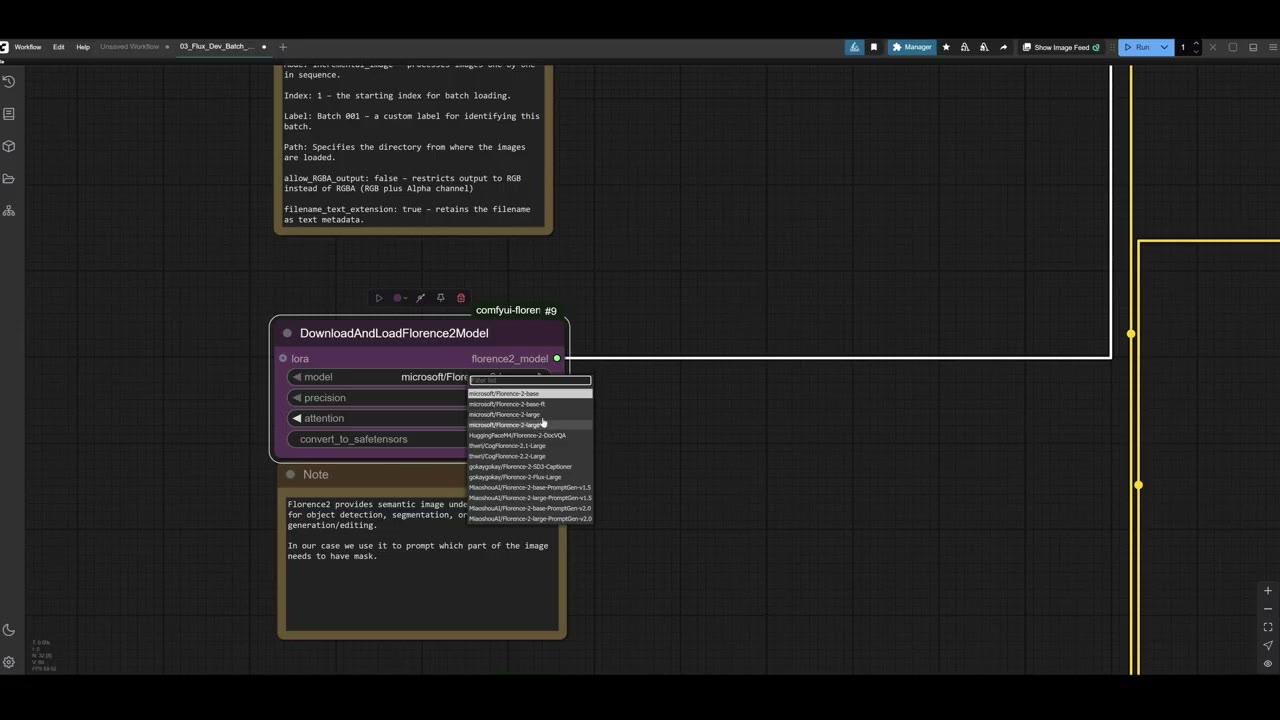
In the Florence 2 node, set the task to caption to phrase grounding and type what to find, here “hands”. Florence 2 can do much more (describe an image, read text), but this task is the one that finds an area from a phrase and returns its mask. I cover it in more detail in masking anything with Florence 2.
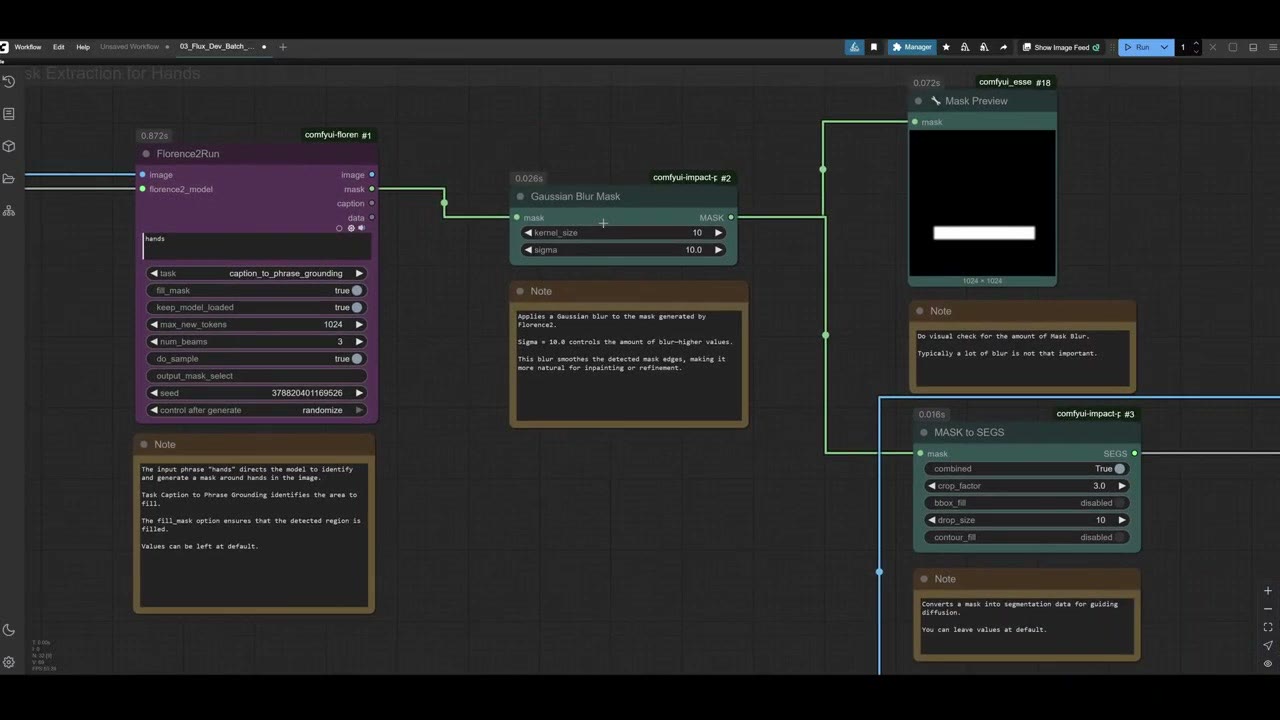
Soften the mask and make it a segment
- Gaussian Blur Mask softens the edges, because a hard-edged mask can leave a visible seam.
- Mask to SEGS turns the mask into a segment, the format the detailer works with.
Re-render with the SEGS detailer
The Detailer (SEGS) node from the Impact Pack crops each segment and scales it so its guide size is 512 px, proportionally. That gives the hand far more pixels to work with, and that’s where the improvement comes from.
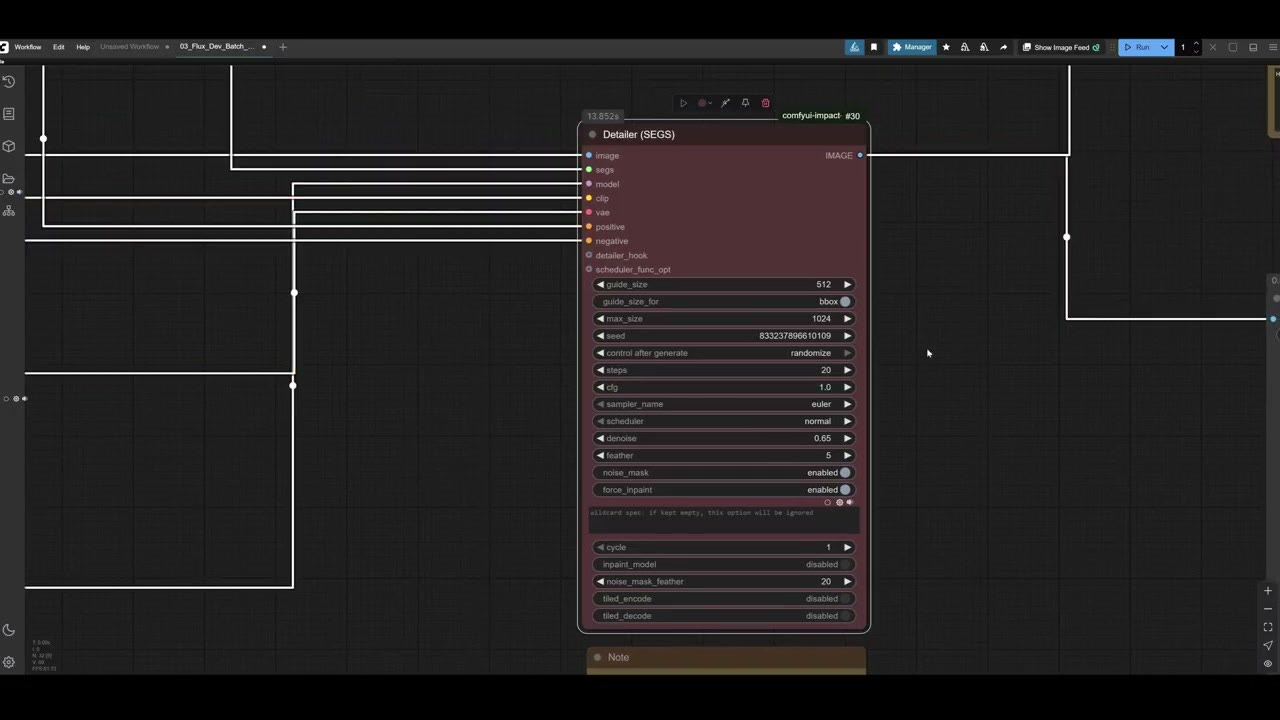
It gets the same inputs as a normal generation:
- Model: Flux dev, VAE and the DualCLIPLoader with Flux’s two text encoders.
- Positive prompt with Flux Guidance. I wrote something like “two hands, five fingers”; it works even when only one hand is visible. The negative stays empty.
Only two settings really matter:
- Steps: 20. Anywhere from 20 to 30 works, and 20 is honestly good enough.
- Denoise: 0.65–0.7. This is how much of the original area gets redrawn. Below about 0.5, the model creates something random there (a vehicle instead of a hand, or another face). At 0.9 it keeps the same broken hand.
Compare and save
An rgthree image comparer shows the before and after, and the result is saved. The fixed hands sometimes come out a little smaller, though it’s not very noticeable.
Expect to run it several times
This is the important part: often 60 to 80% of attempts won’t be good. Run it repeatedly and cherry-pick.
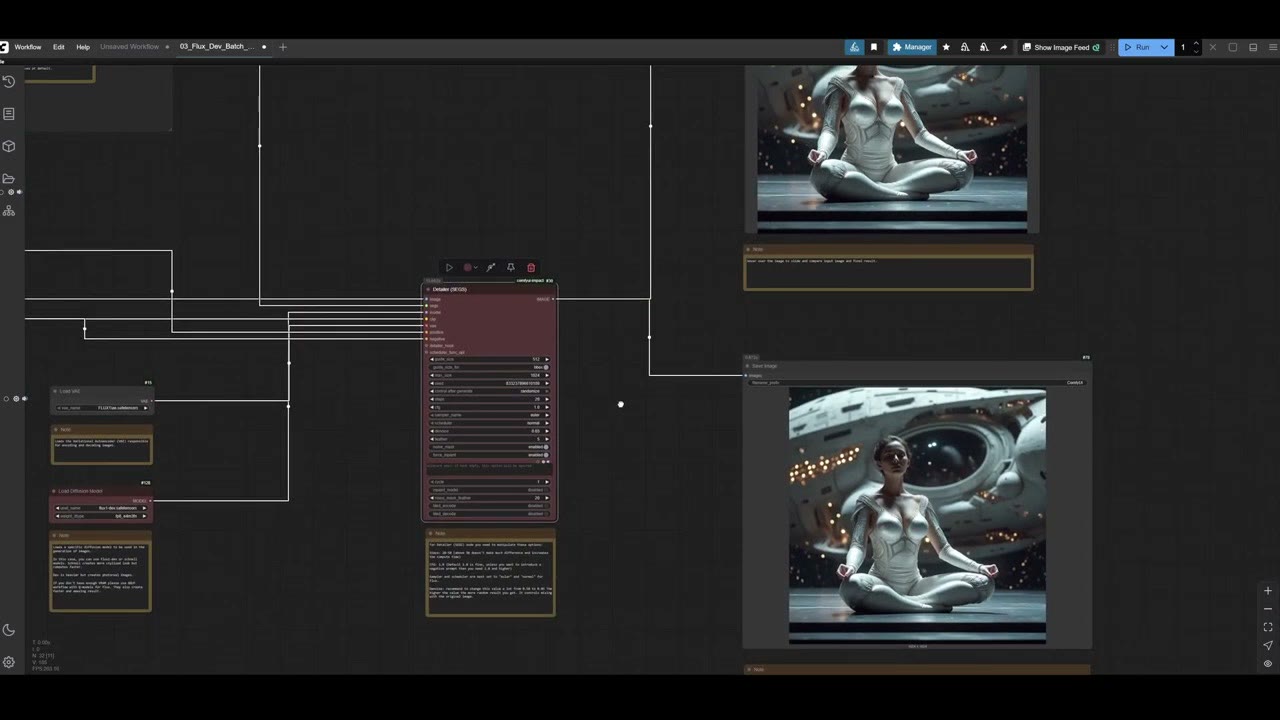
Sometimes the result surprises you. On one image the mask glitched and covered the whole figure, so the detailer redrew everything: it fixed the hand by hiding it, improved the face and the feet, and changed the suit’s design quite a bit. That’s what you’d get from a prompt like “person”. On another image, the hands came out worse than before. Keep running.
Workflow 2: Hands, then face
To fix the face too, cascade a second detailer:
- The first group masks the hands and fixes them, as above.
- Its output image goes into a second mask extraction, searching for “face”, and a second SEGS detailer.
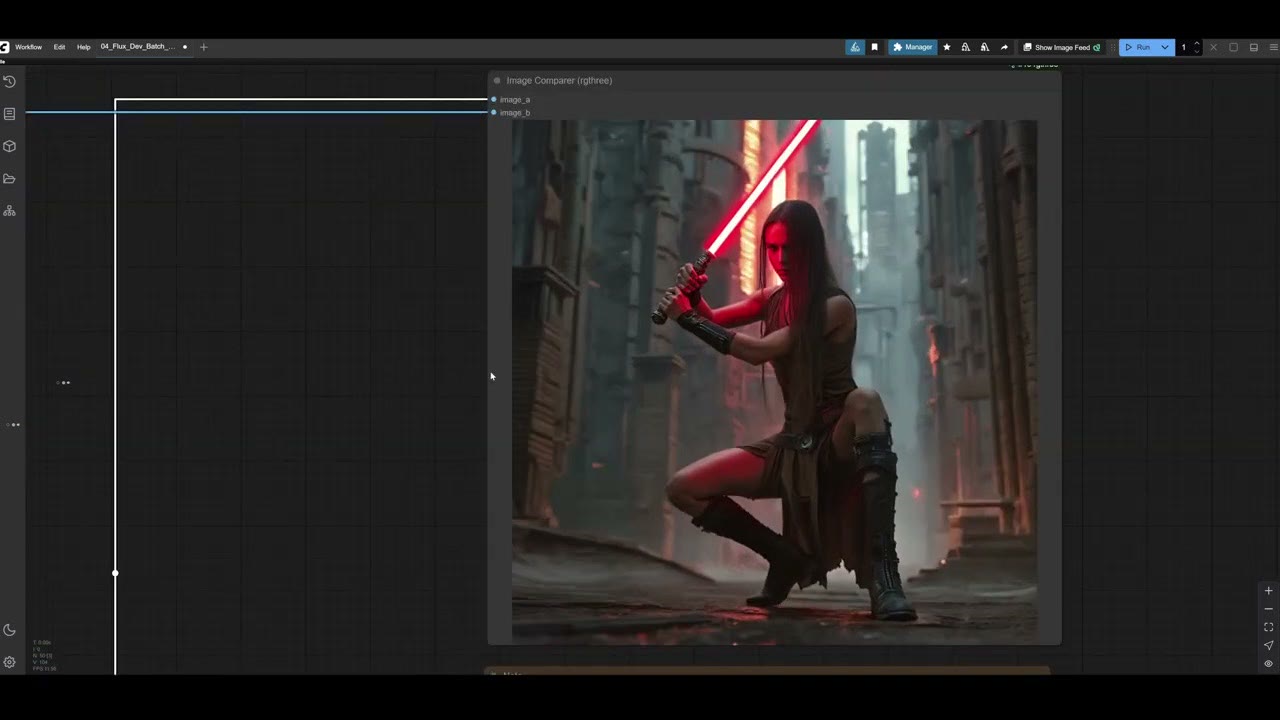
In my test the face went from not quite human to convincing, and one hand came out great (the other needed a couple more runs).
Don’t duplicate model nodes. Every node that loads a model keeps it in GPU memory. Load Florence 2, Flux, the text encoders and the VAE once and connect them to every detailer. Duplicates fill your VRAM very quickly for no benefit.
You can keep cascading (boots, then background), but it gets impractical fast. Hands and faces are where it matters.
Optional: several folders at once
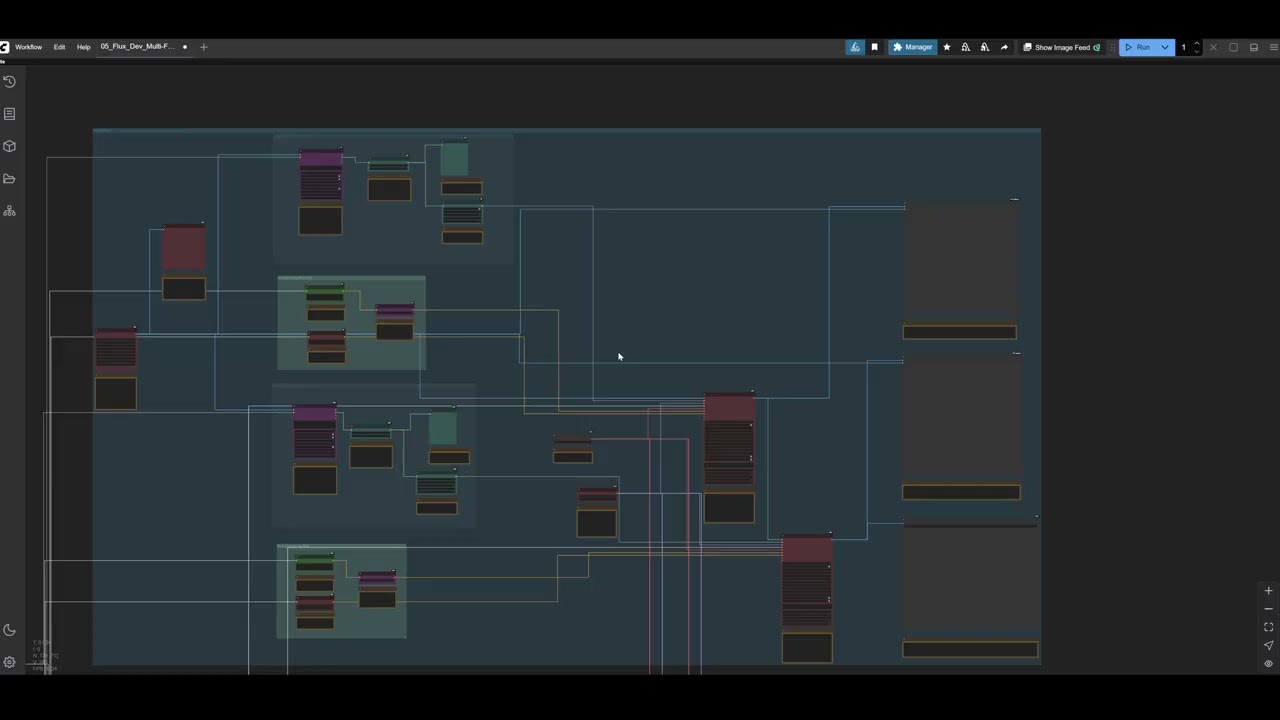
I also built a version that runs three folders through the same fix, all sharing the same Florence 2, Flux, text encoder and VAE nodes. Honestly, it’s more of a test than something you need. But if you have different sets (medieval, fantasy, sci-fi) with different fixes for each, duplicate the groups, give each its own Load Image Batch, and connect them to the shared models.
All the workflows are on my Patreon, and the single-fix inpainting workflow is on RunComfy with free trial minutes. If you don’t have 12 GB of VRAM, a rented GPU works too; see my introduction to RunPod.
The RunComfy link is a referral link, as is my RunPod referral link: new RunPod accounts that sign up with Google get $5–$500 in credit after their first $10, and I get a small commission.
Watch the video version (10:11)
Everything above is in the video too, if you'd rather follow along on screen.
FAQ
Why does AI get hands and faces wrong in full-body images?
Resolution. In a full-figure image, a hand or a face only gets a small number of pixels. The same model renders hands well in a close-up. The fix is to crop that area, render it at higher resolution and paste it back.
What denoise should I use to fix hands?
Around 0.65 to 0.7. Below about 0.5 the model invents something random there; at 0.9 it keeps the broken hand.
How often does the fix work?
Not every time: in my runs, often 60–80% of attempts weren’t good. Run it several times and keep the best result.
How much VRAM do I need?
At least 12 GB for Flux. Load each model once and connect it to every detailer, because duplicate model nodes each take memory.

Anton Tenitsky is a 3D artist with 15+ years in computer graphics, working with Nickelodeon, Gameloft, Marvel Rivals and many other clients. More about me