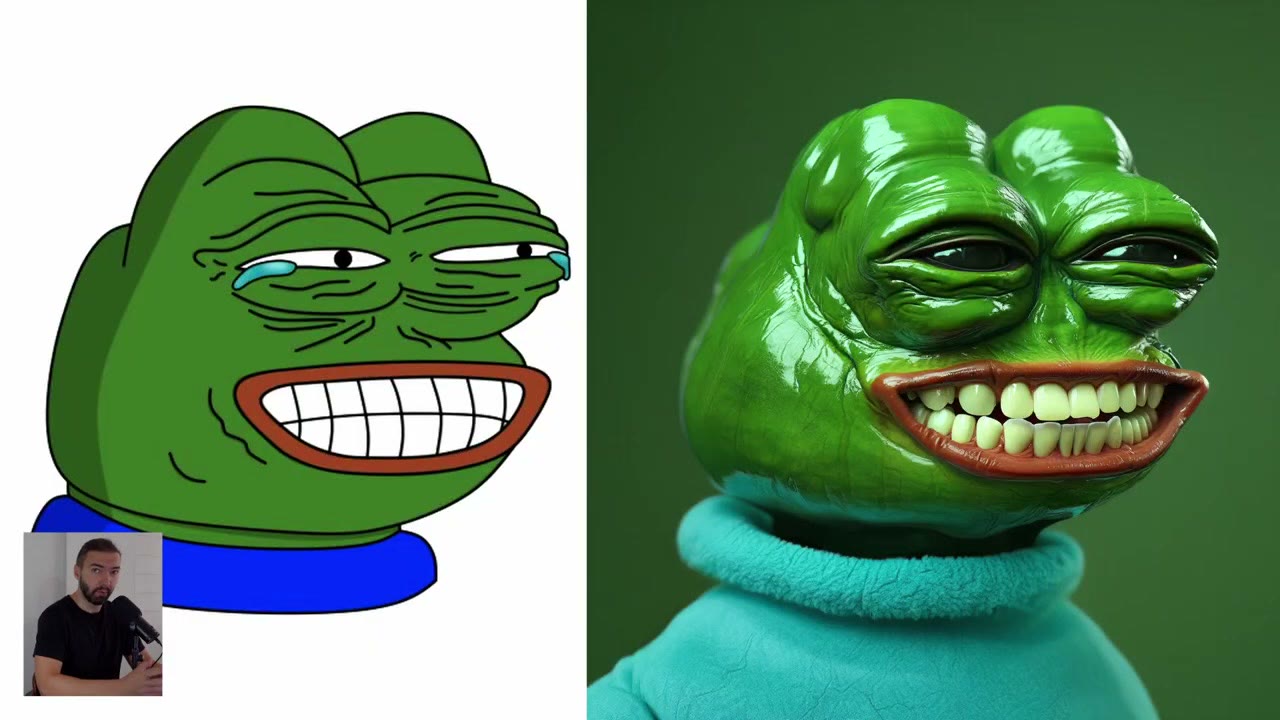
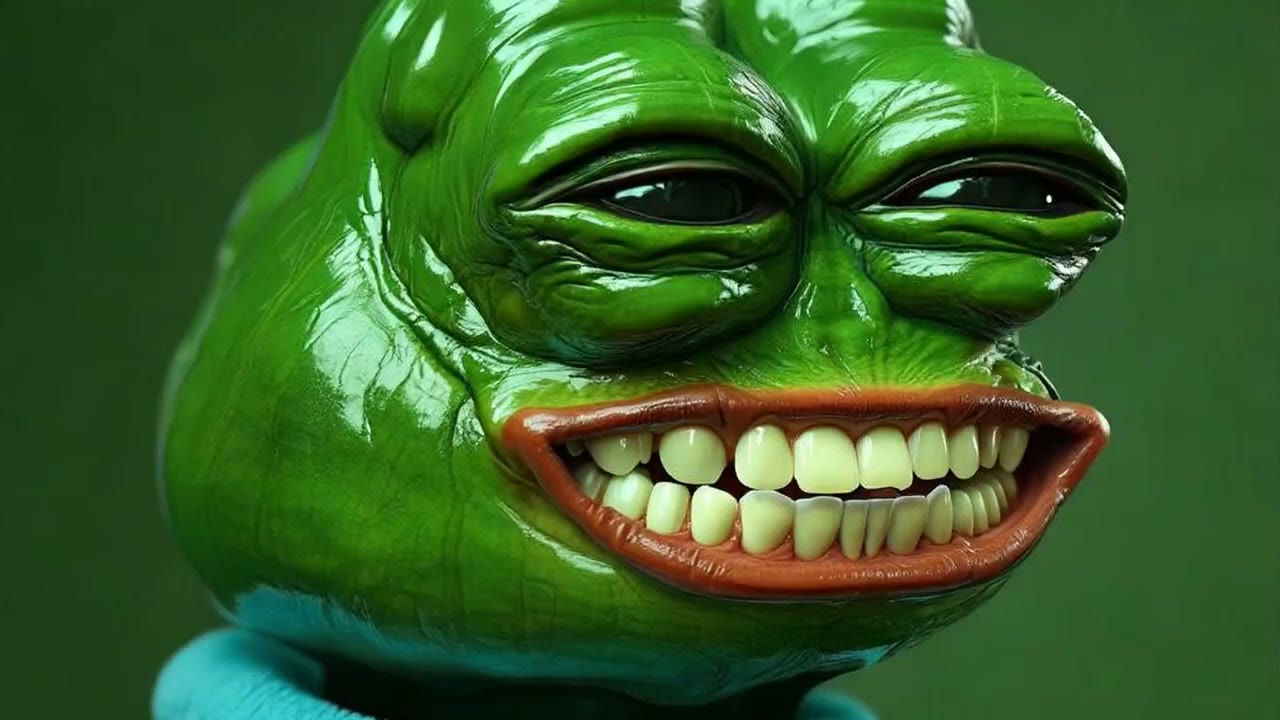
A flat cartoon has no depth, no skin and no light. Flux can add all three, if you give it the shape and describe the rest in enough detail. This guide turns Pepe the Frog into a creepy, photoreal “real” Pepe. All credit for Pepe goes to his creator, Matt Furie.
It runs locally in ComfyUI with Flux dev, and it needs a beefy machine: at least 16 GB of VRAM, I’d say. I have 24 GB. If you don’t, the workflow runs in the cloud too (see the end).
In short
- Shape: Depth Anything reads depth even from a flat cartoon.
- ControlNet: Flux depth ControlNet; less strength gives the model more creativity.
- Prompt: ChatGPT’s description of the sketch as a photo, then edited by hand: that’s where the result comes from.
- Sampler: 25 steps, seed on increment.
- Animation: Seedance on fal, 20–74 cents for five seconds.
The workflow
It’s a simple network. The only unusual part is reading depth from a sketch. You’ll need comfyui_controlnet_aux, rgthree, x-flux-comfyui, ComfyUI Essentials and ComfyUI-GGUF from the Manager.
1. Depth from the drawing
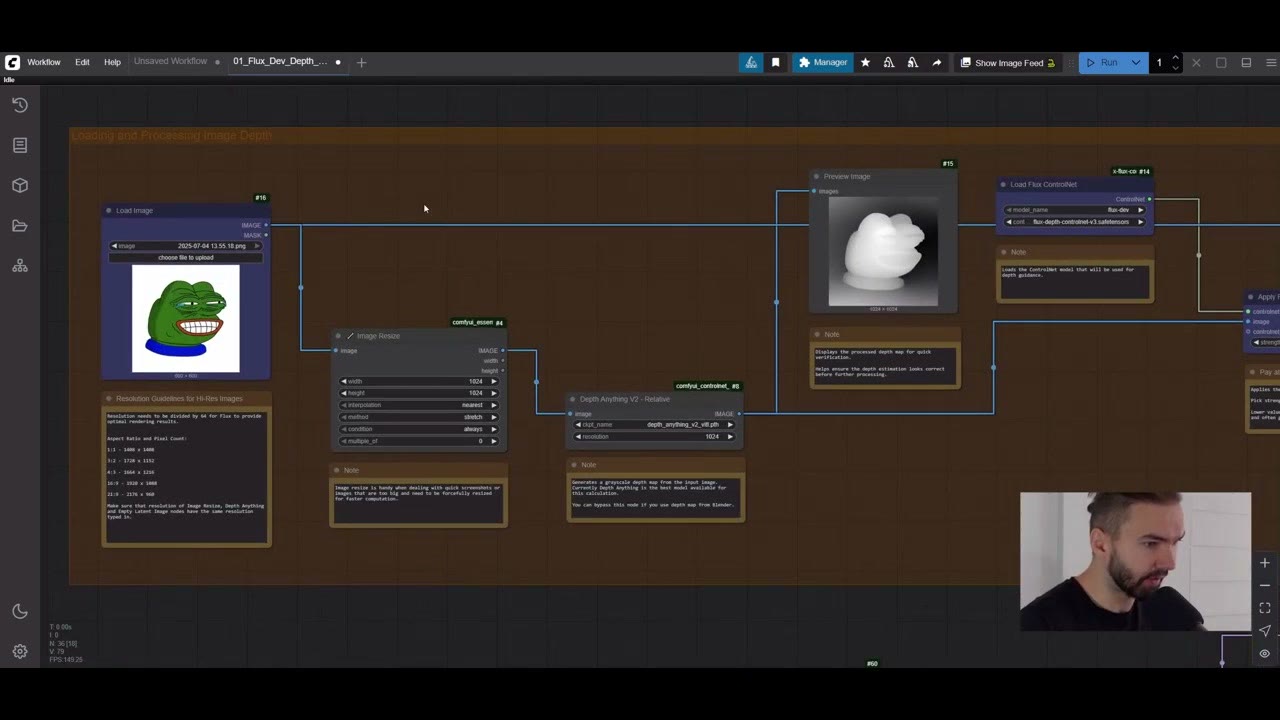
Load the image (mine was square) and resize it to 1024 pixels. Depth Anything then extracts a depth map, even from a flat sketch: white values are near you, black values far away. That’s what helps Flux understand the drawing as a 3D shape. (Depth Anything’s own resolution setting already resizes to 1024, so you can bypass the separate resize node.)
2. The ControlNet
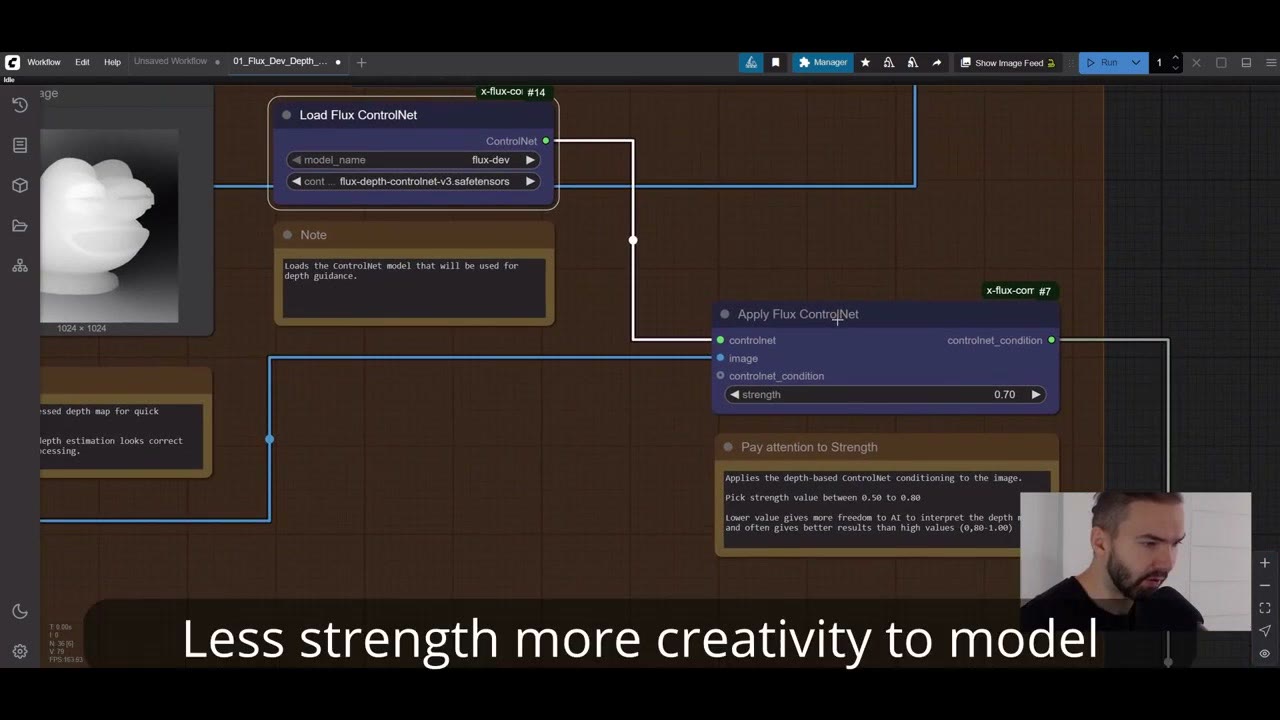
Load Flux ControlNet loads a Flux depth ControlNet that can interpret the depth image, and Apply Flux ControlNet combines it with the depth map. The result feeds the XLabs Sampler’s ControlNet input. Strength controls how strictly the depth is followed: less strength gives the model more creativity.
3. Model and canvas
Flux dev goes into the sampler’s model input. The Empty Latent Image must match the size of your depth image: 1024 × 1024 here. Landscape works too; just change the size everywhere. Notes in the workflow list good resolutions.
4. The prompt: where the result really comes from
The DualCLIPLoader loads Flux’s two text encoders (T5 XXL and CLIP-L, both in the Model Manager). The negative prompt stays empty; Flux doesn’t use one the way SDXL does.
For the positive prompt, I gave the Pepe sketch to ChatGPT and asked for a prompt describing a photoreal image of it. Then I edited it. The bulbous head wasn’t coming out right, and it was too smooth, so I added wrinkles throughout. That made a big difference.
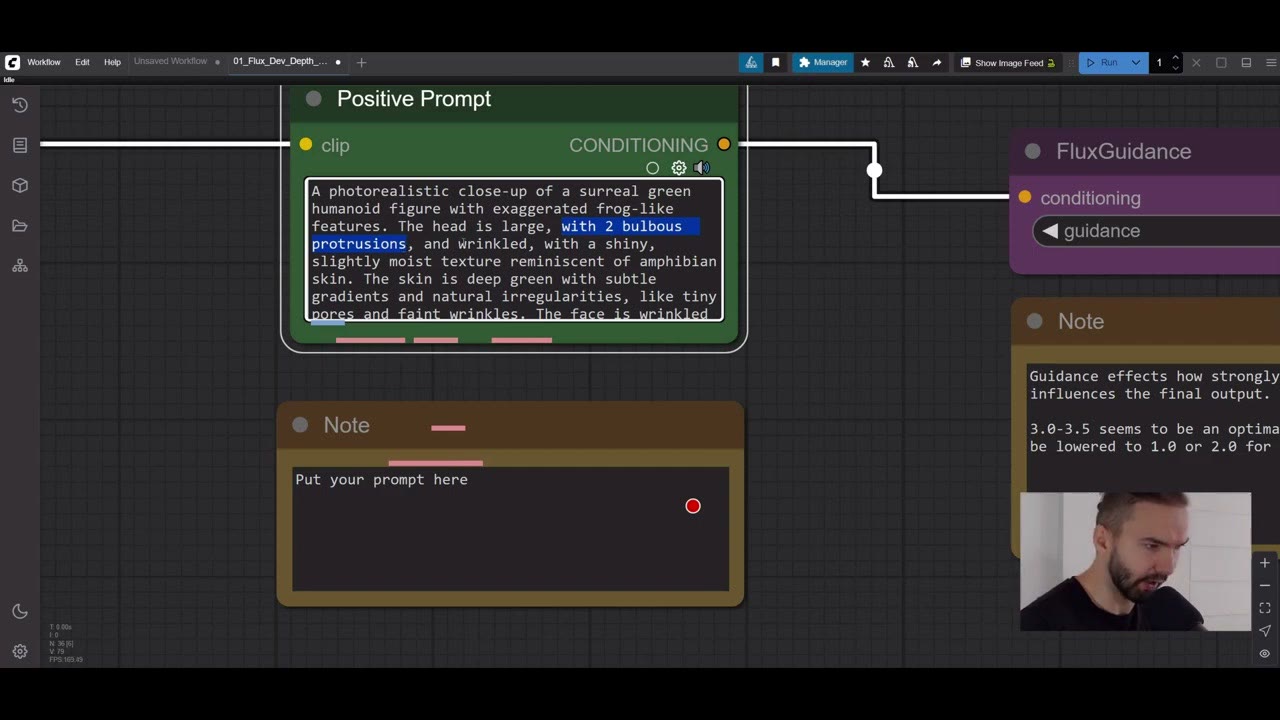
Here’s the full prompt (it can be shorter):
A photorealistic close-up of a surreal green humanoid figure with exaggerated frog-like features. The head is large, bulbous, wrinkly with a shiny, slightly moist texture reminiscent of amphibian skin. The skin is deep green with subtle gradients and natural irregularities, like tiny pores and faint wrinkles. The face shows an awkward forced grin, exposing perfectly aligned, unnaturally bright white teeth. The mouth is wide with pronounced reddish-brown lips that contrast with the green skin. The figure's eyes are narrow and squinting in the middle of the face, with small black pupils looking slightly to the side, very wrinkly on sides. At the corners of the eyes are glistening tear streaks, as if the character is crying while smiling. The tears reflect ambient light, adding to the surreal emotional contrast. The neck is thick, and the figure wears a plain, bright blue fabric collar that appears slightly soft and textured, like fleece or cotton. The lighting is studio-like with soft shadows, emphasizing the glossy, slimy surface of the skin and the moisture of the tears. No nostrils.Notice how much of it describes materials and light: moist skin, pores, glossy tears, fleece, studio shadows. That’s what turns a cartoon into a photo. Both prompts go through Flux Guidance into the sampler’s conditioning.
5. Sample, decode, save
- Steps: 25, for a bit better quality. I leave the other settings as they are; they work.
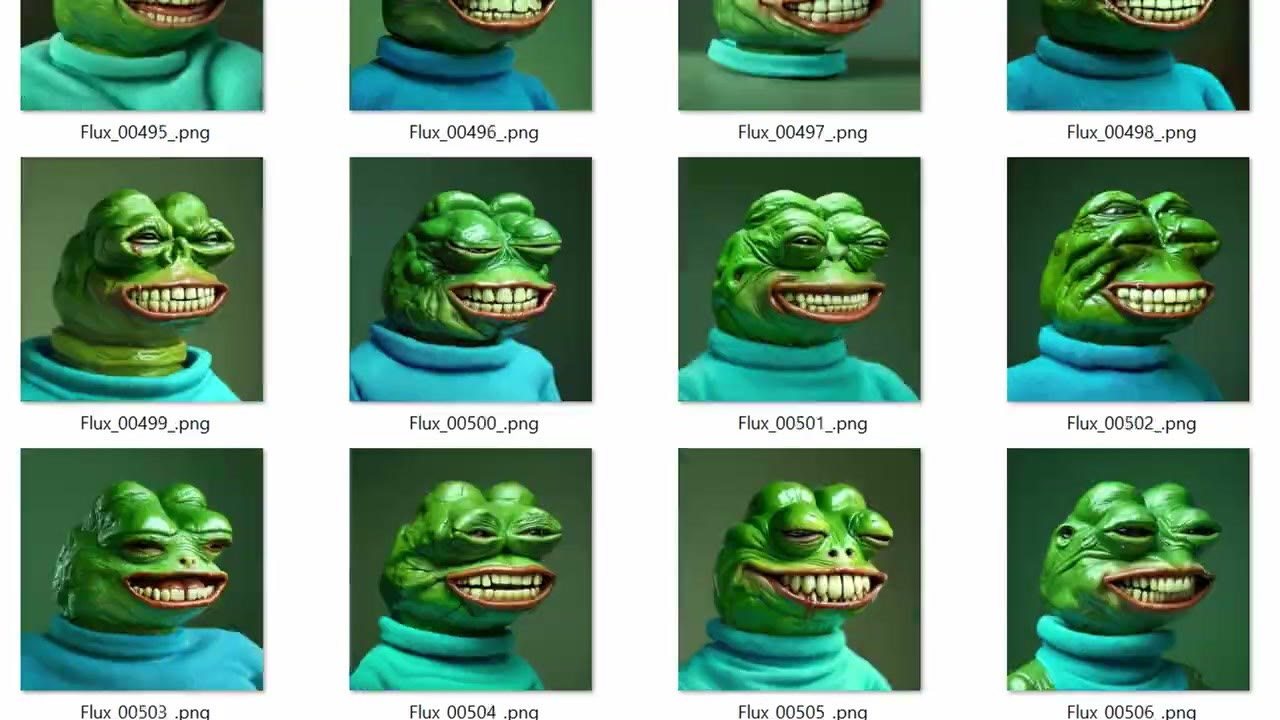
- Seed on increment. Over a few weeks I made about 2,000 images, and every new one is simply the next number, which makes overnight runs easy to track.
VAE Decode turns the result back into pixels. The sampler works in latent space, a compressed version of the image eight times smaller, so it has to be decoded. A comparison node shows the before and after, and the image is saved with the prefix “flux”.
Animate it with Seedance on fal
To make it move, I used fal and ByteDance’s Seedance image-to-video model (search for “Seedance” and pick image to video). Upload the image and write a motion prompt. I copied my Flux prompt and added squinting at the start; minimal effort, and it worked well. It looks properly creepy by the end.
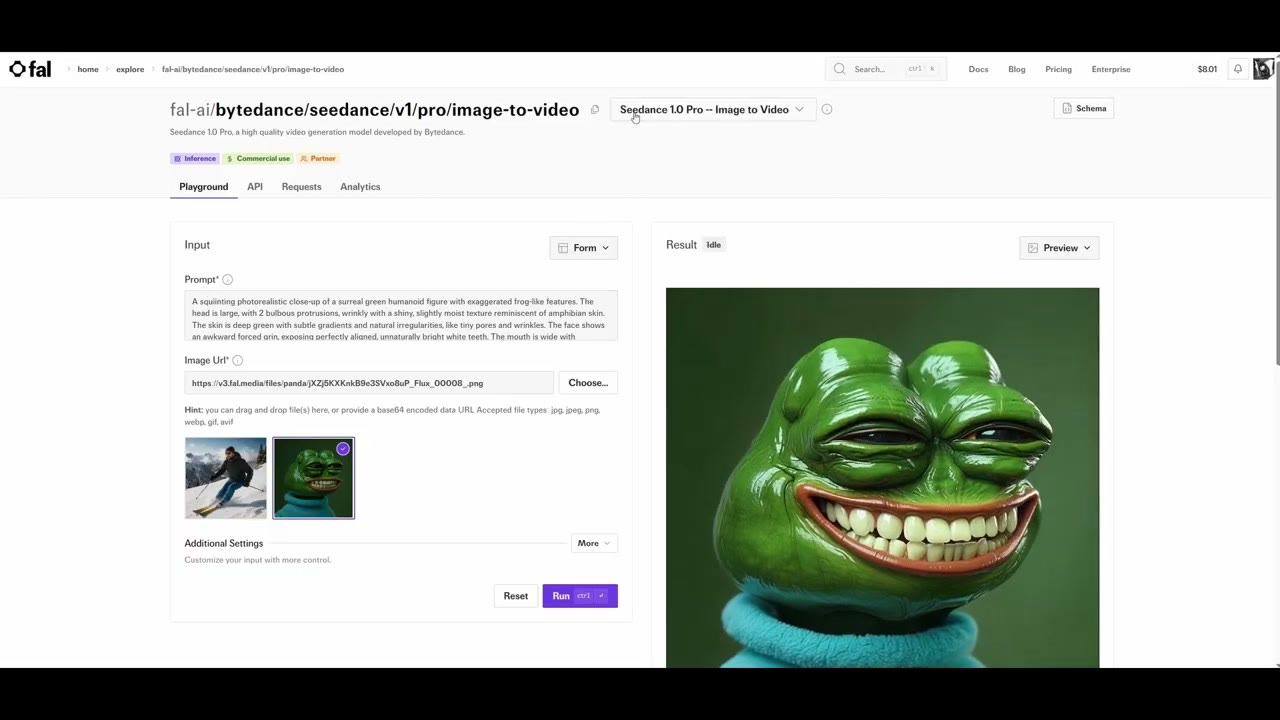
Cost: Seedance Lite is about 20 cents for five seconds, which is cheap by any measure. I used Pro for better quality on YouTube, at 74 cents.
You can also animate locally in ComfyUI, but it needs a lot more compute and can take an hour or two. For a quick meme animation, this was the easy way.
No 16 GB GPU?
The same workflow is set up on RunComfy, so you can run it in the browser. These days I use RunPod for this kind of work; my introduction to RunPod shows how. For a step-by-step look at the same depth setup on any sketch, see sketch to art with Flux.
The RunComfy link is a referral link, as is my RunPod referral link: new RunPod accounts that sign up with Google get $5–$500 in credit after their first $10, and I get a small commission.
Watch the video version (7:37)
Everything above is in the video too, if you'd rather follow along on screen.
FAQ
How much VRAM do I need for this Flux workflow?
I’d say at least 16 GB. I ran it on 24 GB. With less, use a cloud GPU.
How do I make a photoreal version of a cartoon?
Use the drawing’s depth map to keep the shape, then describe it as a photograph in detail. I had ChatGPT write a first prompt from the sketch, then edited it by hand, adding wrinkles and removing what didn’t work.
How much does it cost to animate the image?
On fal, Seedance Lite image-to-video was about 20 cents for five seconds; the Pro version I used cost 74 cents.

Anton Tenitsky is a 3D artist with 15+ years in computer graphics, working with Nickelodeon, Gameloft, Marvel Rivals and many other clients. More about me