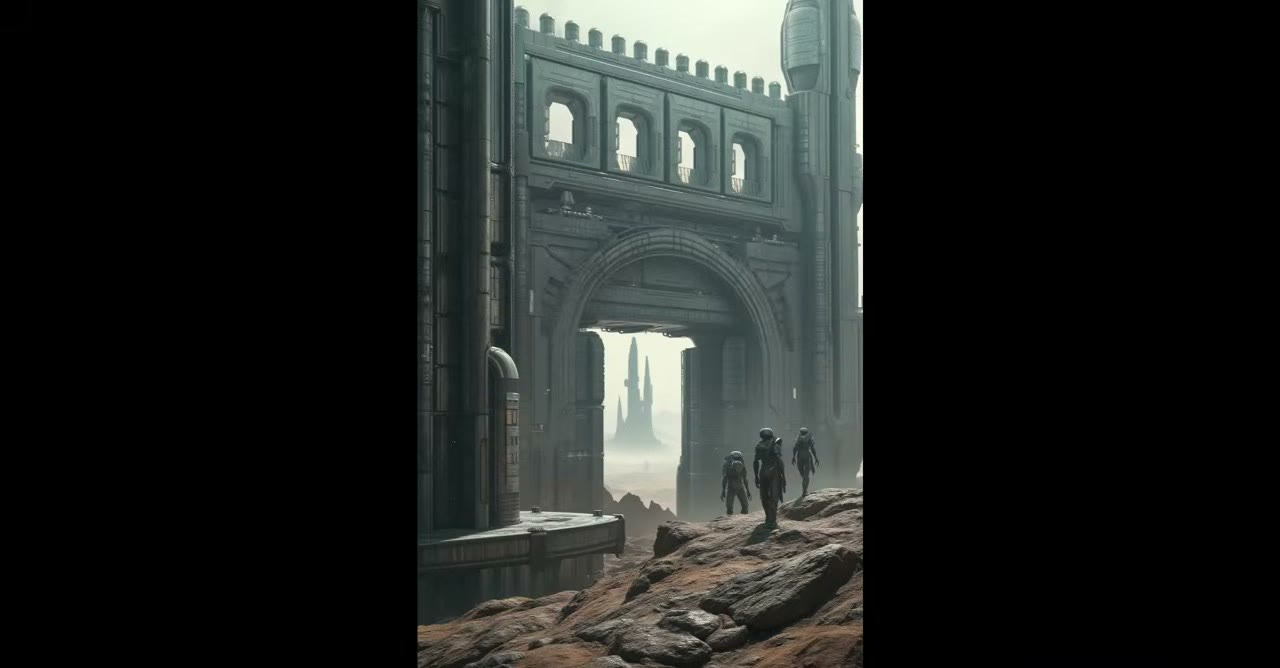
Give this workflow a folder of photos and it turns every one into a piece of concept art, keeping the structure and composition of the photo while restyling everything else. I ran it on a pack of about 700 photos of an old walled desert town, which came out as sci-fi towers, gates and walls.
It runs locally in ComfyUI with Flux 1 dev. I’m deliberately not using Flux 2: it’s much heavier and slower, and when you’re generating ideas in bulk, speed is what matters. Flux 1 runs on cards with anywhere from 8 to 24 GB of VRAM.
In short
- Input: a folder of photos, read one by one.
- Structure: a Depth Anything V2 depth map drives the Flux depth ControlNet.
- Settings: ControlNet strength about 0.8, Flux guidance 3, 25 steps.
- Output: every result is named after the photo it came from.
- The finished workflow is on my Patreon, but nothing in it is secret: it’s all explained below.
Custom nodes you’ll need
All of these install from the ComfyUI Manager:
- ComfyUI Essentials and KJNodes, for image utilities and resizing.
- comfyui_controlnet_aux, which provides the Depth Anything V2 node.
- x-flux-comfyui from XLabs, for the Flux ControlNet and sampler.
- rgthree, for the before/after comparison.
1. Load the photos as a batch
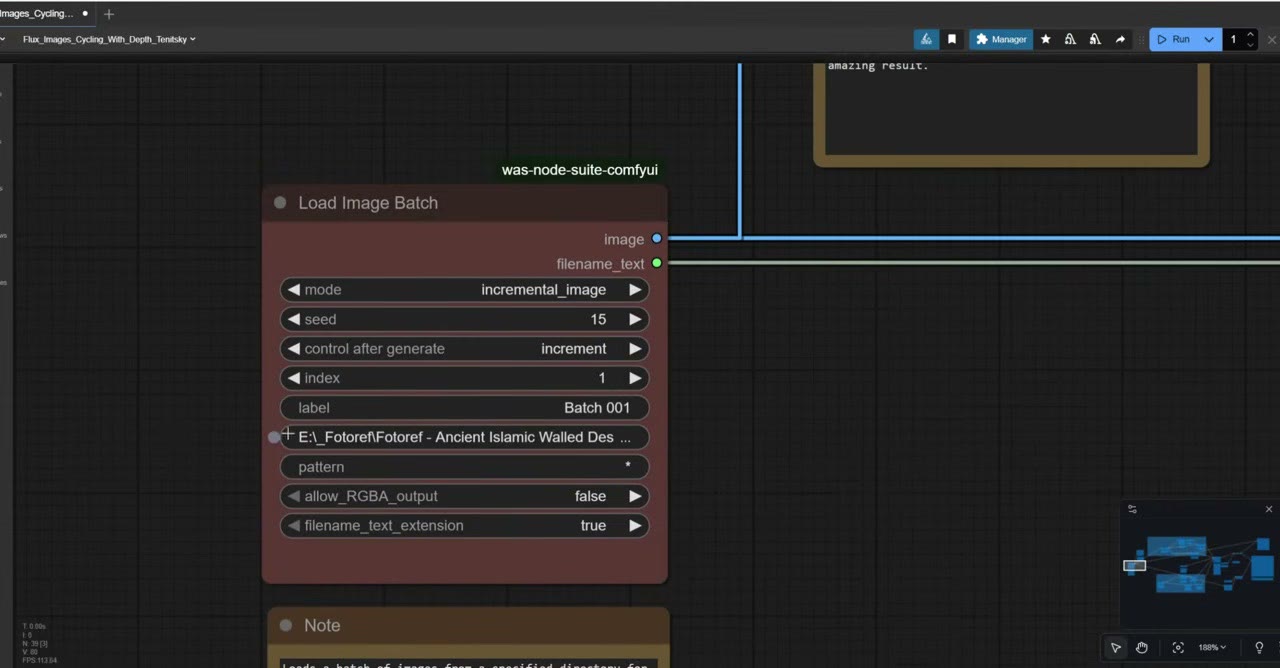
A Load Image Batch node points at a folder and steps through it, one image per run. A preview node beside it is just for troubleshooting, to confirm the right image is coming in.
My photos were large: the one in the video was 3867 × 2578 pixels, far more than Flux needs. The next node downsizes them.
2. Make a depth map and resize
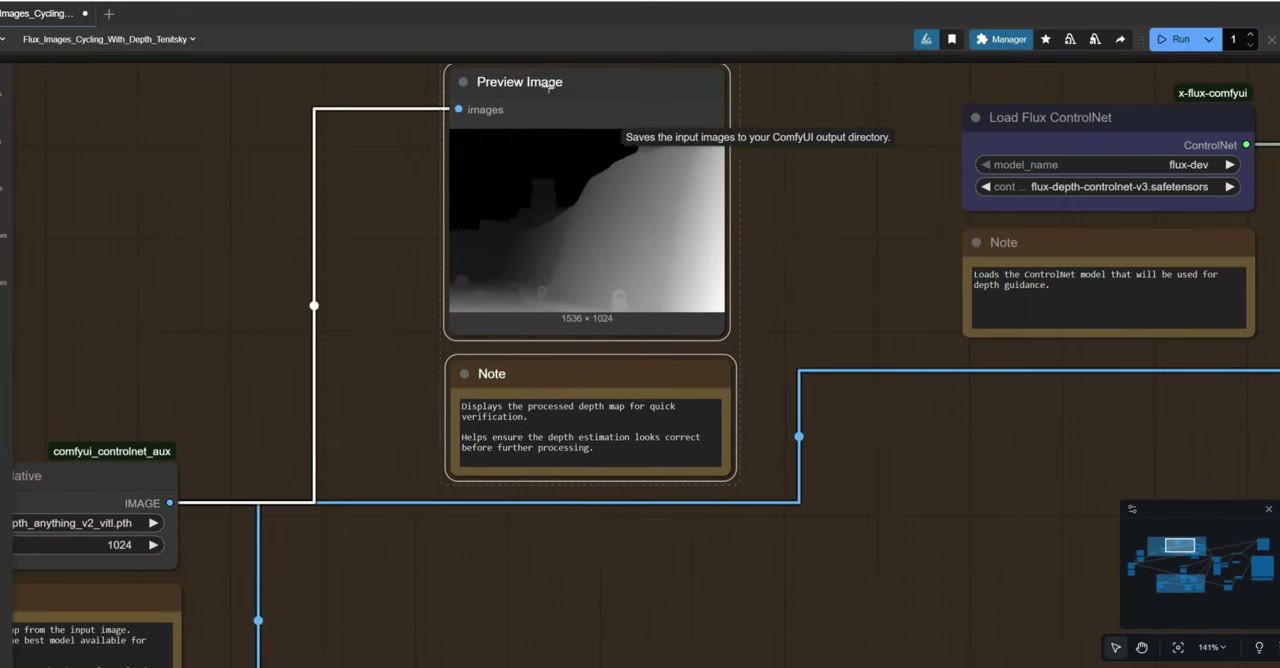
The Depth Anything V2 node does two jobs. It turns each photo into a greyscale depth map (near is bright, far is dark), and its resolution setting scales the photo so its short side is that many pixels, with the long side scaled to match. Portrait or landscape, everything comes out at the right proportions.
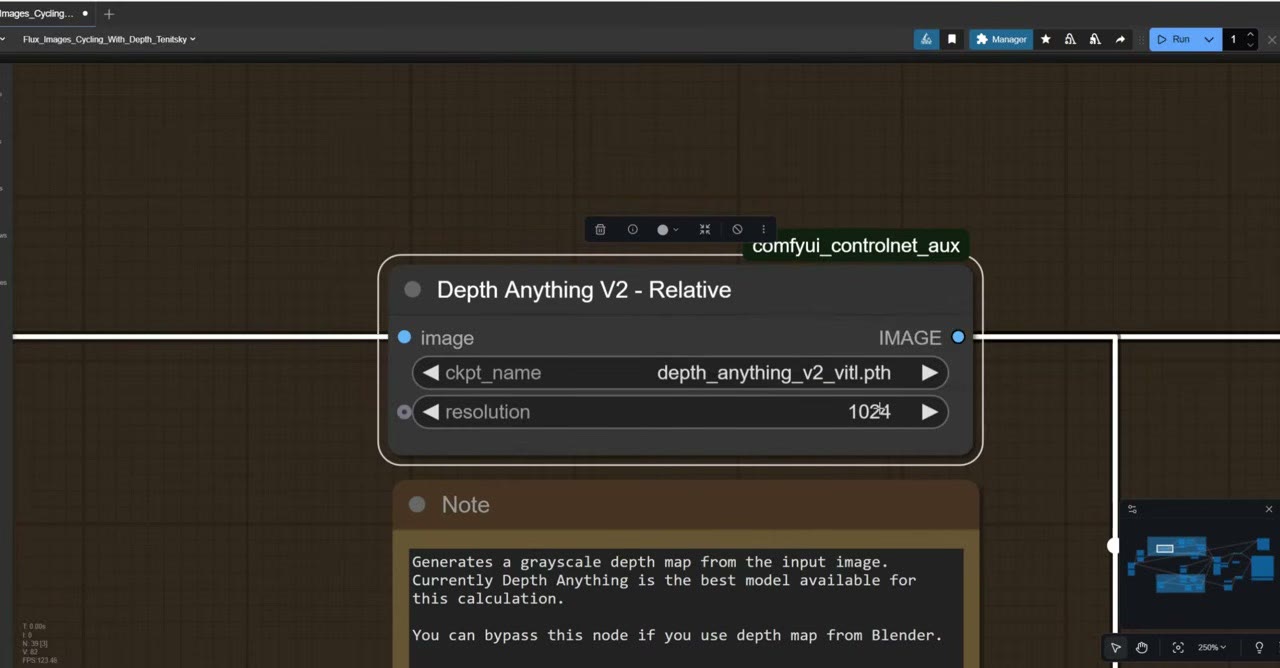
I keep it at 1024. Drop it to 768 if you want faster generations. For the model, I use the largest Depth Anything V2 version, which should give the best depth. Download it from the ComfyUI Model Manager by searching “Depth Anything V2”, then reload the browser page; you don’t need to restart ComfyUI.
A Get Image Size node passes the new resolution on to the Empty Latent Image, so you never type sizes by hand. The empty latent is the blank canvas: noise in the model’s latent space that the sampler turns into the picture.
3. Apply the Flux depth ControlNet
The depth map goes into Apply Flux ControlNet (from x-flux-comfyui), with the Flux depth ControlNet v3 from XLabs loaded. Find it in the Model Manager by searching “Flux depth ControlNet”, download it and reload the page.
The setting that matters is strength:
| Strength | What happens |
|---|---|
| Below 0.5 | Almost random: the result is only loosely based on the photo |
| About 0.8 | My sweet spot with Flux: the structure holds and the prompt still has room |
| 1.0 | Too much: the image starts to burn and artifacts appear |
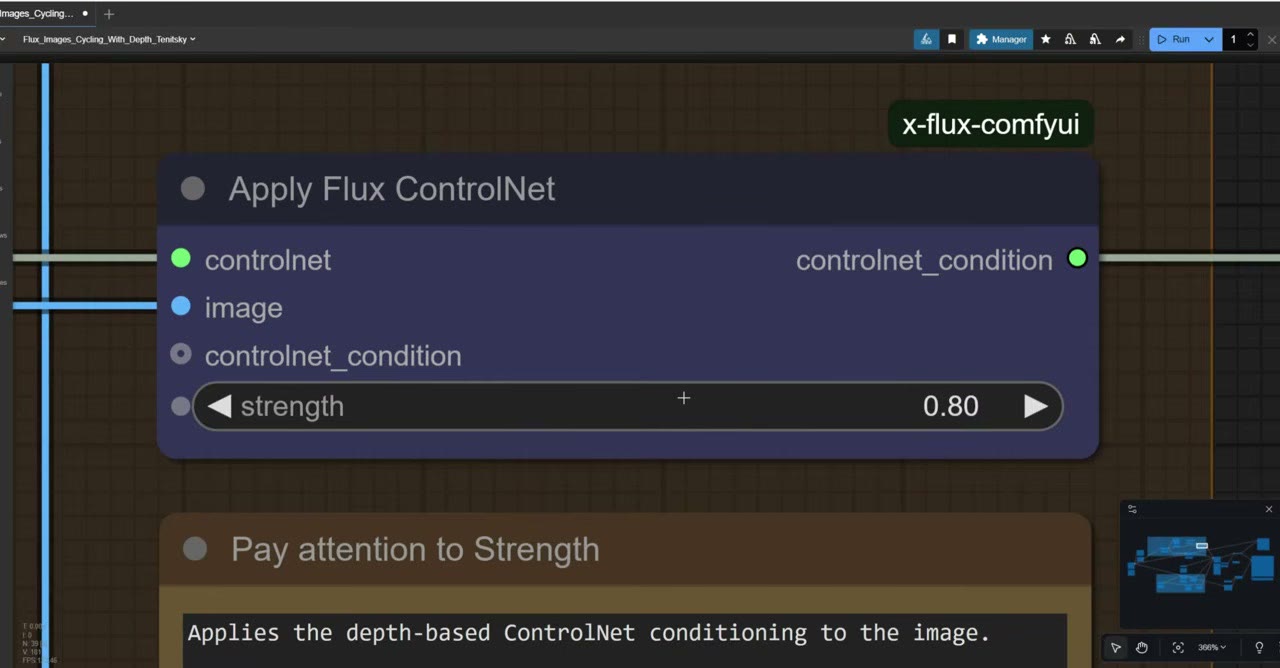
The sweet spot depends on the model. With SDXL, for example, I go down to about 0.6.
4. Load Flux and write the prompt
Load Diffusion Model loads Flux 1 dev with the fp8 weight type. Flux comes in fp16 and fp8; fp8 is faster and needs less memory. I have 24 GB of VRAM but still use fp8, so it doesn’t stall if other programs are using the card.
The DualCLIPLoader loads Flux’s two text encoders, CLIP-L and T5 (also in fp8). They translate the words and their weights into the direction the image generation takes. Both are in the Model Manager.
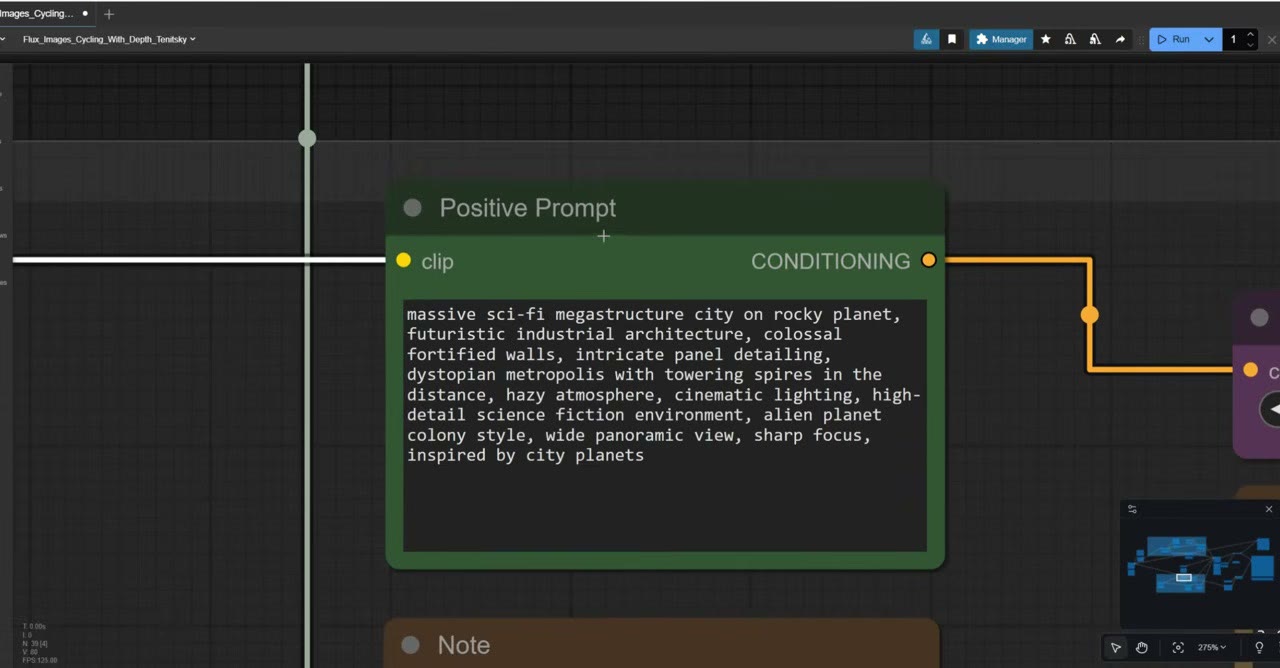
I had ChatGPT write the prompt, then edited out the parts I didn’t want. Because the same prompt runs on every photo, it’s what keeps hundreds of results consistent.
- Flux Guidance: 3. Higher guidance burns the image.
- Negative prompt: Flux doesn’t use one. The node is there only because the sampler needs the input connected; it doesn’t affect the result.
5. Sample and decode
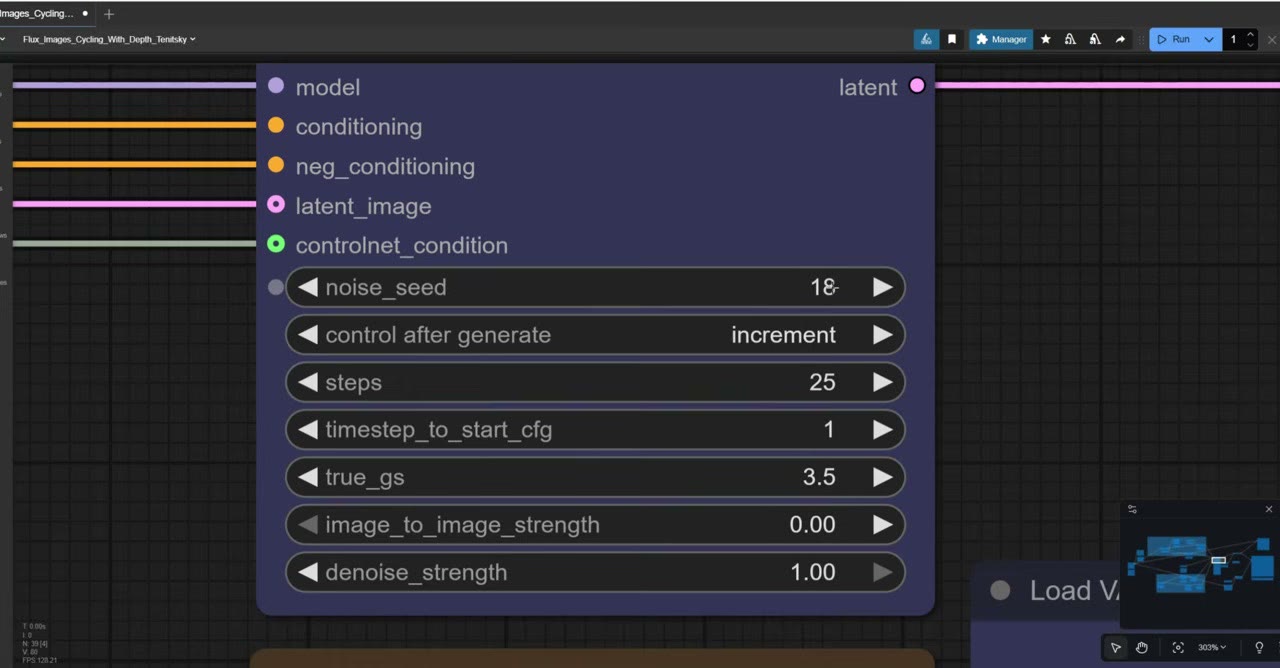
The XLabs Sampler takes everything (model, prompt, latent and ControlNet condition) and makes the image. Its notes in the workflow explain each parameter; the ones I set:
- Seed on increment, so images are numbered 19, 20, 21 instead of random huge numbers. It’s an easy way to track how many you’ve made.
- 25 steps. Past 50 is diminishing returns: more time, no visible change.
VAE Decode turns the latent result into pixels, using the Flux VAE (about 300 MB, also in the Model Manager). An rgthree image comparer lets you drag a slider between the photo and the result.
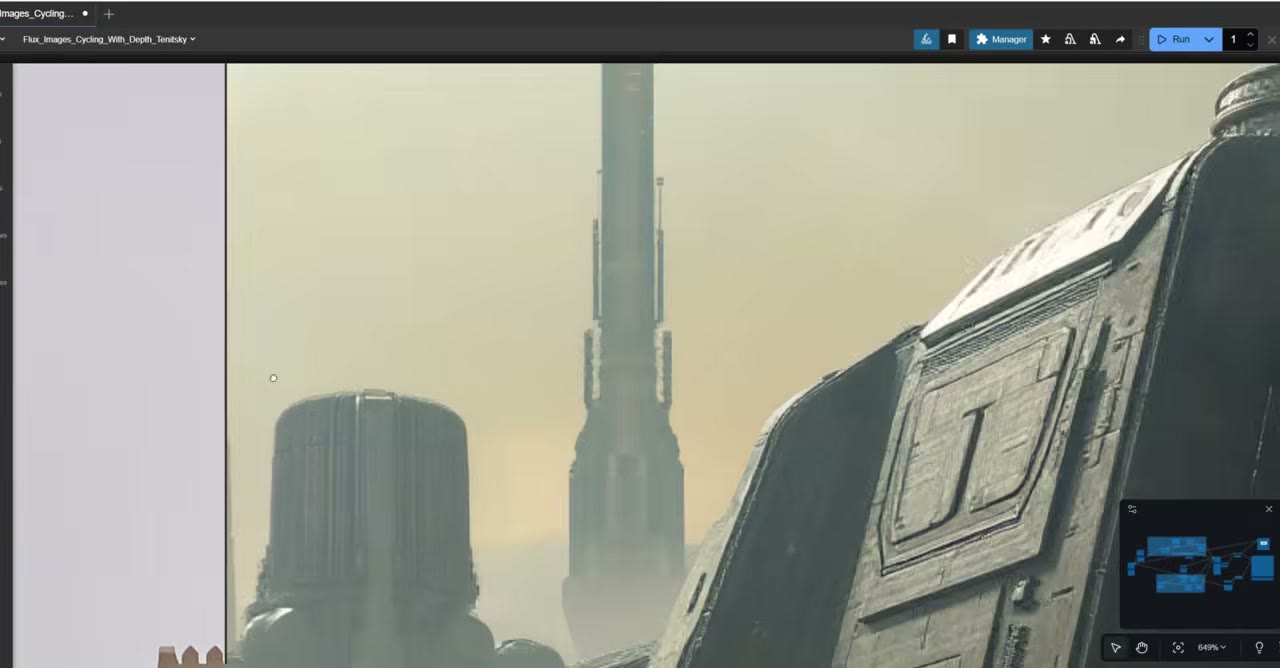
I like what this does with the photos. Giving the model more information than a prompt alone (the depth of a real photo) clearly helps the result: the tower above kept its shape, became a sci-fi tower, and the model added a sci-fi skyline behind it.
6. Name every result after its photo
When you generate hundreds of images, you want to know which photo each one came from. The workflow takes the photo’s file name from the batch loader and concatenates it with a prefix (I used flux-desert-city), then passes that to the Save Image node as the file name.
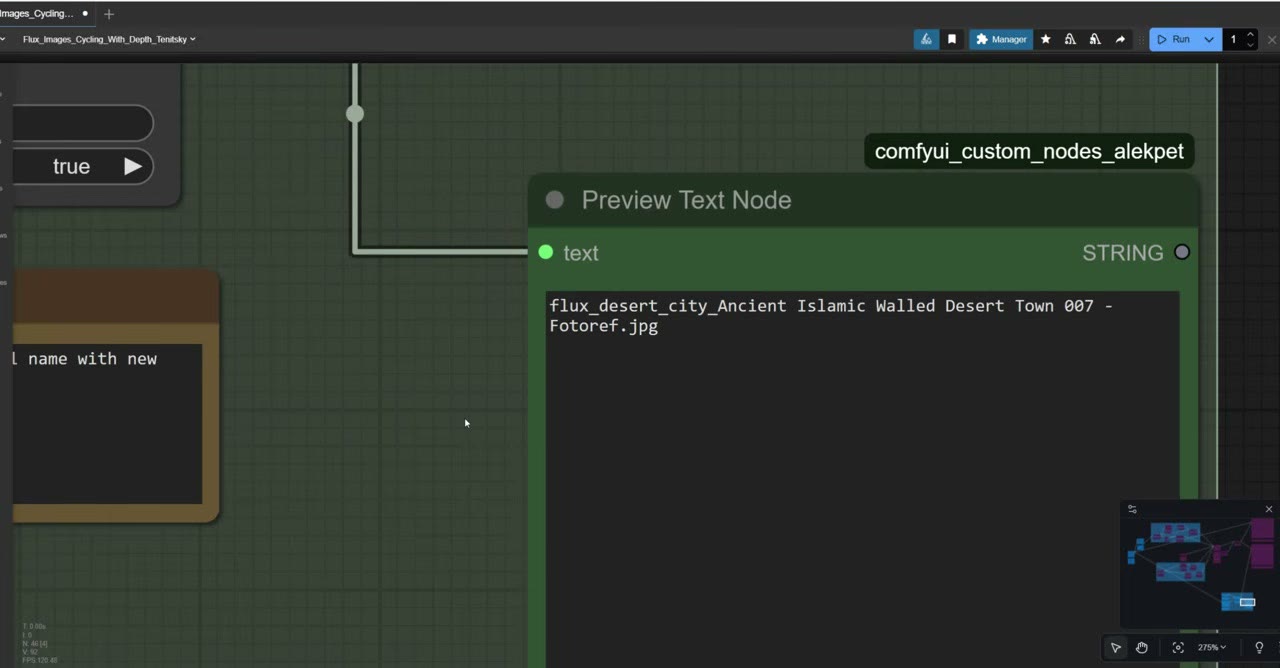
The names are a little awkward, but every result can be traced back to its source photo.
Where to run it
This runs locally on cards with 8 to 24 GB of VRAM. If yours is smaller, a rented GPU is the easier route. My introduction to RunPod shows the setup, and the same approach works for any ComfyUI workflow.
If you try RunPod, my referral link gives new accounts that sign up with Google $5–$500 in credit after their first $10, and I get a small commission.
Watch the video version (10:18)
Everything above is in the video too, if you'd rather follow along on screen.
FAQ
Why use Flux 1 instead of Flux 2 for batch concept art?
Speed and memory. Flux 1 runs on cards with 8 to 24 GB of VRAM; Flux 2 is heavier and much slower, which matters when you are generating hundreds of ideas.
What ControlNet strength should I use with Flux?
About 0.8 for Flux depth ControlNet v3. Below 0.5 the result is only loosely based on the photo; at 1.0 the image starts to burn. With SDXL I use about 0.6.
How many steps does Flux need?
About 25. Past 50 steps you pay in time without seeing a better image.

Anton Tenitsky is a 3D artist with 15+ years in computer graphics, working with Nickelodeon, Gameloft, Marvel Rivals and many other clients. More about me