Google’s Nano Banana (Gemini 2.5 Flash Image) got called a “Photoshop killer” within days of its release. That’s always an annoying, hype-heavy thing to say, and usually it comes from people who don’t use Photoshop. So I tested it the way I’d actually use it: on my own portfolio, from 15+ years of 3D and concept work.
The honest answer: it isn’t a Photoshop replacement. It does a lot that Photoshop never could, and Photoshop does a lot it never will; you can’t move something two pixels to the right with a prompt. But for restyling, colourising and re-imagining existing artwork, it’s a very powerful tool.
In short
- Best result: a rough sketch turned into a finished mobile-game vehicle, almost exactly what I wanted.
- Very good: colourising old black-and-white concept art, especially with a reference photo.
- Good but imperfect: placing a vehicle into a matching environment; shadows and saturation don’t quite match.
- Misfires: removing goggles removed the head; a 3D temple came out looking like cheap 3D.
- Verdict: a powerful tool for image tweaks, and a natural partner for image-to-3D.
Getting started in Google AI Studio
Nano Banana runs in Google AI Studio. If you search for it, the top results are mostly third-party wrappers and sponsored links, so go to AI Studio directly.
It’s a plain chat: paste an image into the prompt field (Ctrl+C, Ctrl+V works), type what you want changed, and run. Each result took about 30 seconds.
Two things make iterating easier:
- Edit and rerun. Instead of typing a new prompt, edit the previous one and click the star icon to rerun it. The new image appears in the timeline, and earlier ones are kept.
- Connect Google Drive if you want your images saved automatically.
The chat also remembers earlier prompts, and they start to influence later results. Start a new chat when you change subject.
What worked
A sketch into a finished mobile-game vehicle
This was the one that struck me most. I gave it a page of rough vehicle sketches and asked for them as finished 3D models for a mobile game. It got almost exactly what I wanted: clean, readable, on a plain background.
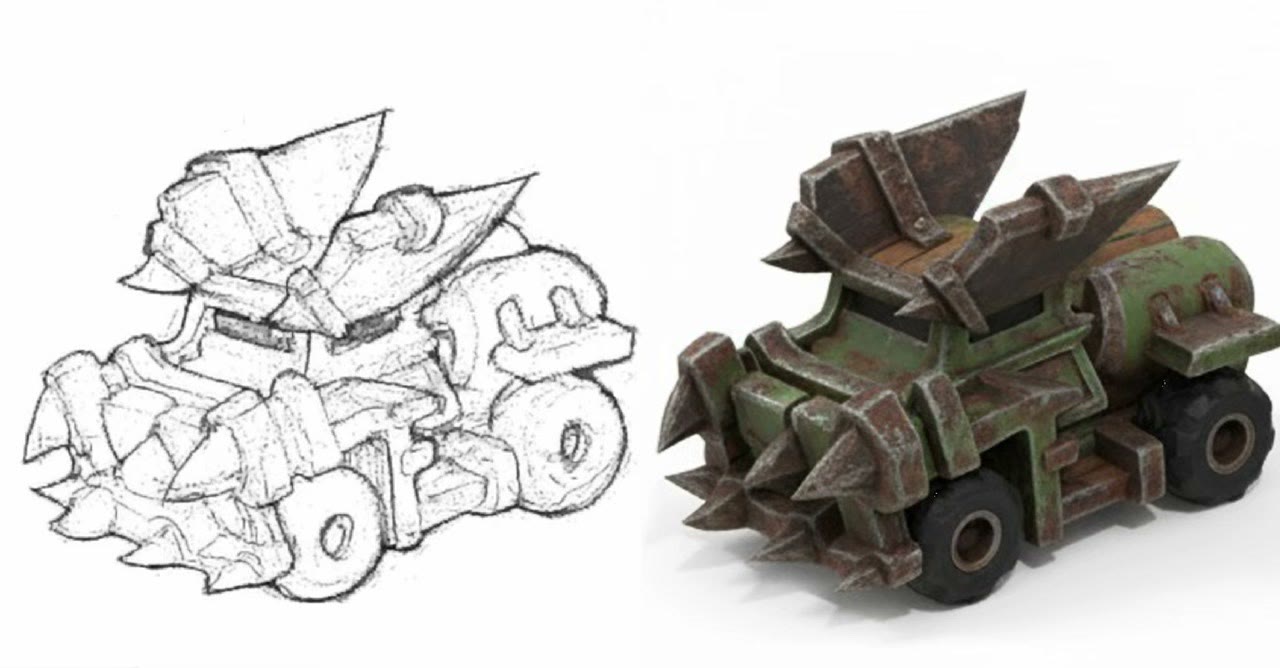
That plain background matters: it makes the result easy to turn into an actual 3D model. I cover the image-to-3D step in turning simple 3D shapes into tank concepts and TRELLIS 2.
Making a character more human
I gave it an alien character render and asked for human-like skin, a neon sci-fi cityscape behind him, and a blue jumpsuit (he was naked). The first pass got the jumpsuit and the city but not the skin. Editing the prompt to “make skin human realistic” and rerunning fixed it, while keeping his alien eyes.
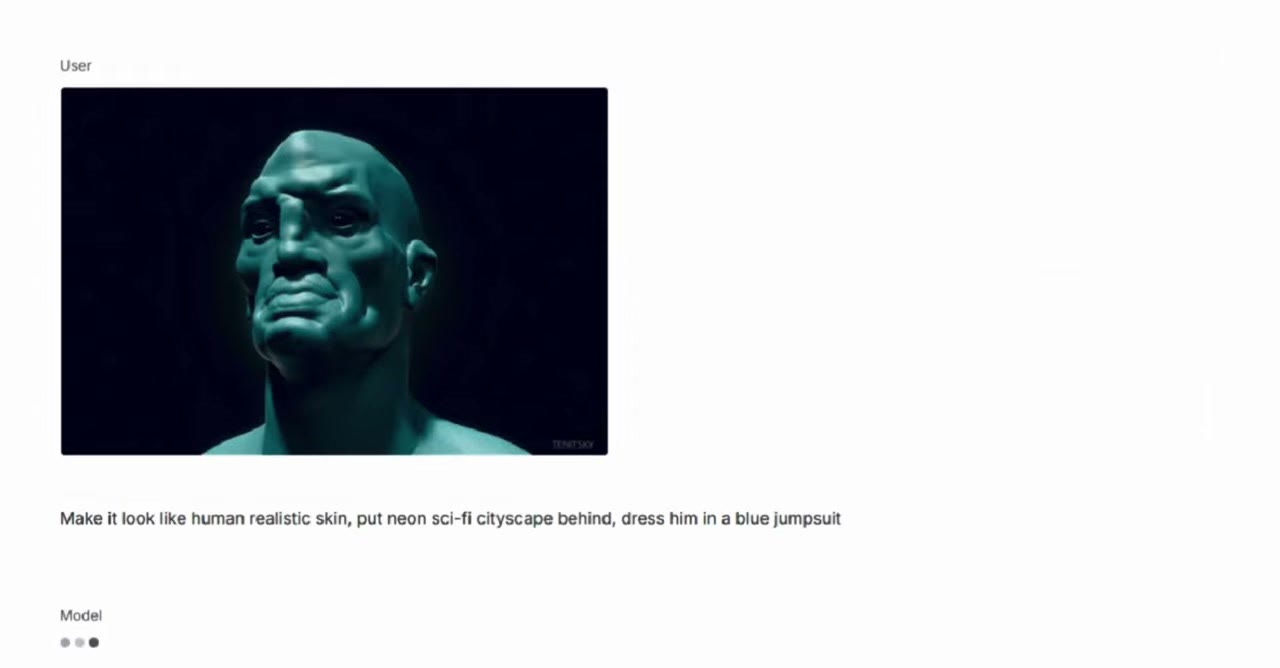
It was easy to keep going: I added a balding head at one point. Adding hair was less successful: it looked like cheap 3D hair.
Colourising black-and-white concept art
This is something I’ve always wanted from AI: to finish my older black-and-white work. I gave it one of my black-and-white images plus a photo from a photo pack and asked it to colourise the first using the second as a colour and detail reference.
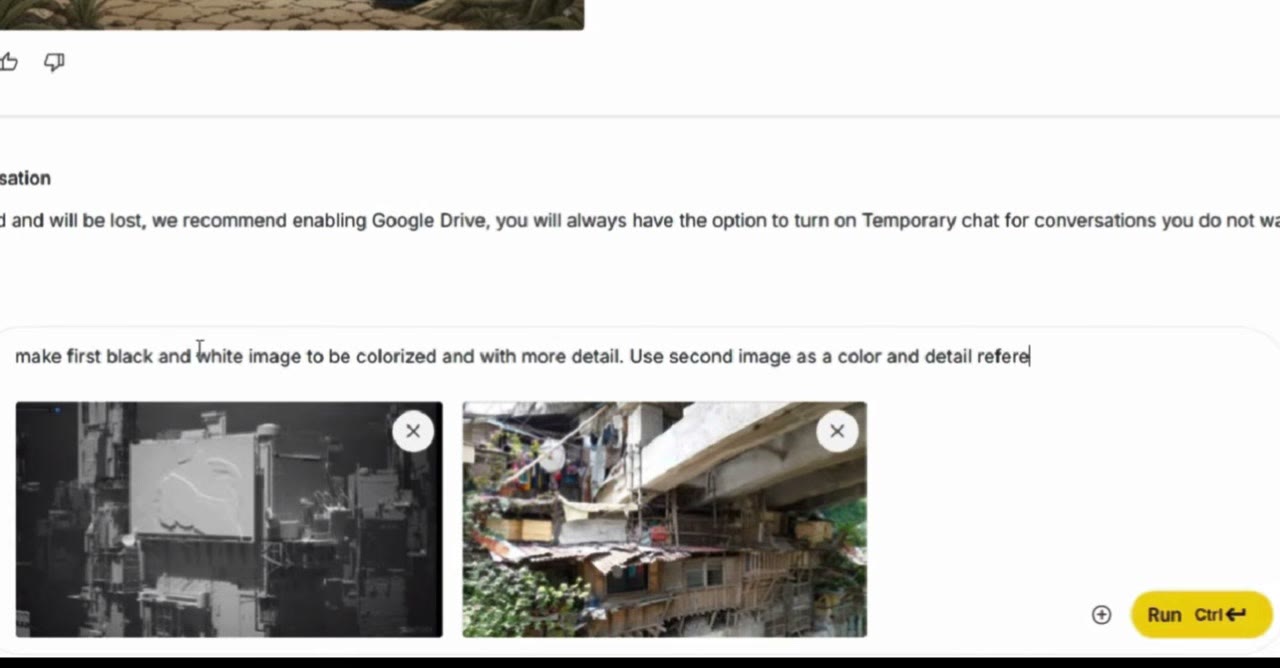
It enhanced the image a lot. It wasn’t consistent everywhere: some parts stayed uncoloured, and asking it to colourise the bottom of the image did nothing. But it’s very close to what I’d want.
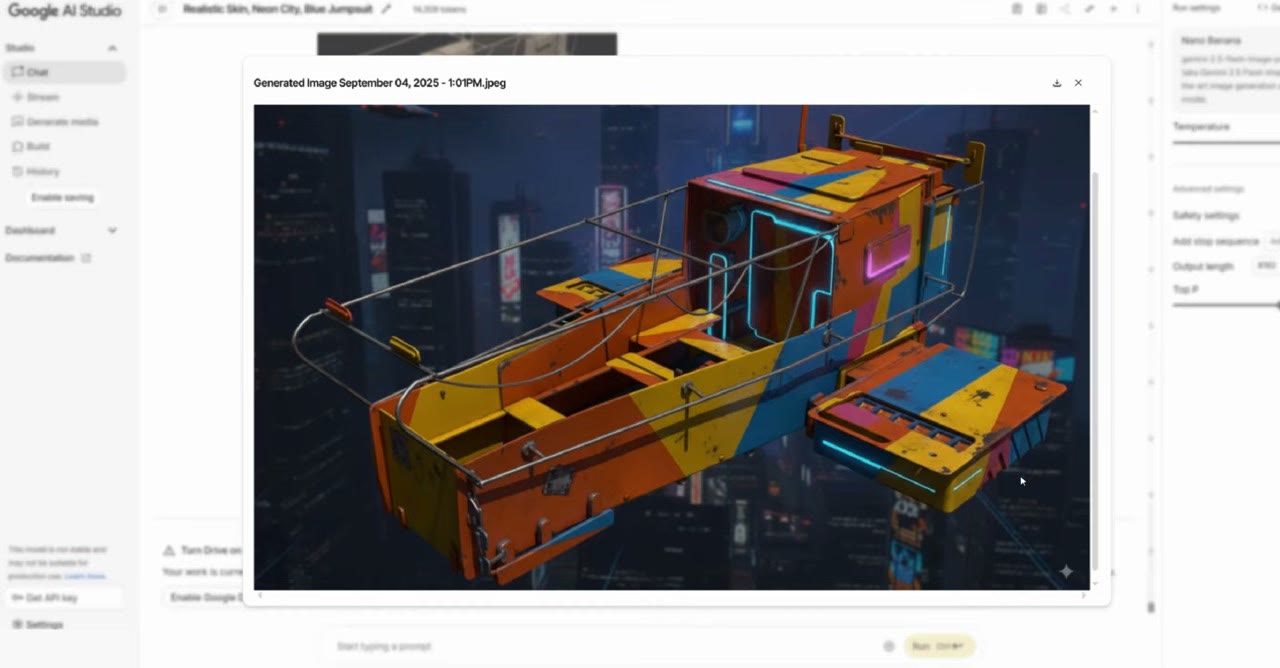
On a black-and-white 3D-Coat concept of a flying cargo ship, asking for a movie-style colour pass gave metallic parts that read as metal, and the damage was spot on. There were maybe too many colours. It also picked up the sci-fi city from earlier in the chat, which is that memory effect at work.
Placing a vehicle in a matching environment
I asked it to put a concept tank into an environment that fits its style. The result was pretty amazing, though the shadows don’t really match and the tank’s saturation is slightly off.
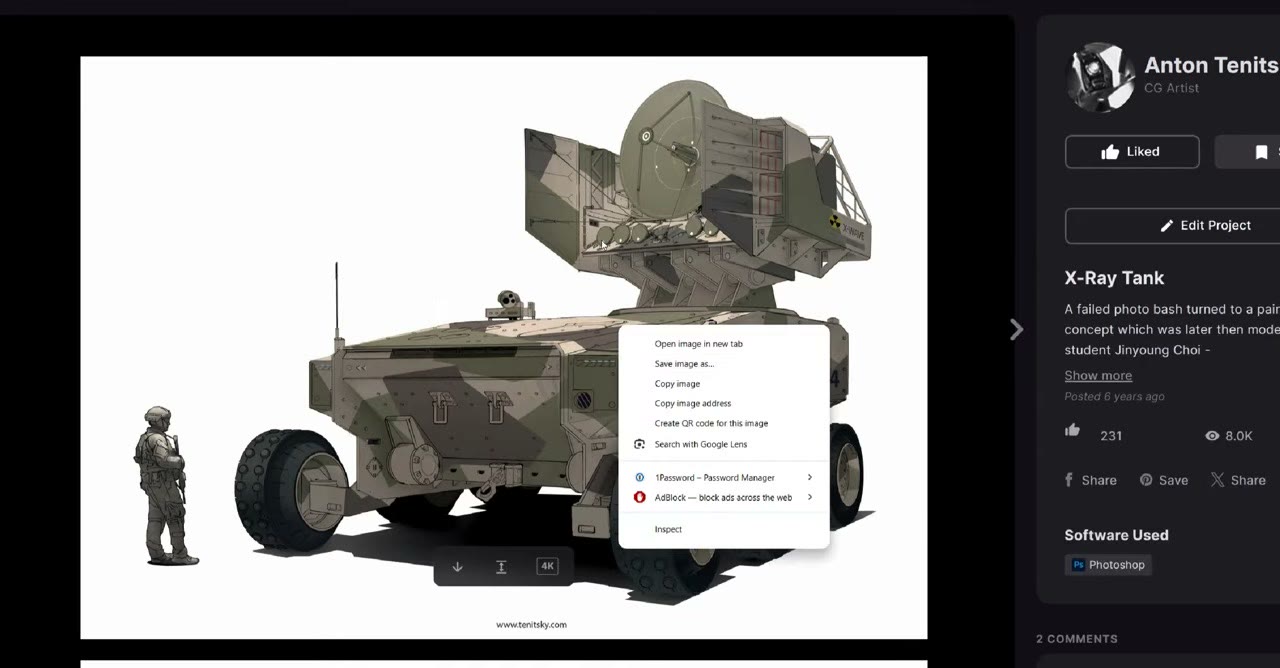
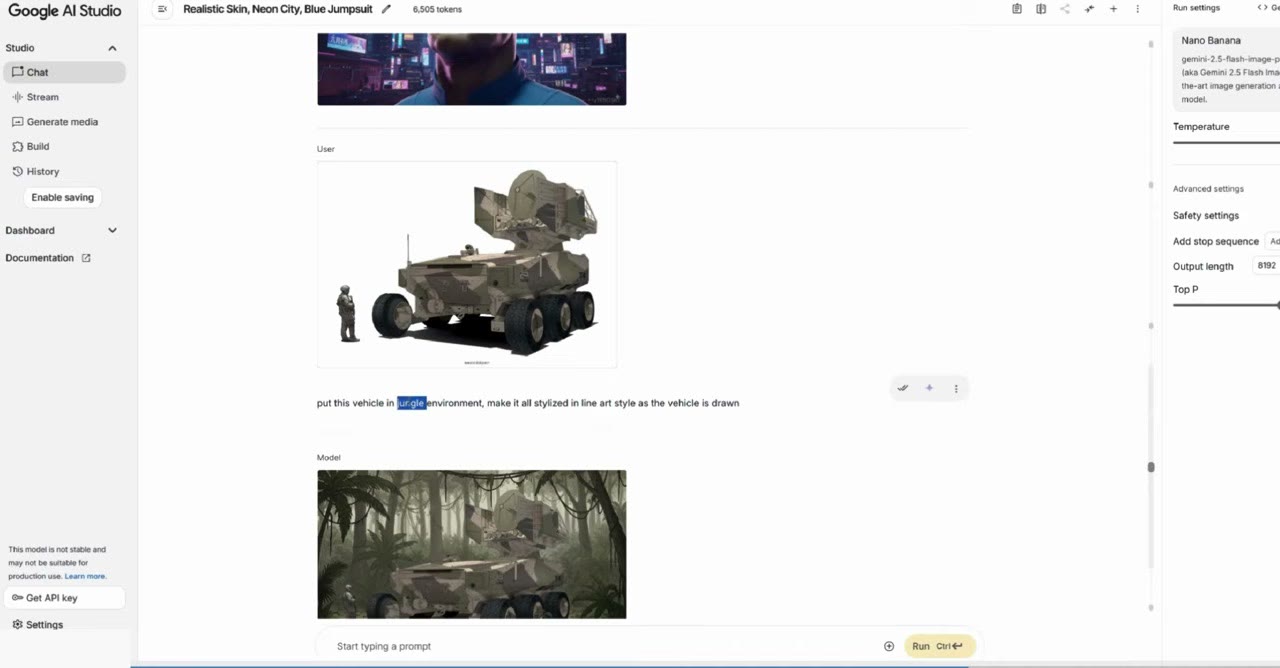
When I asked for a harsher desert, the camouflage no longer fitted, and in a jungle-desert version the background looked cartoony next to the realistic tank.
What didn’t work
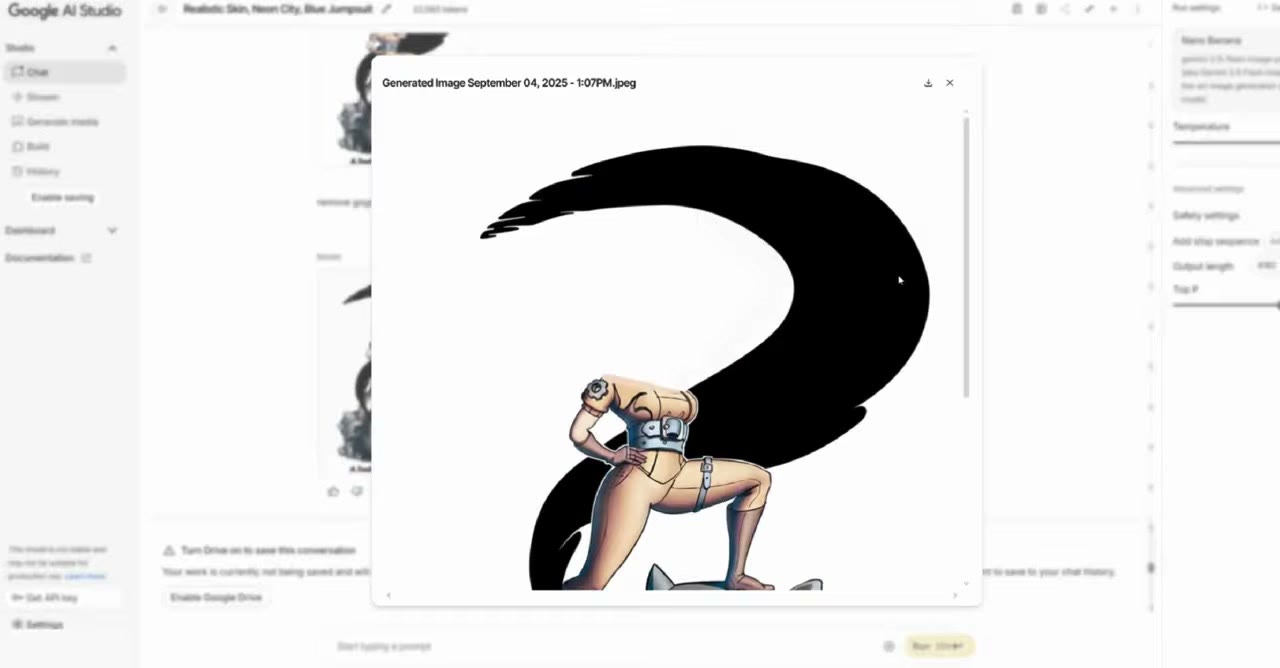
Removing goggles removed the head. I asked it to take the goggles off a character in one of my cartoon-style illustrations, and it removed her head instead. Asking it to turn her into a boy changed the face but kept a female body. I couldn’t get much out of that image in the end.
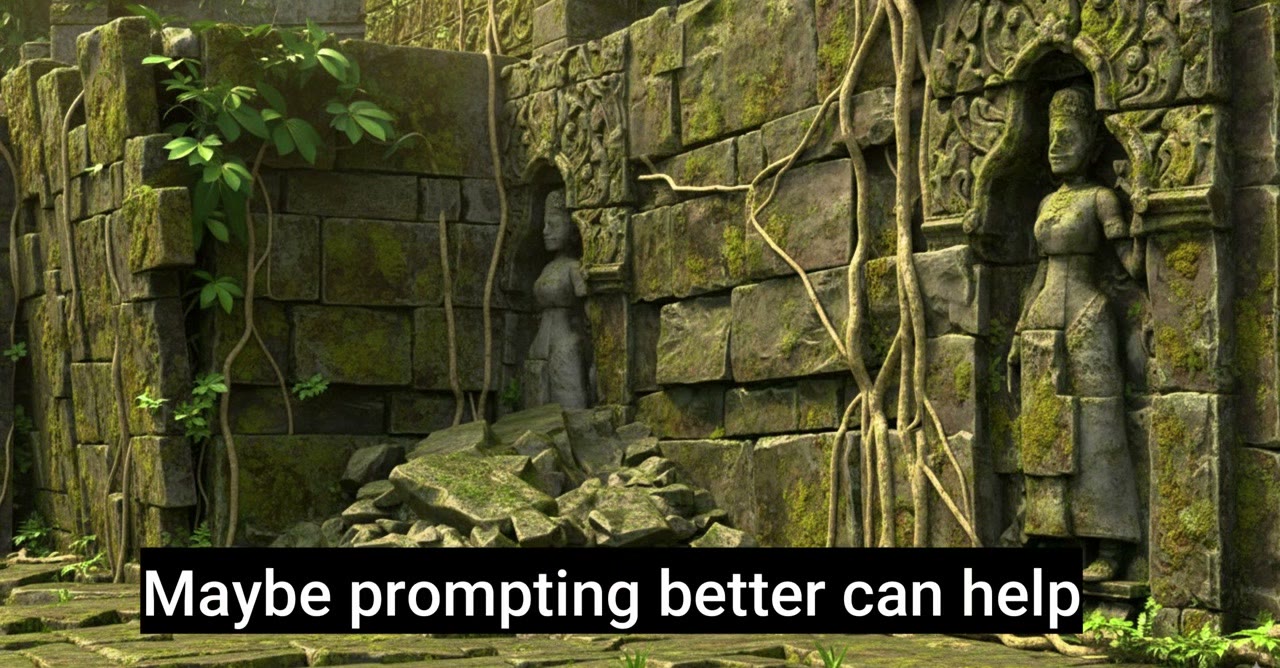
3D detail doesn’t improve. I gave it a large 3D environment I’d made and asked it to add jungle detail and make it look like a Khmer temple in Cambodia, the original reference. It came out looking like cheap 3D rather than richer or more photoreal. Probably a matter of a few months.
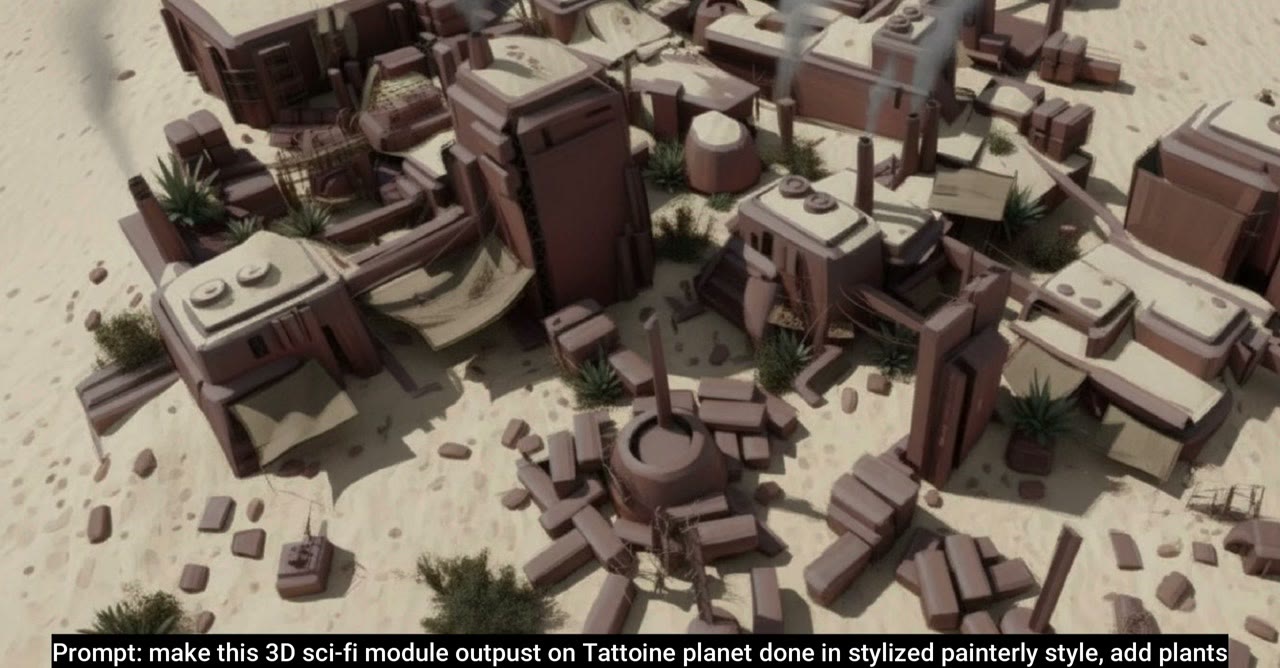
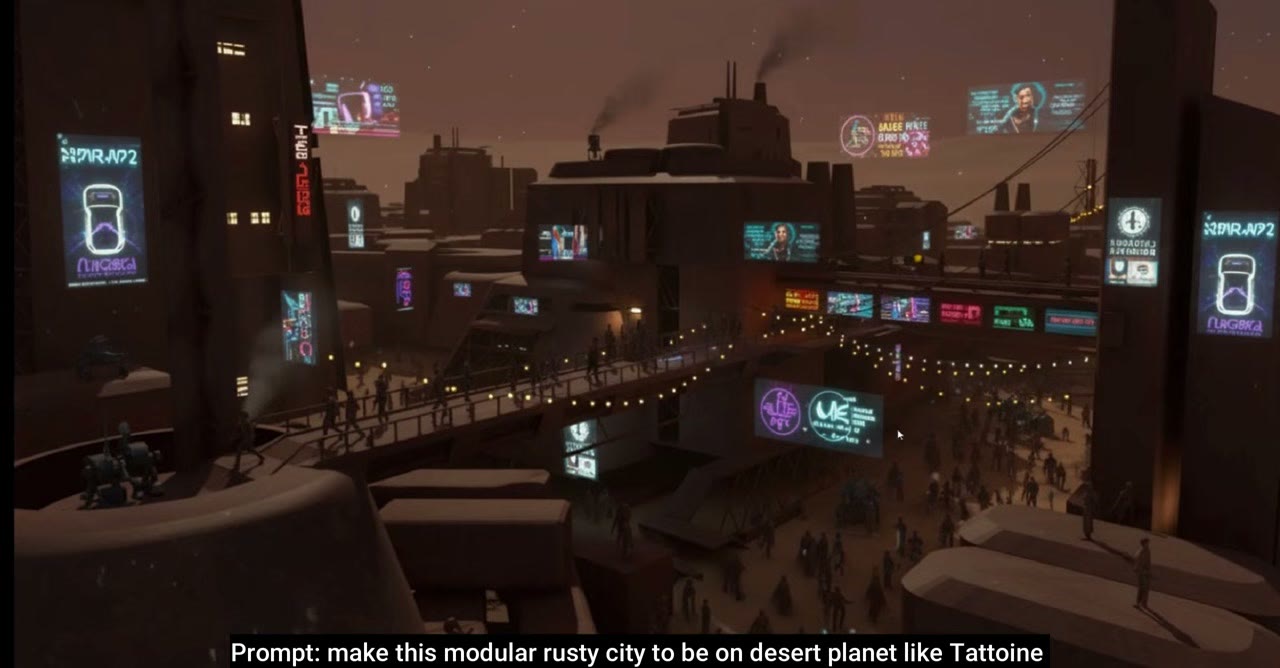
Environments from blockouts were mixed. Turning a city blockout into an abandoned, overgrown jungle worked well. A desert planet in the style of Tatooine looked quite “AI”. A water world with dramatic lighting broke the horizon. Asking for more neon advertising produced typical AI clutter, and asking for more lights made it over the top.
Verdict
Nano Banana is an incredibly powerful tool for image tweaks. Its biggest strength is that it changes only what you ask for and leaves most of the original image alone, so it works with existing art rather than replacing it. Paired with image-to-3D, sketch to finished asset to 3D model becomes a very short path. I think it’s going to be used everywhere.
The photo packs I used are on Fotoref (mud pools and under the bridge), where I’m a co-founder.
Watch the video version (8:01)
Everything above is in the video too, if you'd rather follow along on screen.
FAQ
Is Nano Banana a Photoshop killer?
No. It can do things Photoshop never could, like restyling or colourising a whole image from a sentence, but you can’t nudge something two pixels to the left with a prompt. They do different jobs.
Where do I use Nano Banana?
In Google AI Studio. Searching for it brings up many third-party wrappers and sponsored links first, so go to AI Studio directly.
What did Nano Banana do best?
Turning a rough sketch into a clean, finished mobile-game vehicle on a plain background. It was almost exactly what I wanted, and the clean background makes it easy to turn into a 3D model.

Anton Tenitsky is a 3D artist with 15+ years in computer graphics, working with Nickelodeon, Gameloft, Marvel Rivals and many other clients. More about me