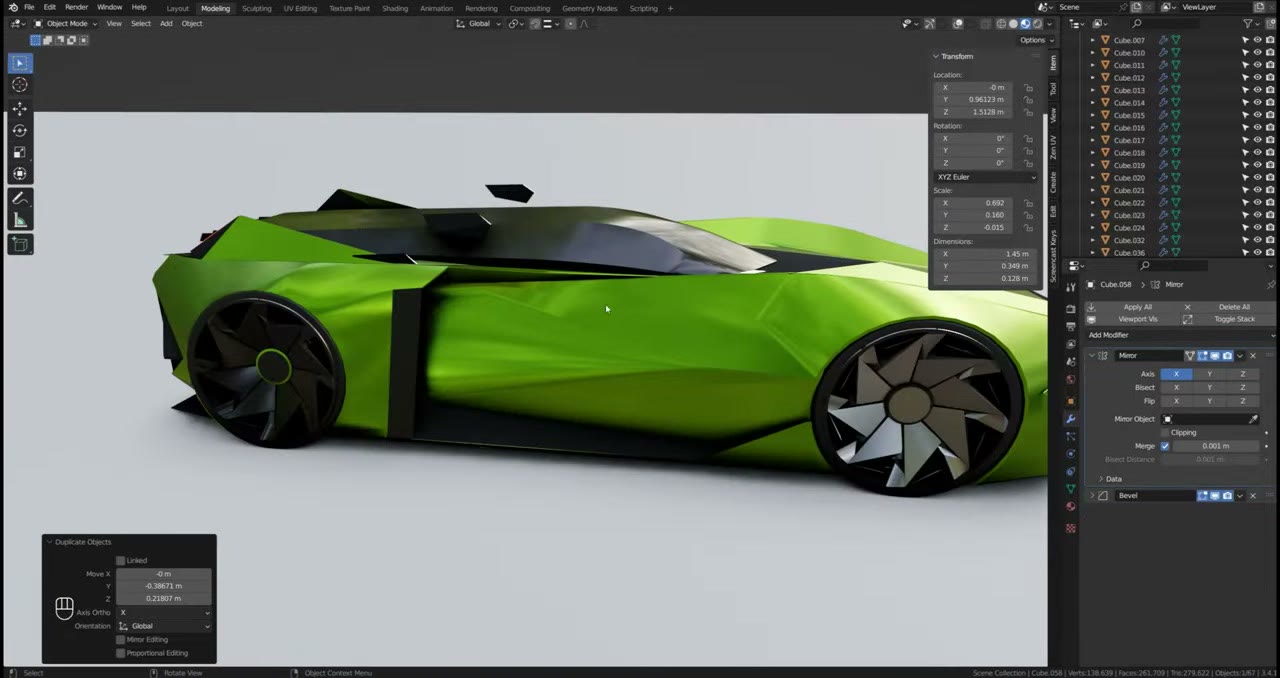
This one has no AI in it. It’s how I design a vehicle in plain Blender, with no plugins, recorded as three timelapses with commentary: the low-poly concept, finishing the design, and the retopology into a clean subdivision model. The same blockout skills are where my Blender + AI workflows start.
The brief I gave myself: something futuristic and fairly aggressive, a one-seater performance car. I had no sketches. I’m not good at drawing vehicles, so Blender is my way of designing them. The whole thing took about three days, a couple of hours each day.
In short
- Concept fast and low-poly: mirror, bevel and solidify modifiers, booleans, and multiple materials per object.
- Design with materials too: glossy black, matte black, metallic green, LED emissives. Layering is a big part of modern car design.
- Repeat one motif (here, a sharp triangle) in different forms around the body.
- Wheels early: they guide the proportions. I added them too late.
- Retopologise at the end into a quad sub-D model with creasing, and design your own logo.
Part 1: the low-poly concept
Start with the driver and a capsule
I started with a human figure for scale, posed in Marvelous Designer. Then a passenger capsule: half a box, mirrored, with a non-destructive Bevel modifier so I could change the bevel at any time with bevel weights. The idea was a capsule with everything built around it. I even considered a flying vehicle without wheels, but went with wheels for the challenge: wheel arches add a whole extra layer of difficulty. For a quick form study, I’d skip the wheels.
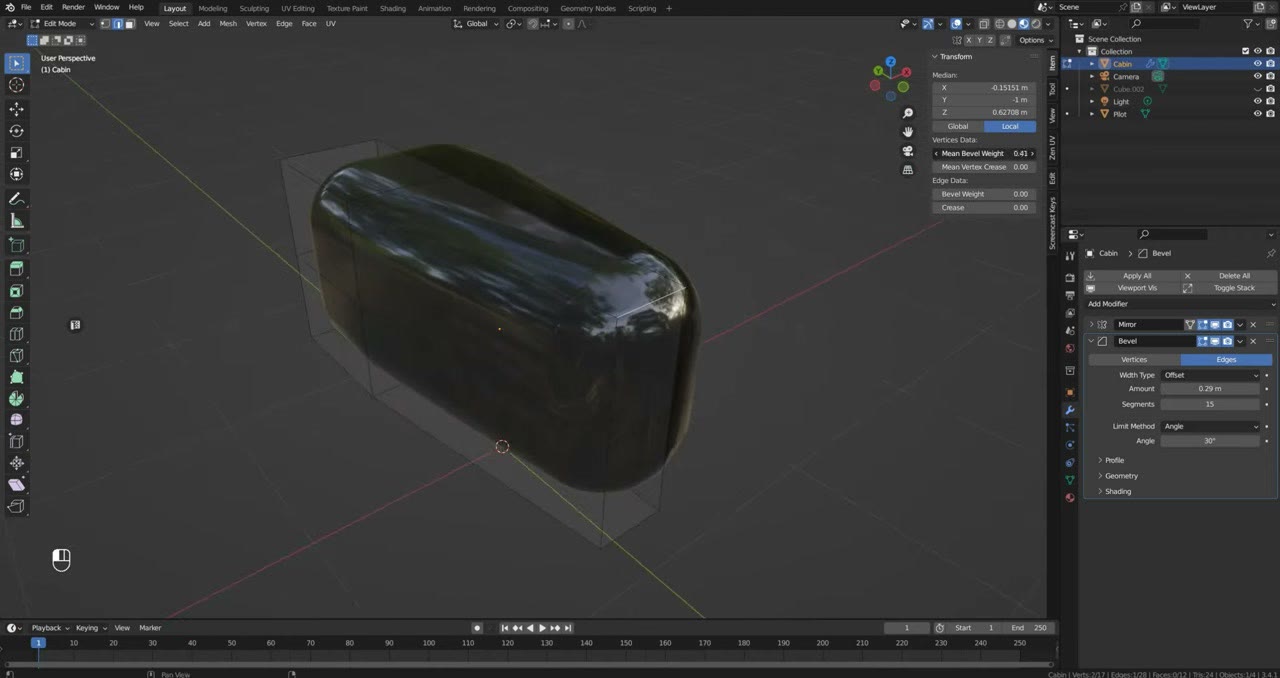
The body started as another box, mirrored, cut up with the knife tool. At first I was just looking for shapes. The capsule penetrated the body, so I laid the driver down; sports cars allow almost horizontal driving positions. That’s what makes them fun: a passenger car has to hold people and luggage, while a concept car can have really aggressive, big shapes.
Avoid looking like anything else
I had a ton of Pinterest references on my second screen, but the worst thing I can hear is “it looks like a Nissan” or “it looks like an Audi”. I want a design nobody has a point of reference for.
A second Blender window helps a lot. I keep one on another screen locked to a fixed three-quarter or front view, so while working on the back I can check the front without rotating the camera. A tablet works as a third screen.
Low-poly, with modifiers
- Bevel modifier on the body rounds things without extra geometry, until edges get too close together.
- Minimum polygons, maximum result. I don’t care about topology at this stage.
- A backup collection: before a drastic change, I duplicate the part into a hidden “backup” collection. Everything is low-poly, so it barely affects the file size, and it’s quicker than digging through old saves.
- Lights: a bevel on the sharp edges and a bright emissive material, so they’re not just grey.
Wheels and proportions
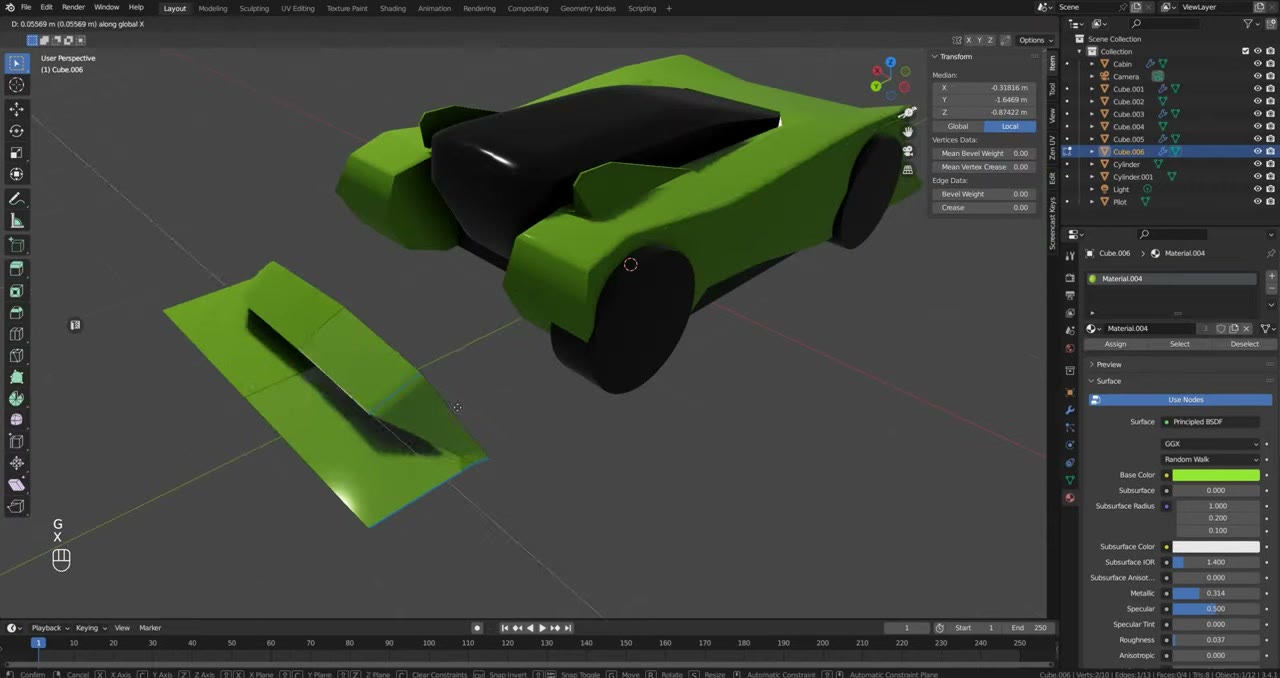
When I added the wheels, the shape suddenly started to make sense. Put them in first; they guide the design. I used 64 divisions for the wheels (64–128 is fine; I want them round) and 32 for the arches, to keep the body light.
The body was too short: about two wheels’ length between the wheels. I wanted two and a half or three. It looked a bit cartoony, like a bulldog. I liked that too, but in the end I made it longer.
Shading that helps you design
I used metallic green with black from early on and kept it to the end. I tried other colours (black and yellow, orange); changing the colour is worth doing because it changes the mood and can give you clues, but green felt right. Black looks cool but hides the design.
Blender’s Eevee viewport with its default HDRI is a game changer for this. I’m a long-time Maya user, and Maya’s viewport doesn’t help you feel good about a design. In Blender, even a simple shape looked good enough to make me proud, and seeing how the surface reflects tells you whether a change is better or worse. I used auto smooth and weighted normals.
Sharp breaks, not a sub-D cage
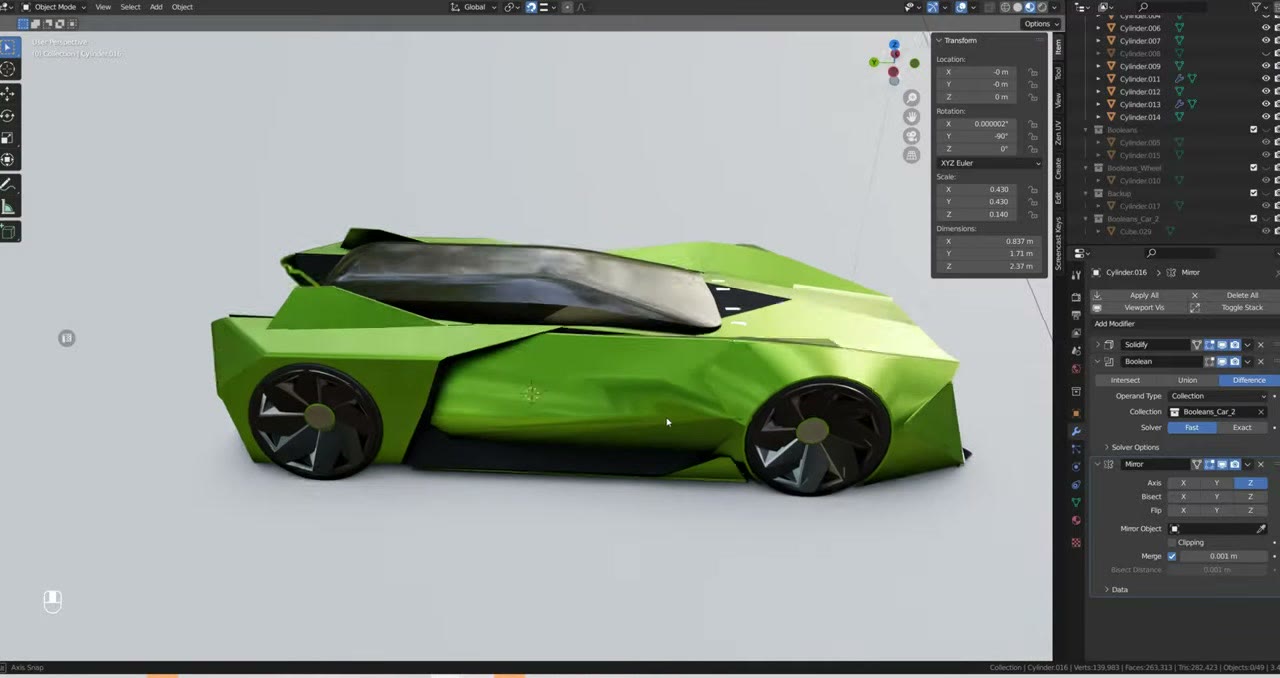
Most Blender car-design videos model a subdivision cage with creasing. I didn’t: that limits you. I wanted a broken-down model, with smooth surfacing next to really sharp, aggressive breaks. A sub-D model makes you think about topology, which suits some designs, but for fast concepting this is quicker.
One motif, repeated
The triangle on the front bumper was strong and defining, so I repeated it along the vehicle in different forms: the winglets became simple triangles, and the shape returns in the intakes and lights. I really like a round shape running into a sharp triangular break. The round bulge in the middle contrasted nicely with the sharp shapes elsewhere.
Material layering
Modern vehicles layer many materials, and not just colours but roughness: glossy black for the capsule, matte black for plastic parts, metallic black for disc parts, green metal, LED lights. A Solidify modifier can give an object’s rim a second material, which is very handy.
Wheel discs: one segment, instanced
Start with a segment around the centre, then Alt+D to instance it and rotate each copy by 45° (360 ÷ 8). Move one vertex and all eight change. With only about 20 vertices, every vertex has its own influence, and overlapping, self-penetrating parts give little accents of the second material.
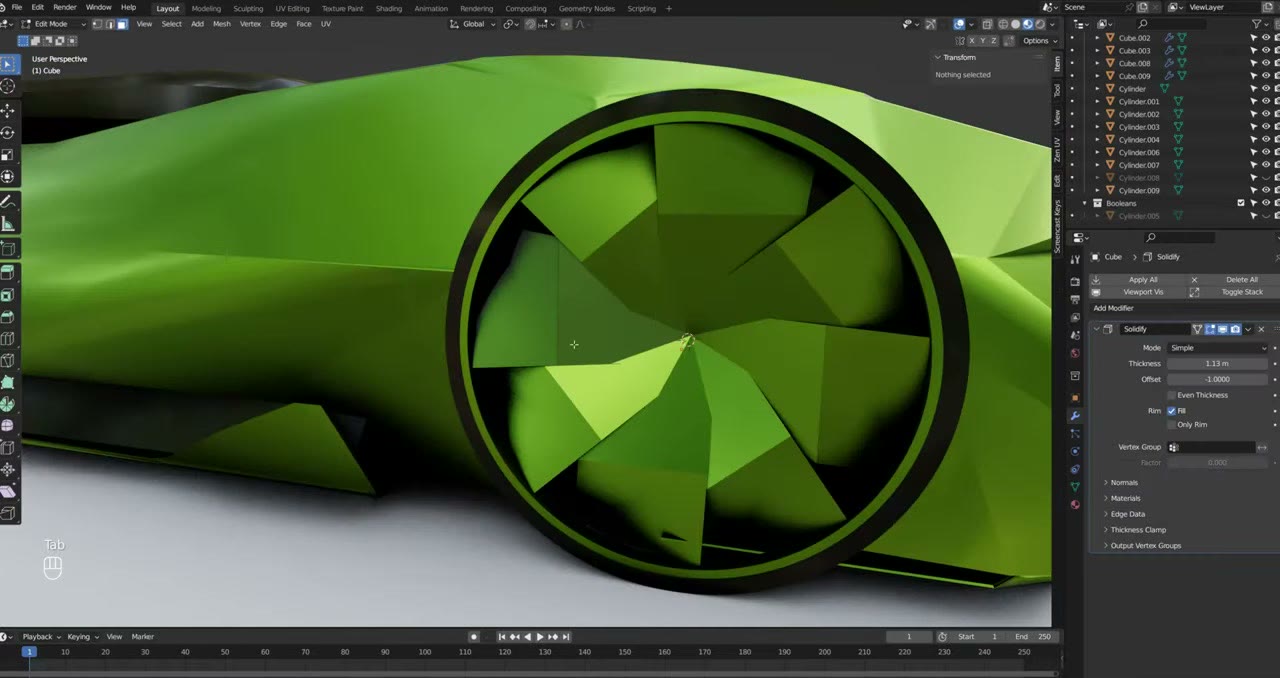
- An outer cylinder boolean cuts off anything poking outside the rim.
- Ctrl+L → Copy Modifiers to the instances; instances share polygons, not modifiers.
Discs are almost too easy: I can make 50 designs I like and want to use all of them. At some point you have to let it go and move on. In an earlier tutorial I spent two or three days only on discs.
Booleans in their own collections
The wheel arches are cut with booleans (the Fast solver), and every boolean shape gets a transparent material so I can see through it. I keep booleans in several collections, so they don’t interact with each other too much. The fender rims are 32-sided cylinders snapped vertex by vertex to the body. There are shading seams everywhere at this stage; they’ll go away in the retopology.
Arrays add repetition and grids; a boolean cuts them to shape. Always use constant offset: with relative offset, the spacing breaks as soon as you edit the polygon. The front grille got so dark it’s nearly invisible: an overpowering grille is too easy a trick and starts to look cheap.
Part 2: finishing the design
The second part starts with more disc variations and then fixes what bothered me.
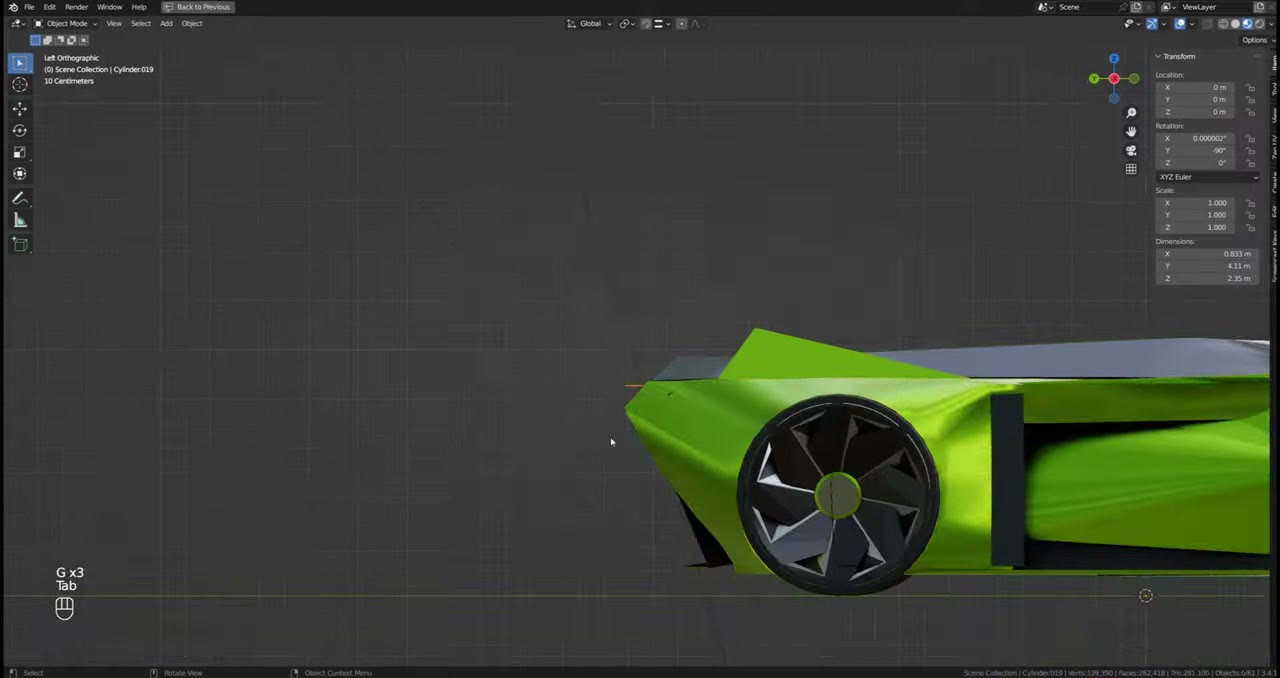
- The back fender was too simple and not contemporary enough. I cut it with a boolean and built it from a circular shape.
- The rear “diffuser” is a design element, not a real diffuser; a real one has vertical fins to direct the air. I learned a lot about aerodynamics along the way: a road car rarely goes over 100–120 km/h, but a performance car at 200 has to be pushed to the ground, and that shapes the design a lot. This concept is meant to look good in a game, not to be fully aerodynamic.
- The engine: electric felt boring if I ever animate it with sound, and I didn’t want petrol, so I imagined hydrogen. That still needs intakes for cooling.
- Arrays: I kept only three or four elements instead of dozens. Fifty layers is an easy trick people can spot; I wanted it to feel sculpted.
- Separate parts stay separate. Merging the front fender into the body would have made the booleans fight. When a boolean misbehaves, don’t spend hours on it; make a new one. Every program has its own unexplainable bugs.
Back lights. I enjoyed designing these. Lines that don’t align with the previous lines look fresher; I used six, but there’s no rule. I tried making every edge a light, which was too noisy, and an outline all around, which felt forced. In the end: strong angular lights perpendicular to the design’s motion, which add danger and aggressiveness.
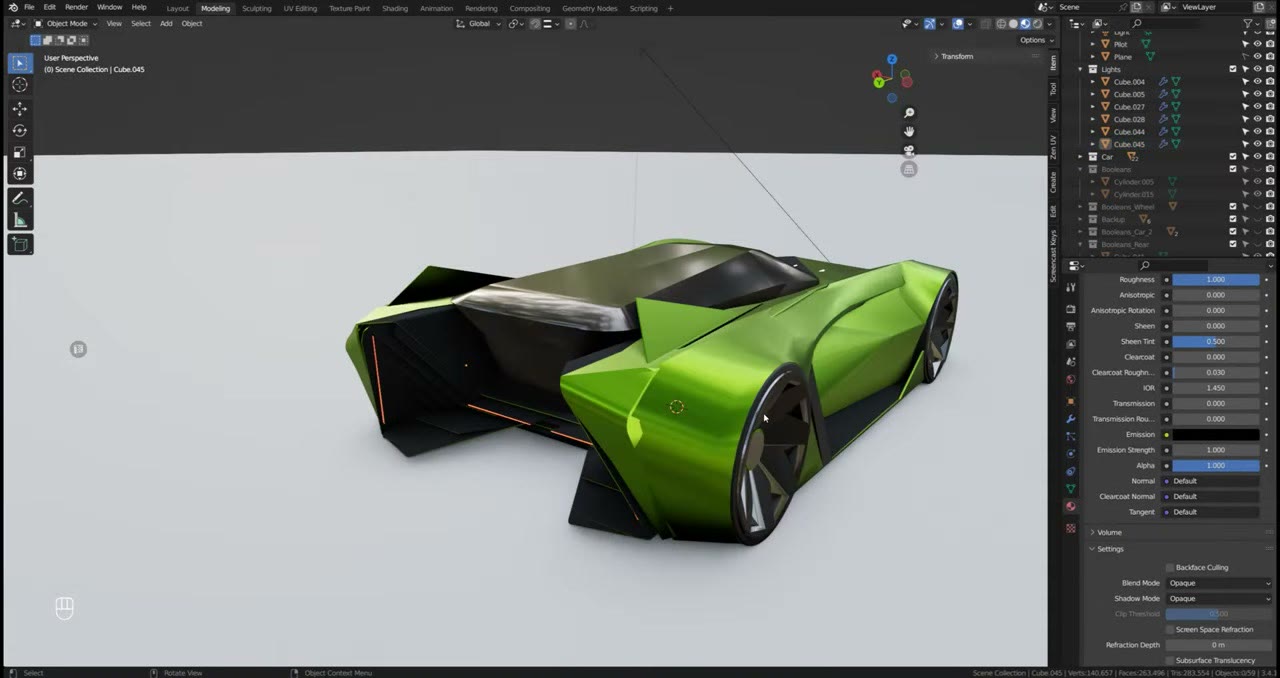
Evenness is the enemy. Elements of the same size, evenly spaced, look bad. Think about the composition of each element relative to the others. But it still has to look like it could exist, so compromises happen.
Aerodynamics vs looks. A teardrop is the most aerodynamic shape, but on wheels it looks ugly. A Formula 1 car has a far worse drag coefficient than a road car, because it needs downforce. That’s what makes performance cars so visually busy.
No windscreen wipers. Air blown across the windscreen can keep droplets off, or a screen inside could replace the view, which frees the shape of the windscreen.
Pick one and move on. With the pilot capsule I had five designs that all looked good. You can waste a lot of time playing. I also try not to obsess over one part: leave it, move on, come back.
Ambient occlusion hides detail you don’t need. If something is a black hole in the viewport, it’ll be a black hole in the render. Still resolve it in your mind: an intake has a mesh behind it to catch debris, even if you never model it.
A logo that’s yours
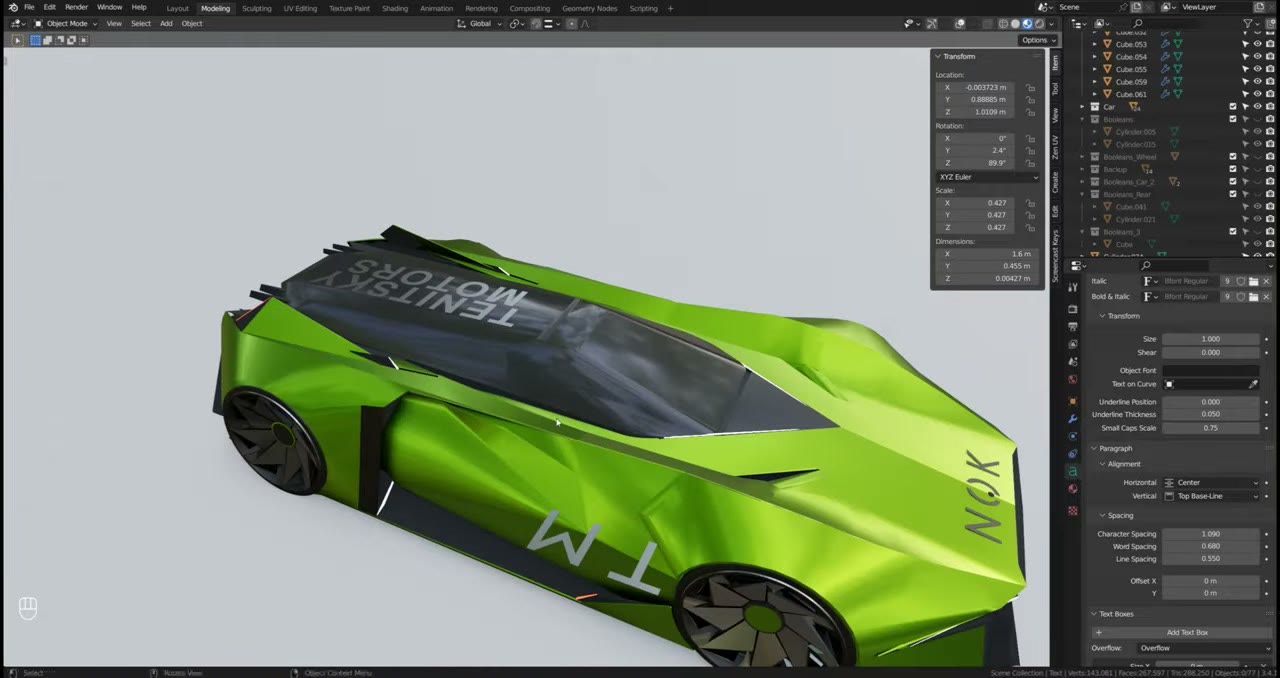
I don’t use Audi, BMW or Peugeot logos. That’s free advertising for them, and you lose ownership: a client who wants to buy or show your work can’t use it with someone else’s brand on it. You’ll find plenty of “create an Audi concept” tutorials, which is honestly copyright infringement. I made my own: Tenitsky Motors, with a “TM” monogram. Googling a letter pair plus “logo” shows how many ideas already exist.
Part 3: retopology into a sub-D model
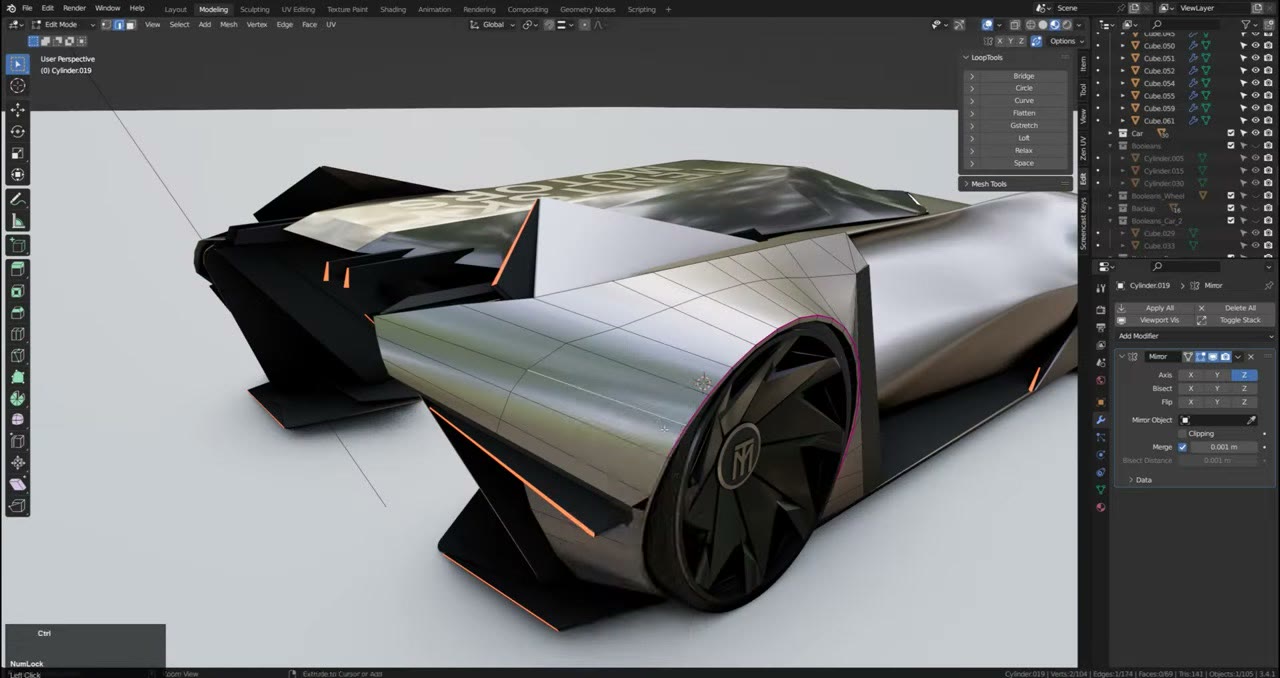
Many shapes, like the wheel arches, carried straight over from the concept; having them set up made retopology much easier. Most of the work was moving vertices; few complicated operations, just time-consuming. I wish AI could do it.
- Clean stack: remove the concept modifiers. Checker deselect removed every second vertex on curves; a sub-D model doesn’t need that many.
- Auto merge (about 0.001) snaps vertices together; I lowered it for the tiny logo.
- Be minimal. You can always subdivide once more. A simple mesh is easy to modify without bumps, which is why I keep it simple religiously.
- Creasing wherever possible, though it’s not a cure-all: when it broke on the discs, edge loops worked better. Too much crease looks super sharp.
- LoopTools (G-Stretch, Relax, Space) and scaling to zero on one axis straighten edge loops; check the reflections for bumps.
- Triangles and n-gons: I meant to stay 100% quads, so the model could go to CAD (as NURBS), but I got tired and left a few. On a hard-surface model it hardly affects the smoothness.
- Normals: checking for flipped normals and non-manifold geometry is easier in Maya, so I exported to Maya a few times. If you know a fast way in Blender, tell me.
- No panel cuts. Doors and hatches would mean a much denser mesh. If I need them, I’ll UV the model and use displacement.
- Light blockers: black boxes inside the body stop you seeing through it.
- Small gaps between plastic and metal parts look real; parts penetrating each other look fake.
I also tried Plasticity for a CAD version and failed for now; it felt a bit raw to me then. A CAD tool gives perfectly smooth surfaces, which is what I miss in sub-D.
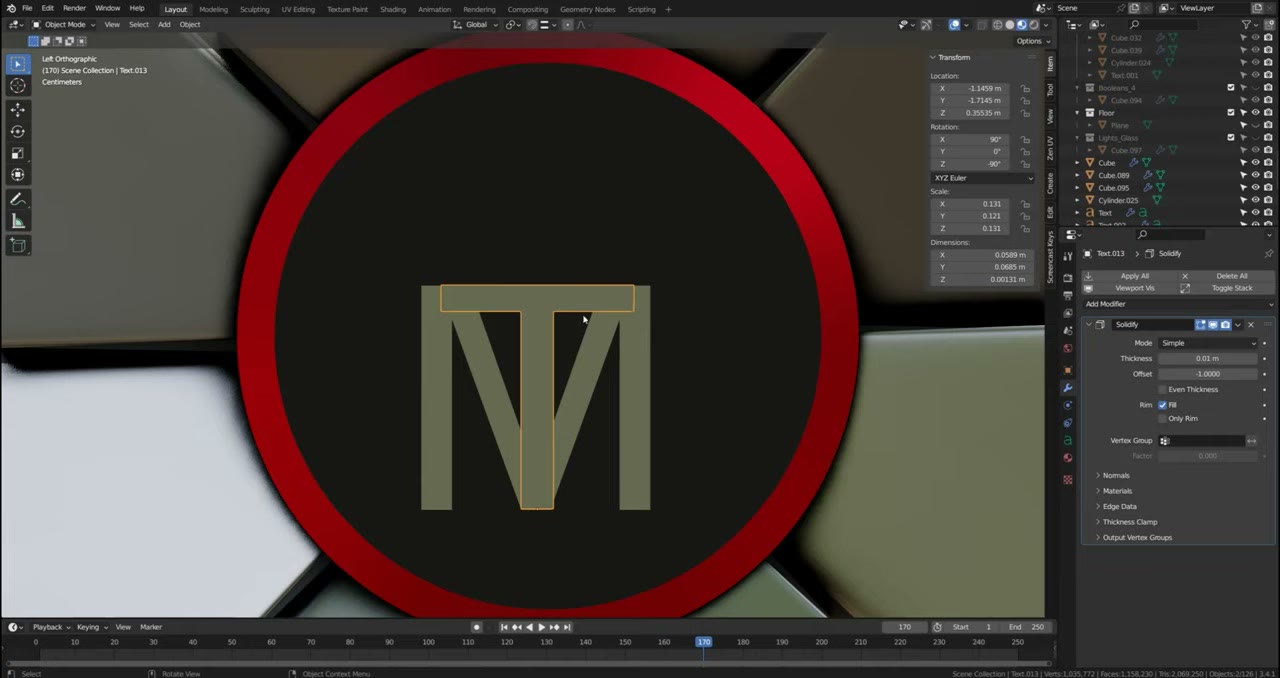
The logo: text converted to a mesh came out badly triangulated, and a boolean attempt failed, so I rebuilt half of it by hand as a flat polygon, mirrored it, extruded it and added holding edge loops. Different materials on the sides and front finish it.
The discs got the same treatment: one segment with different materials on different polygons, instanced with Alt+D and rotated. I also tried other colours, including red.
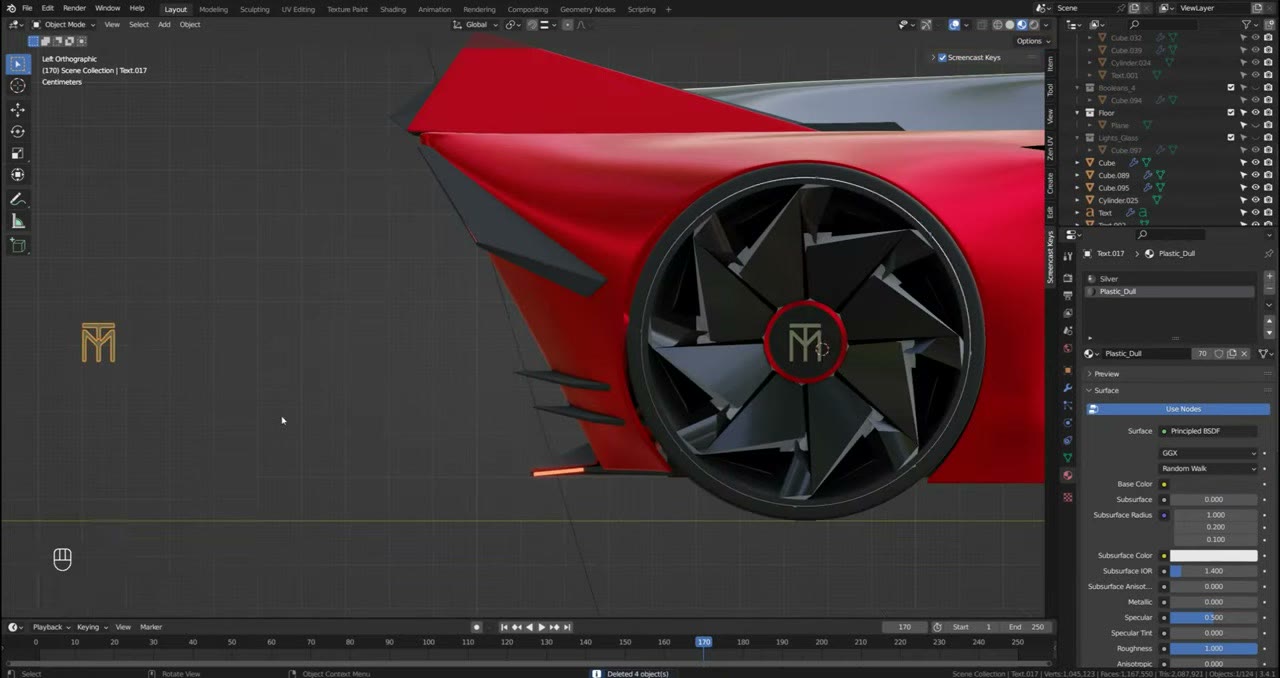
The full timelapses with commentary are on YouTube: this page’s video is part 1; continue with part 2 (finishing the design) and part 3 (retopology).
Watch the video version (1:10:15)
Everything above is in the video too, if you'd rather follow along on screen.
FAQ
Should I model a concept car with subdivision surfaces from the start?
Not for the concept stage. A low-poly model with bevel, mirror and solidify modifiers lets you make big changes fast and keep sharp breaks next to smooth surfaces. Retopologise into a sub-D model once the design is settled.
How do I make wheel discs quickly in Blender?
Model one segment, then instance it with Alt+D and rotate each copy (45° for eight segments). Moving a single vertex on the one segment changes all of them. Copy the modifiers to the instances with Ctrl+L, since instances only share the mesh.
Should arrays use relative or constant offset?
Constant offset. With relative offset, the spacing changes as soon as you edit the polygon shape, and the array goes out of whack.
Why not put a real car brand’s logo on a concept?
It gives free advertising to that brand and you lose ownership of the design: a client can’t use or buy work carrying someone else’s logo. Design your own.

Anton Tenitsky is a 3D artist with 15+ years in computer graphics, working with Nickelodeon, Gameloft, Marvel Rivals and many other clients. More about me