A plane, a sphere and a handful of cubes become a lighthouse on an island between two cliffs. This guide goes from start to finish: a basic Blender blockout, a depth pass, a photoreal image from Stable Diffusion with a depth ControlNet, and then a camera projection that puts the render back onto the 3D shapes so the camera can move. It’s aimed at people who are new to Stable Diffusion.
What I like about this process is that you control the final composition. As a professional artist I’ve always had more ideas than time to realise them. This approach lets me try a lot of them with fairly minimal effort.
In short
- Blockout: plane for the sea, UV sphere for the island, cubes for the cliffs and the lighthouse. 33 mm camera.
- Depth pass: Z pass → Map Range → Invert Color; view transform Raw; 16-bit PNG.
- Stable Diffusion: AUTOMATIC1111 with epiCPhotoGasm and the ControlNet extension: Depth, preprocessor depth_zoe, weight 0.75.
- Projection: UV Project from View, a Background shader, plenty of subdivision.
- Project files: the Blender scene is free on Gumroad.
This video used AUTOMATIC1111. For the same idea in ComfyUI, live while you move the camera, see real-time concept art with Blender and Stable Diffusion.
1. Block out the scene in Blender 4.3
Blender 4.3’s interface differs slightly from earlier versions. Everything here is as basic as it gets.
- Sea: Shift+A → Mesh → Plane. Move it with G, scale it with S to make it much bigger.
- Island: a UV Sphere, sunk into the plane and set to Shade Smooth.
- Lighthouse: a cube, scaled tall. Add a couple of small buildings, sporadically, not too many.
- Cliffs: more cubes, duplicated (Shift+D), tilted and scaled.
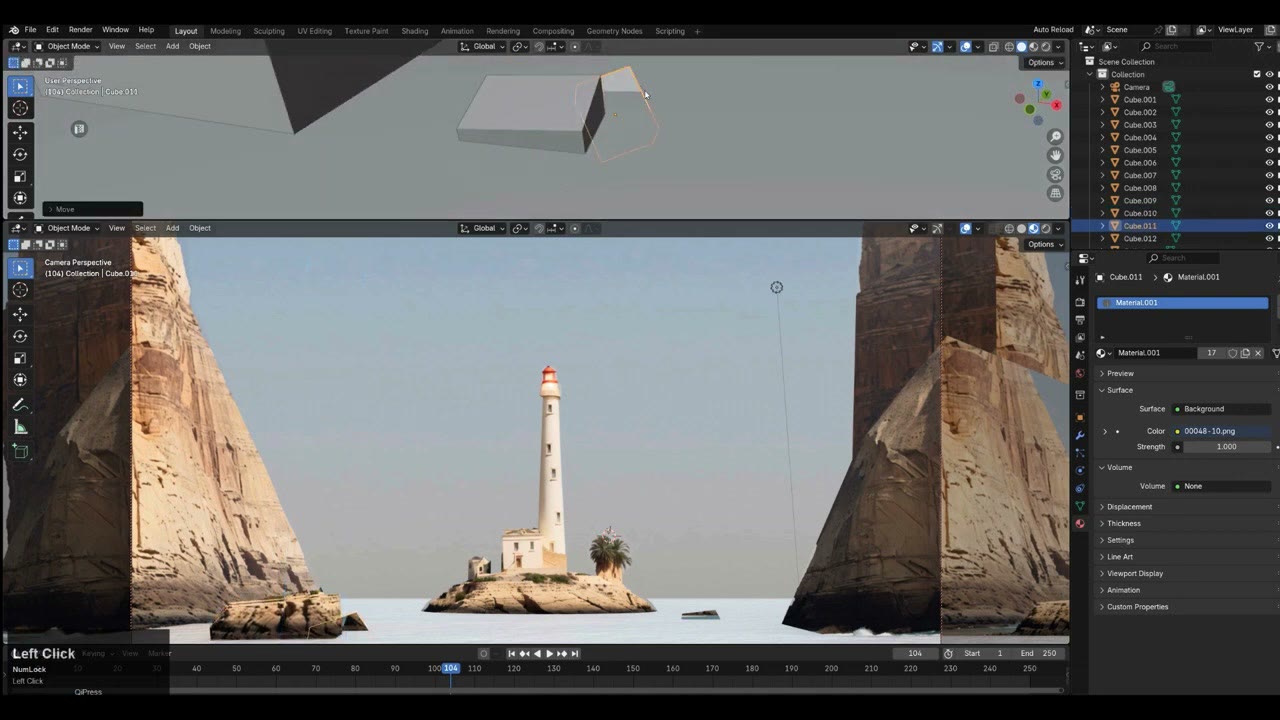
Add a camera. Drag a second viewport down, set it to the camera view (View → Cameras → Set Active Object as Camera), and enable Lock Camera to View so you can navigate without losing the camera. I used a 33 mm focal length, slightly wide for a landscape view.
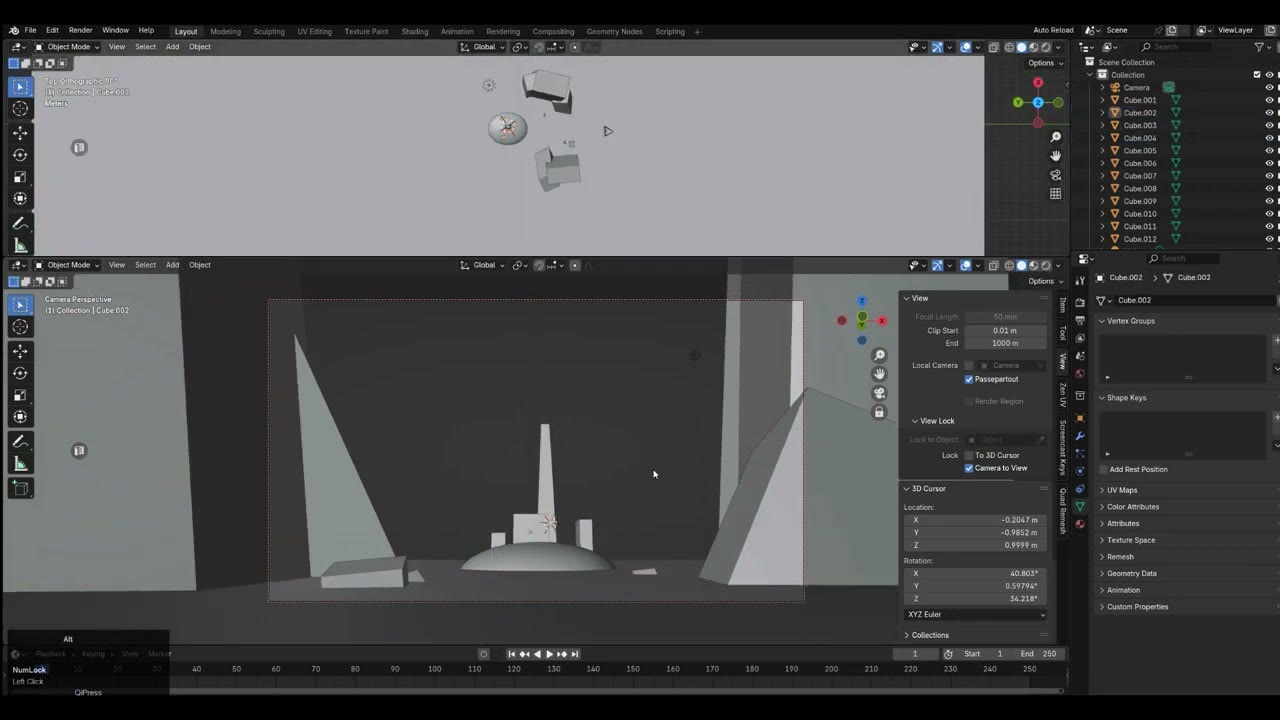
Then place the cliffs around the island to frame an opening, with a small island in the middle: a lighthouse, a castle or a sci-fi tower. I spend most of the time here, moving and scaling rocks. I want big contrast between big and small shapes, and the eye drawn to the main subject. This composition is simple: the subject goes right in the middle.
Sky: duplicate the plane and rotate it upright with R (hold Ctrl to snap). Keep it not too far away; a very distant plane can skew the depth values.
In Output Properties, drop the resolution to 50% so Stable Diffusion runs faster.
2. Render a depth pass
In a depth pass, white pixels are near and black pixels are far.
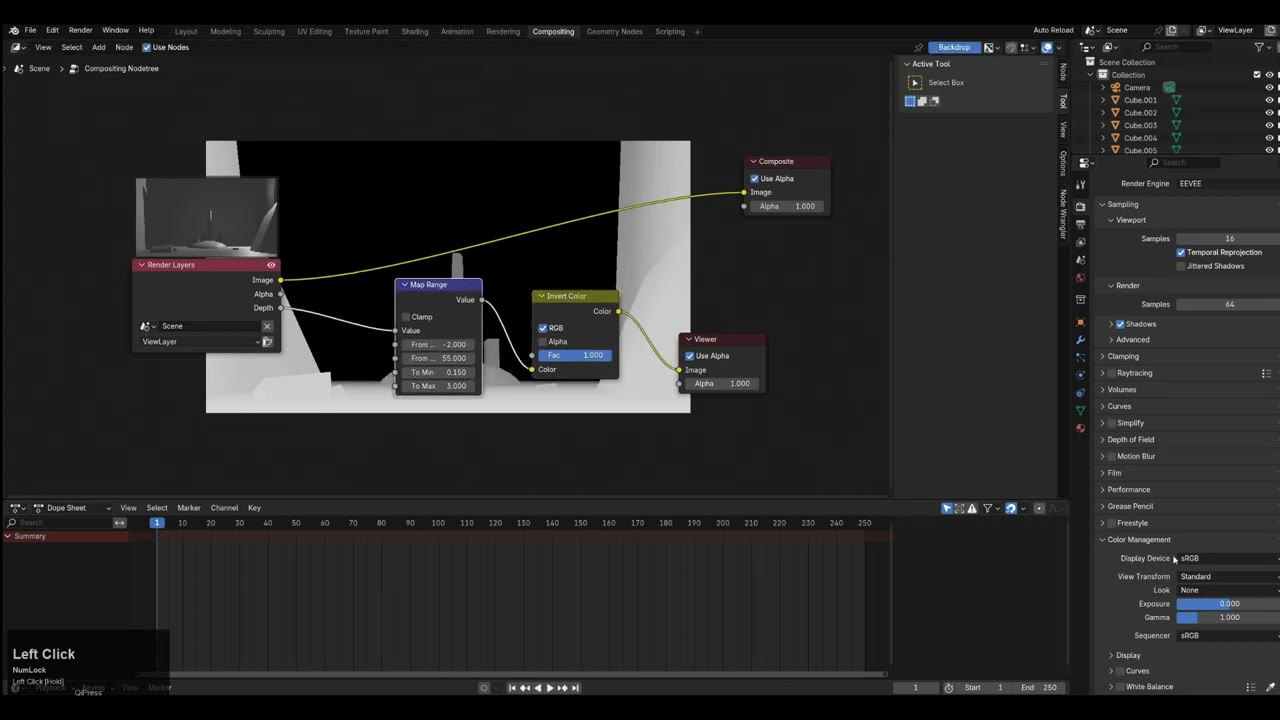
- View Layer Properties → Passes, enable Z.
- Switch to the Compositing workspace and click Use Nodes.
- Render once. The scene lights don’t affect the depth pass, so a simple light is fine.
- Add a Viewer node and connect the render’s Depth output. At first the image is overblown.
- Add Map Range between them and drag the From and To values until the gradient looks right. I just scrolled the sliders left and right until I found the look I wanted.
- Add Invert Color; the pass doesn’t work the right way round as it is.
- Render Properties → Color Management → View Transform: Raw. It gives a softer, better-defined range.
- Connect Invert Color to the Composite node, render, and save as PNG, 16-bit colour depth, 0% compression. 16 bits gives a richer image.
3. Install Stable Diffusion and ControlNet
The easiest install of AUTOMATIC1111 is the v1.0.0-pre release: download only sd.webui.zip, unzip it, and run run.bat. It takes a minute or more to download the extra packages; give it time.
- Models go in the Stable Diffusion models folder. I found mine on Civitai; the one I used a lot is epiCPhotoGasm, great for realistic images. Search Civitai for other styles and drop them in the same folder.
- ControlNet extension: in the web UI, Extensions → Install from URL, paste
https://github.com/Mikubill/sd-webui-controlnetand install. Then Installed → Check for updates → Apply and restart UI. - ControlNet models: download from lllyasviel/ControlNet-v1-1 on Hugging Face into the extension’s models folder. I mostly use depth; I also downloaded canny (line detection), but this guide only uses depth.
ControlNet itself is described in Adding Conditional Control to Text-to-Image Diffusion Models (Zhang et al., 2023).
4. Generate the image
In the txt2img tab:
- Checkpoint: epiCPhotoGasm.
- Width × height: 960 × 540, matching the render.
- Seed: 10, fixed, because I don’t want variation while tuning.
- ControlNet: open the panel, click Depth and tick Enable. Set the preprocessor to depth_zoe, which is much better than the default depth_midas. Drag in the depth PNG.
- Control weight: start at 0.7. Lower values add variation (at 0.2 the result is very different from your scene) and 1.0 also breaks it. Stay between 0.5 and 0.9.
The prompt is just what I see: “canyon, lighthouse, small island, sea, sunny day, limestone”. Swap “limestone” for a country, like Ireland, and you get a completely different landscape.
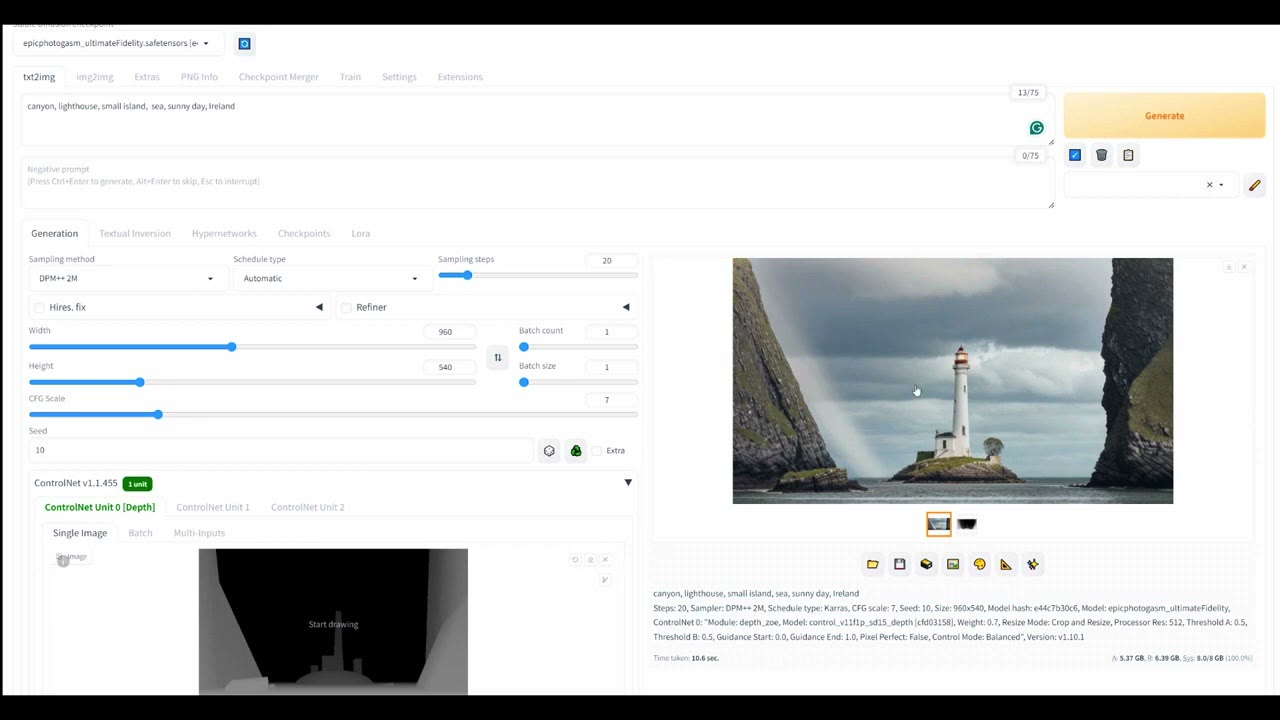
A halo around a shape usually comes from the ControlNet weight. Lowering it to 0.6 removed some of it but caused failures. 0.75 was just right; at 0.8 it added a beach in front.
Hires. fix doubles the resolution. Depending on your VRAM it can run or fail; it usually takes a couple of minutes, and sometimes I have to restart the computer to get a clean run. The 2K version is much higher quality, but details change from the 1K one. I don’t yet know how to keep it consistent; if you do, leave a comment on the video.
Everything is saved automatically in the web UI’s outputs folder, an endless gallery of your attempts.
What went wrong along the way
- Weight 1.0 broke the image. Around 0.5 it started to blend in.
- Depth Midas produced something entirely different, nothing to do with the island.
- A weak depth gradient created a beach in front, or blended mid-ground objects into the foreground. Use the Raw view transform and a good Map Range.
- Busy backgrounds: I had to change prompts, and move the island and details in Blender, to get a clean background.
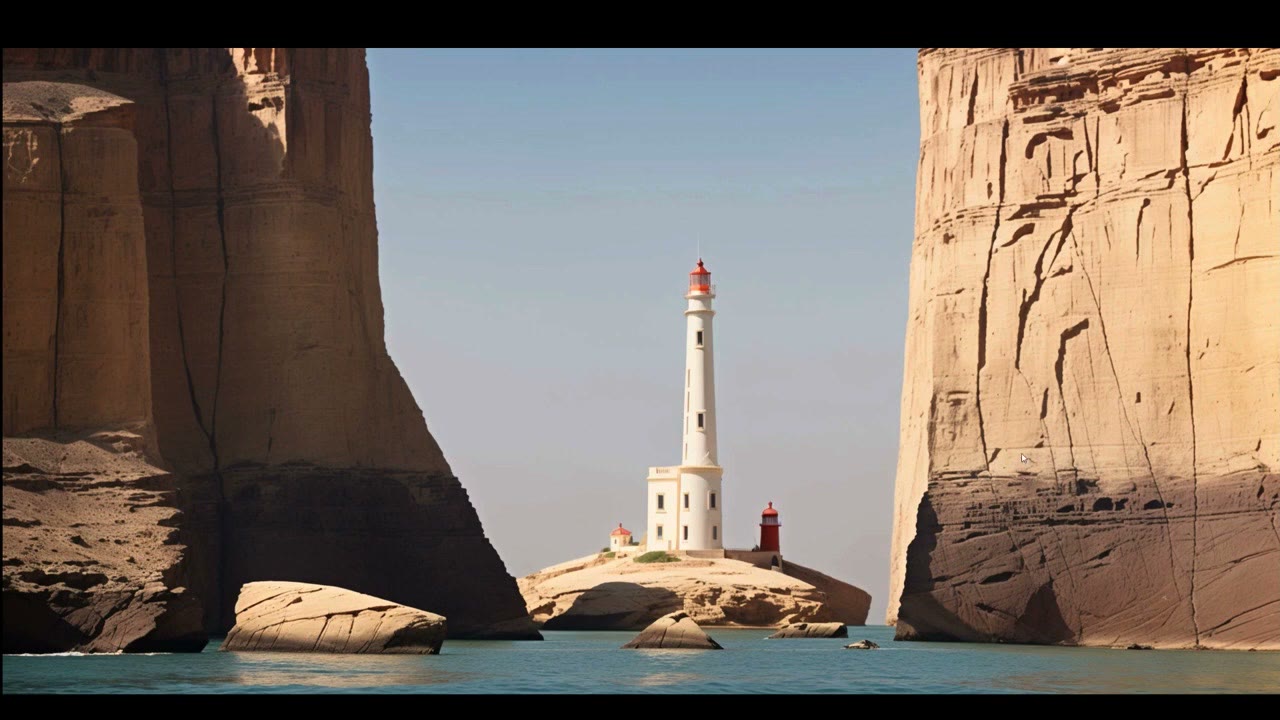
Once I had depth_zoe and a good weight, the good images started. I also tried a gloomy medieval castle, countries like Jordan and Yemen, and a futuristic castle, which gave quite a modern look. The rocks in the foreground there are my cubes; it follows the blockout really well.
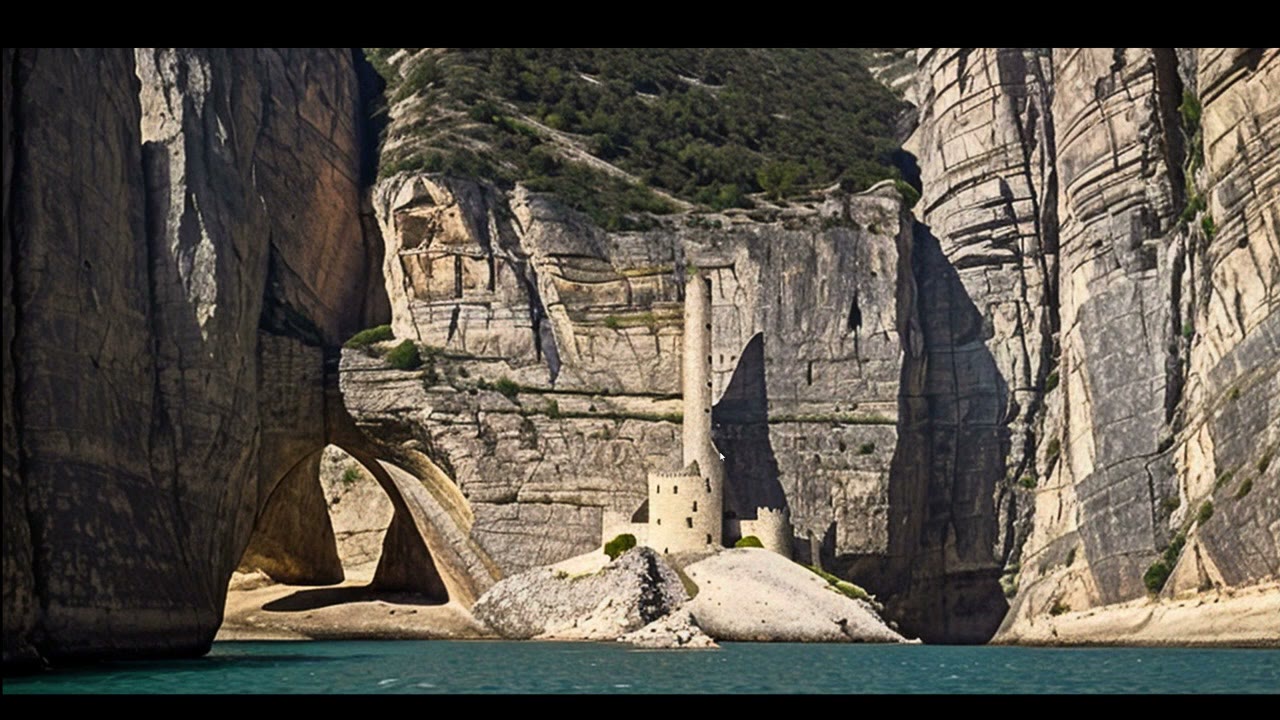
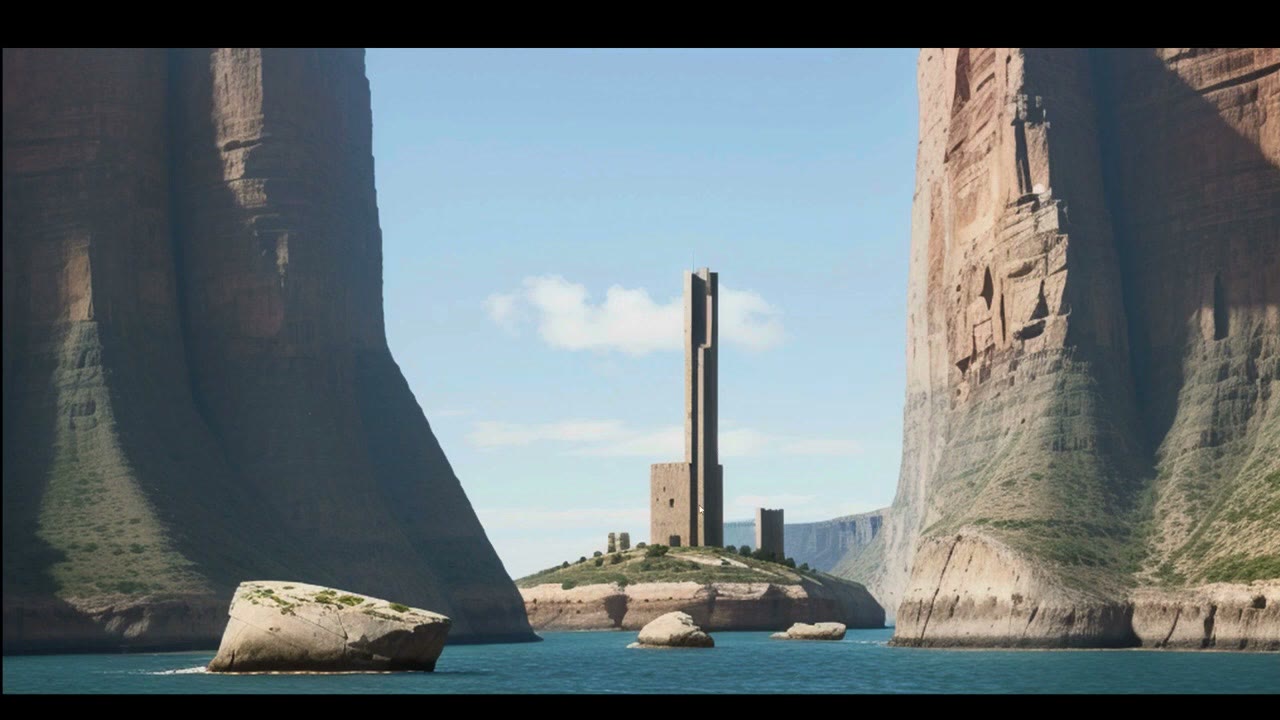
5. Project the render back onto the scene
- Select every object except the camera and lights, press Tab, and A to select all.
- UV → Project from View, from the camera.
- Give one object a new material and switch it from Principled BSDF to a Background shader: there are no reflections, it’s a flat projection of the texture.
- In the Shading workspace, add an Image Texture with the Stable Diffusion render and connect it.
- Select everything visible, then the textured object last, and press Ctrl+L → Link Materials.
At first the projection looks off. Subdivide the meshes (not the sphere, which is already dense enough, but the cliffs, the sky and the water): in Edit Mode, Subdivide several times, then Project from View again. I had to subdivide once more before everything looked right. Now when you move the camera, it reads as a 3D scene.
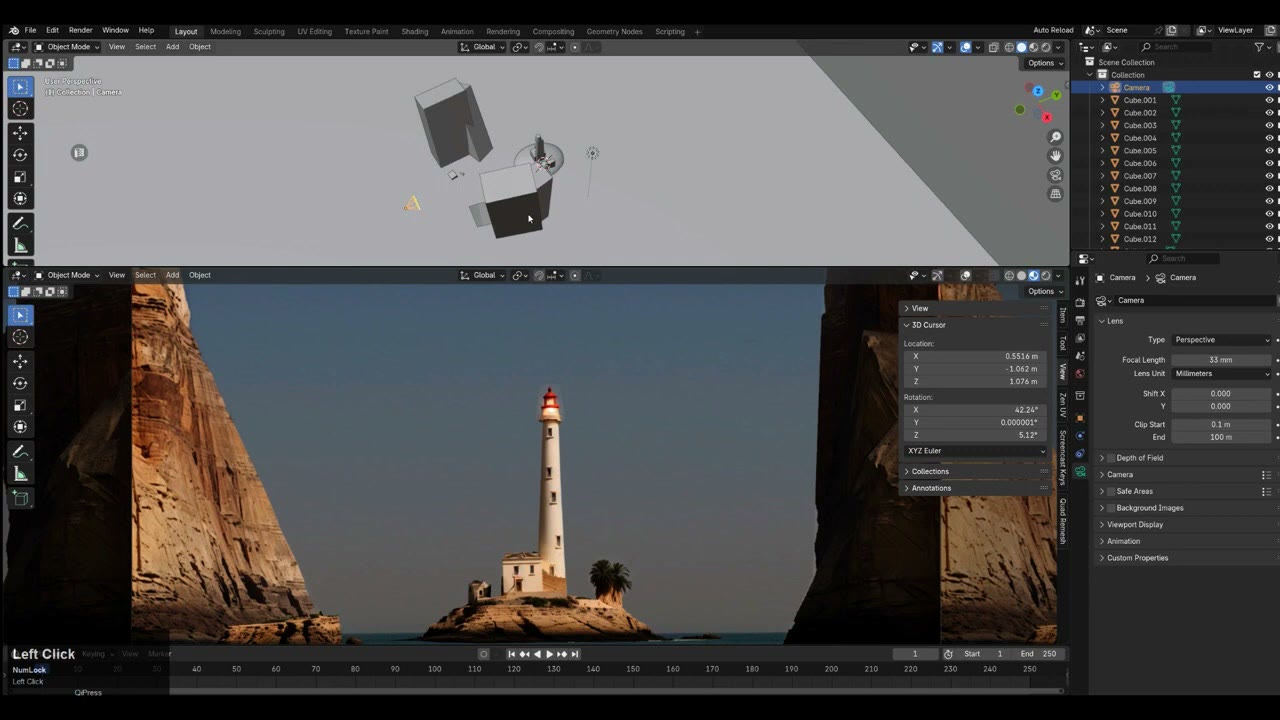
Fix what the blockout lacks
- The lighthouse top: the cube didn’t reach it. Shift+right-click to place the 3D cursor, add a cylinder, scale and taper it to fill the space, give it the Background material, and Project from View again. I did the same for the palm with a placeholder sphere. Later I broke the top into cylinders to remove a halo.
- The sky: in Photoshop I made a clean gradient from the render’s sky. Clicking the material’s user count (17) creates a single-user copy, and I swapped in the new image there.
- Rock edges show when the camera moves. Moving the rocks back a little makes the clipping much less visible for a small move.
6. Water and the camera move
On the sea plane, replace the material with a new Principled BSDF at roughness 0. It reflects the HDRI, so turn on ray tracing in Render Properties (it works slightly differently in 4.3) to get a mirror reflection of the scene.
Then add ripples: Noise Texture → Bump (colour into Height, Normal into the shader’s Normal), with Texture Coordinate and Mapping in front of it. Keyframe the Mapping location on frame 1, move it on frame 250 and keyframe again. The first try was too fast; I dropped the movement to 0.1 m for a subtle animation.
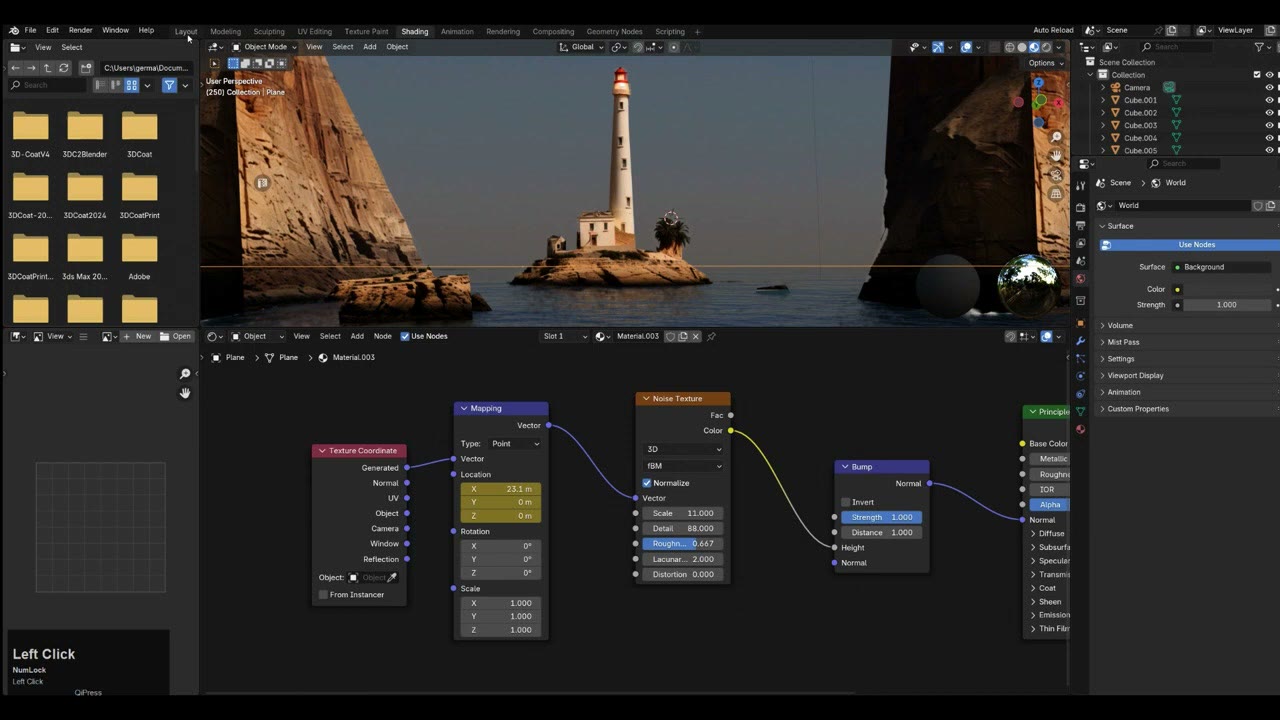
Before rendering:
- Raise the viewport samples to 256.
- Switch the view transform from Raw back to Standard, connect the render’s Image (not depth) to the Composite node, and set the resolution back to 100%.
- Sink a few rocks into the water and bring the water to the foreground.
- Keyframe the camera on frame 1, move it slightly closer on frame 150, keyframe again, and Render Animation to your output folder. I rendered a video file to make it faster.
Afterwards I tried other prompts, like Greenland and Thailand, and replaced the texture in the folder to get new versions of the same scene. The Blender scene is free on my Gumroad.
Watch the video version (23:27)
Everything above is in the video too, if you'd rather follow along on screen.
FAQ
How do I export a depth map from Blender for ControlNet?
Enable the Z pass in View Layer properties, then in the Compositor run Depth through Map Range and Invert Color so near is white and far is black. Set the view transform to Raw and save as a 16-bit PNG with no compression.
What ControlNet weight should I use for a depth map?
Between 0.5 and 0.9. At 1.0 it broke the image; at 0.6 it produced failures; 0.75 was just right, while 0.8 added a beach in front.
Depth Zoe or Depth Midas?
Depth Zoe. With Midas the result had nothing to do with the island.
Why do my mid-ground objects blend into the foreground?
The depth map doesn’t have enough change in its gradients. Set the view transform to Raw and tune Map Range for a good, even gradient.

Anton Tenitsky is a 3D artist with 15+ years in computer graphics, working with Nickelodeon, Gameloft, Marvel Rivals and many other clients. More about me