A prompt alone gives you little control over pose and composition. A 3D scene gives you all of it. In this workflow, I pose a character in Blender, build a rough scene from boxes, and let Flux render it in a specific artist’s style, here Albrecht Dürer’s engravings, through a style LoRA.
The style comes from a LoRA I trained on about ten of Dürer’s engravings. Training is covered step by step in how to train a LoRA on any artist’s style, so this guide starts where that one ends: with a trained LoRA file.
In short
- Pose: a free character and animation from Mixamo, imported into Blender.
- Scene: cubes, spheres and cylinders, rendered with Eevee.
- Structure: a Depth Anything V2 depth map drives Flux depth ControlNet v3, at a strength of about 0.7.
- Style: a Flux LoRA trained on an artist’s work, with its trigger word at the start of the prompt.
- Quality: Flux 1 dev, guidance 3, 25 steps.
1. Get a posed character from Mixamo
Mixamo is a free Adobe library of characters and animations. Pick a character, then search the animations for a pose that fits your idea. I searched for “sword” and used Great Sword Crouching Block; any frame of an animation can be your pose.
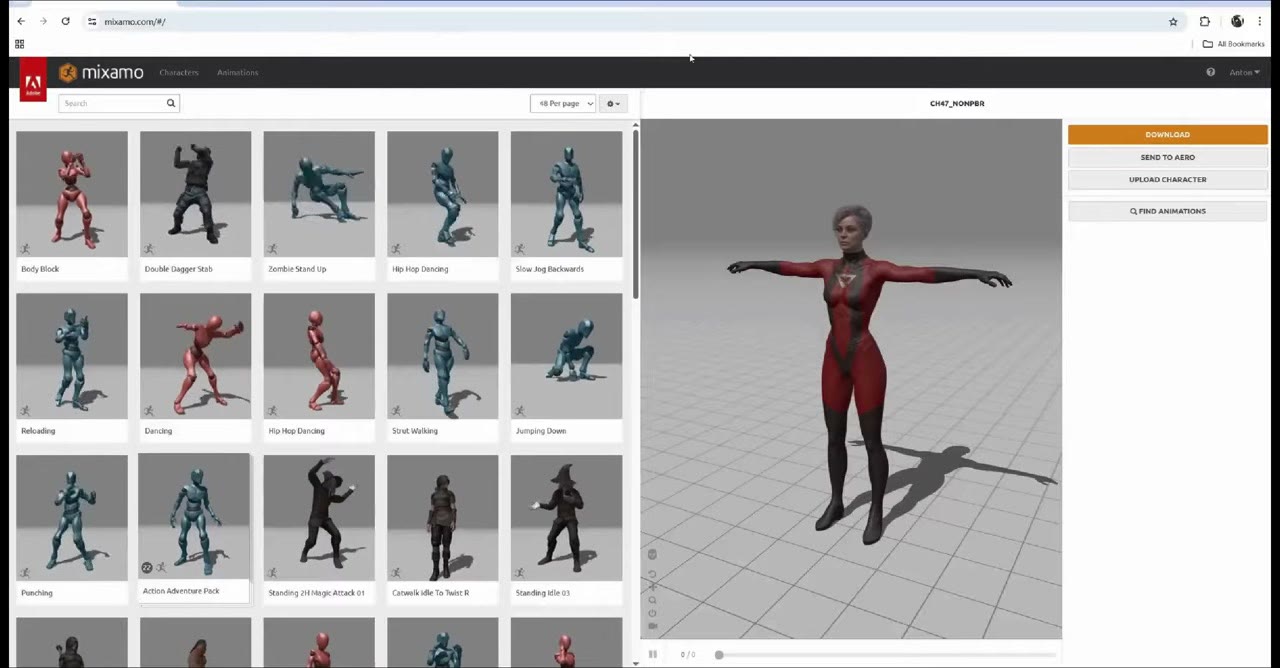
The character doesn’t need good anatomy. Depth ControlNets work with very rough shapes, even stick figures. Download the animation as FBX with the default settings (mine was about 50 MB).
A licensing note: for the characters I sell, I made and rigged my own, because I can’t use Mixamo’s characters commercially in a package. For posing your own renders, Mixamo is the easiest start.
2. Build the scene in Blender
In Blender, use File → Import → FBX, hide the armature, and scrub the timeline to find the frame and angle you want.
Then build the scene from primitives. I added a cylinder as a lightsaber (it’s a static pose, so it doesn’t need to be parented) and made a whole cityscape from boxes: duplicated many times, stretched and scattered. Place the camera, add a light, and render with Eevee, with ray tracing on.
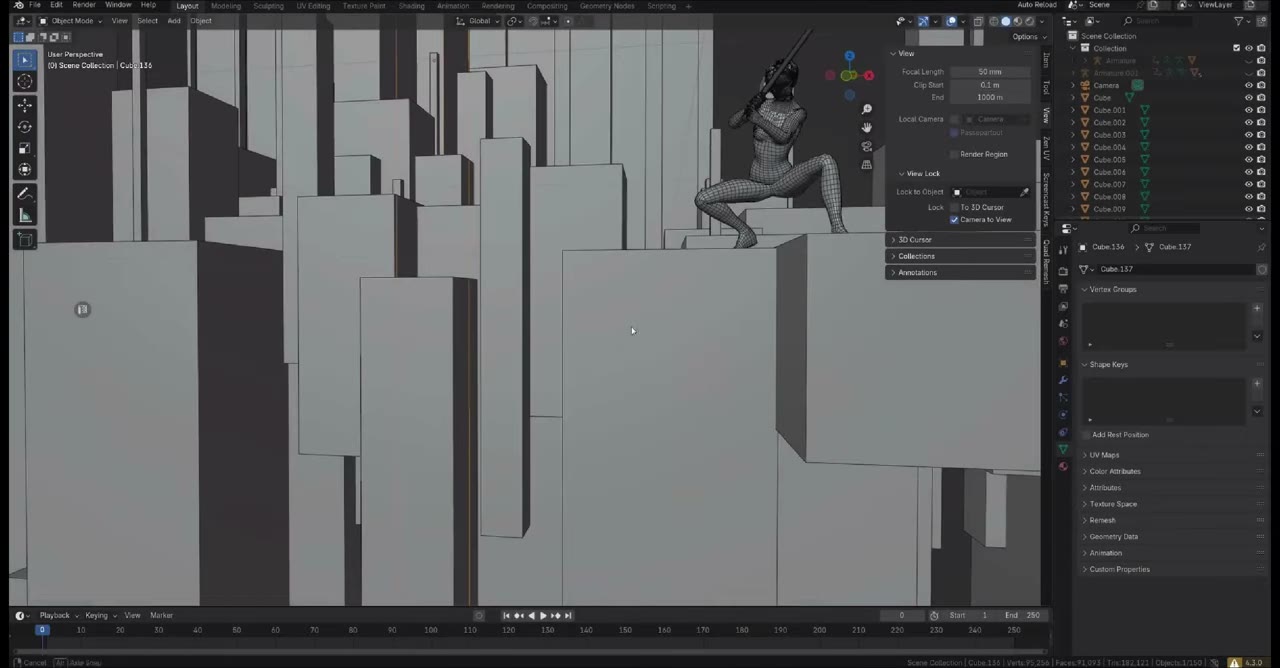
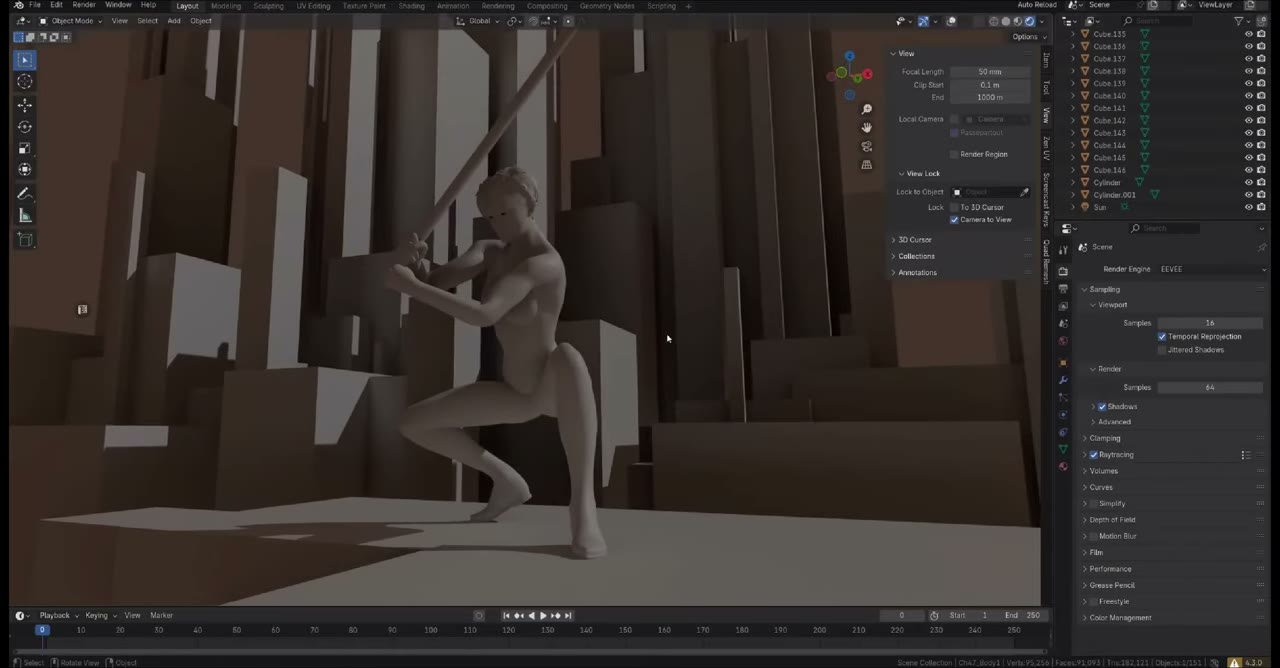
The anatomy in my pose is ugly, with odd deformations and the usual “AI hands”. That doesn’t matter: with the right ControlNet strength, the AI rebuilds it.
3. The ComfyUI workflow
You’ll need these custom nodes, all from the ComfyUI Manager: comfyui_controlnet_aux (Depth Anything), x-flux-comfyui (Flux ControlNet and sampler), KJNodes (Set/Get nodes), rgthree (image comparer) and the WAS Node Suite (Image Save). The finished workflow, with my three artist LoRAs, is on my Patreon.
Load and resize the render
A Load Image node brings in your Blender render. I use square renders: at 1024 × 1024, Flux reliably gives very good results. A note in the workflow lists other good Flux resolutions.
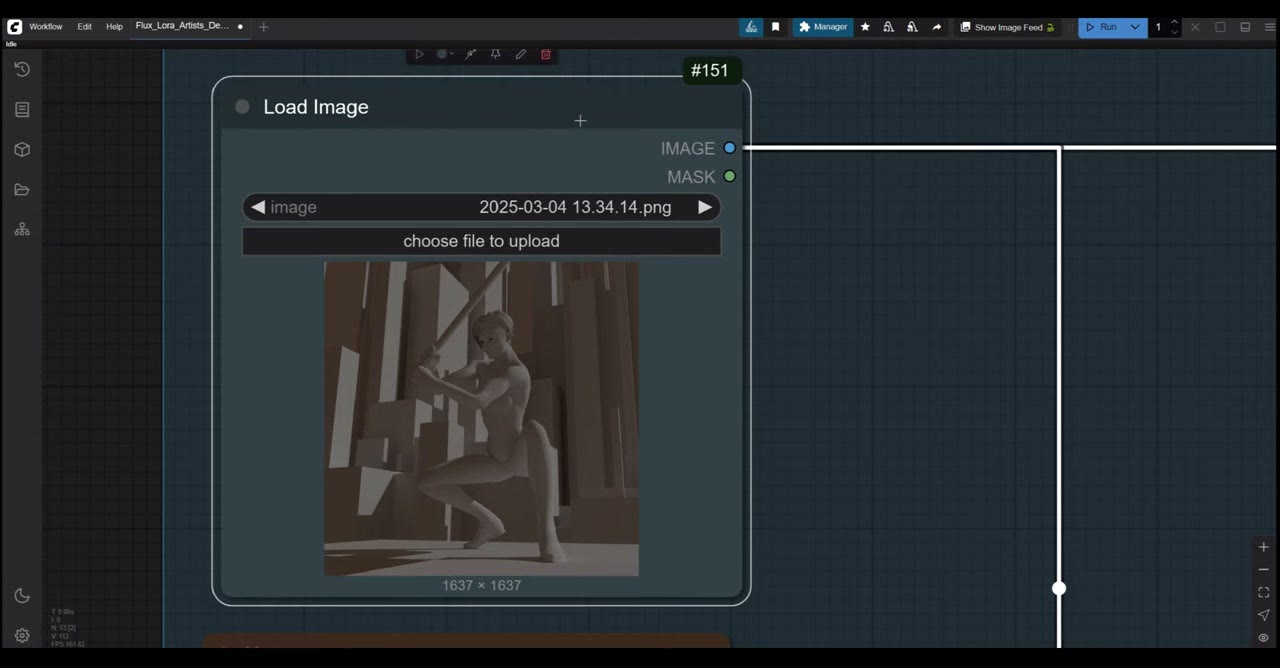
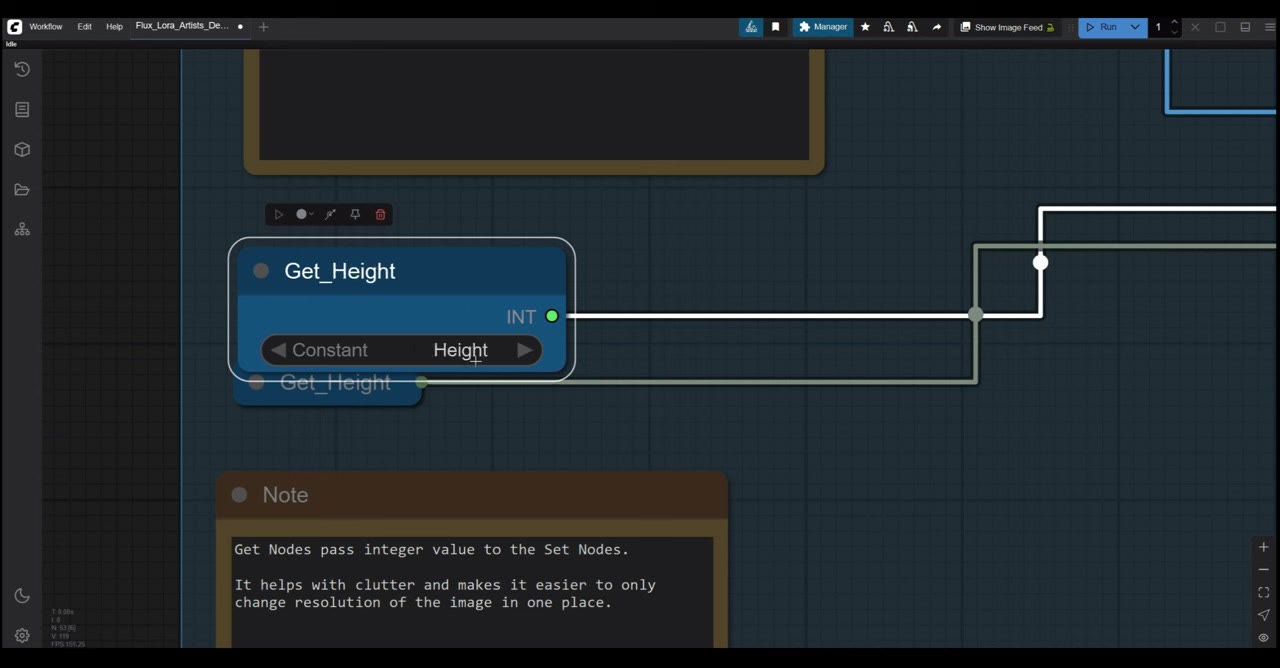
A tidy trick: Set and Get nodes. The resolution is needed in several places. Instead of typing it everywhere or running long wires across the graph, I put the width and height into integer nodes, store them with Set nodes (named width and height), and read them anywhere with Get nodes. Change the size once, at the start, and every node that uses it updates.
Depth map and ControlNet
The resized render goes through Depth Anything V2. I use the largest model for the best quality; smaller ones exist if you’re short on memory, though Flux needs a fair amount anyway. Its resolution also comes from the Get node.
The depth map goes into Apply Flux ControlNet with Flux depth ControlNet v3 (from the Model Manager). Strength is the setting that matters:
- Near 1.0: the result gets very ugly.
- Below 0.5: too creative; it loses your pose.
- 0.6 to 0.9 is the useful range. I use 0.7, because it leaves Flux enough freedom to fix the anatomy.
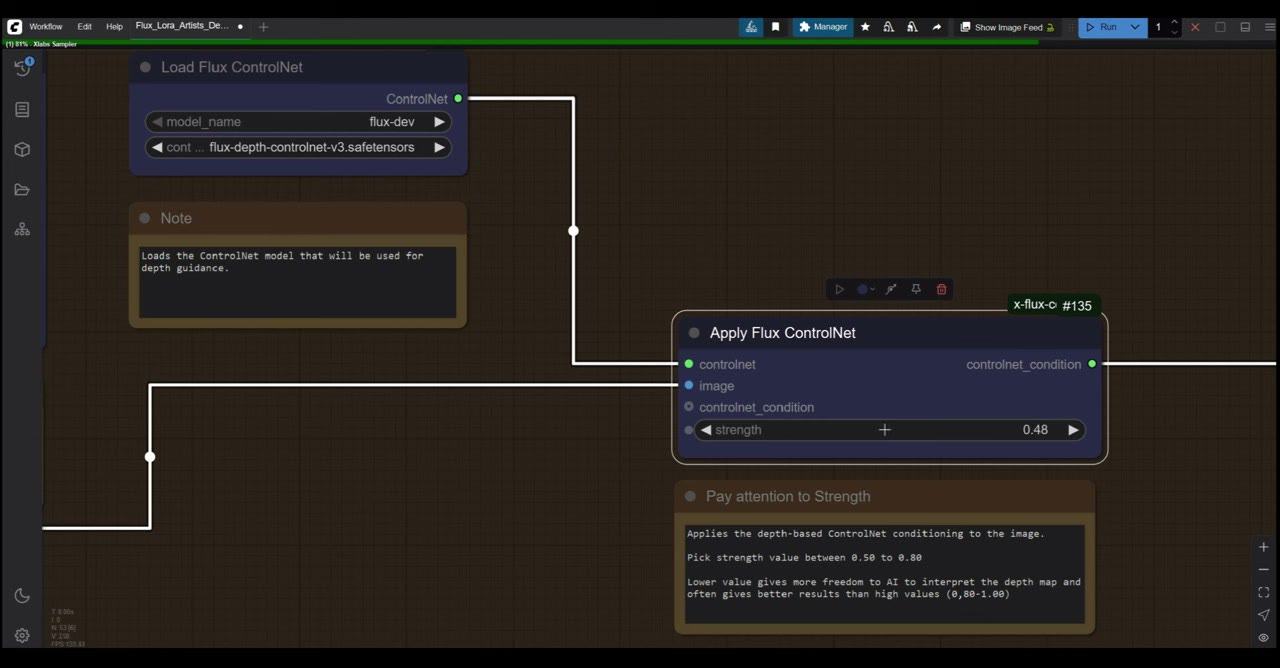
That freedom is the point. I posed a female Mixamo character, and the result is a male figure in full armour, with believable anatomy.
Model and LoRA
Load Diffusion Model loads Flux 1 dev (about 12 GB; the Model Manager download freezes ComfyUI until it finishes). It feeds a Load LoRA node with the style LoRA, here my Dürer LoRA, which adjusts the model’s weights toward that look. I leave the LoRA strength at full; lower it if you want only a hint of the style.
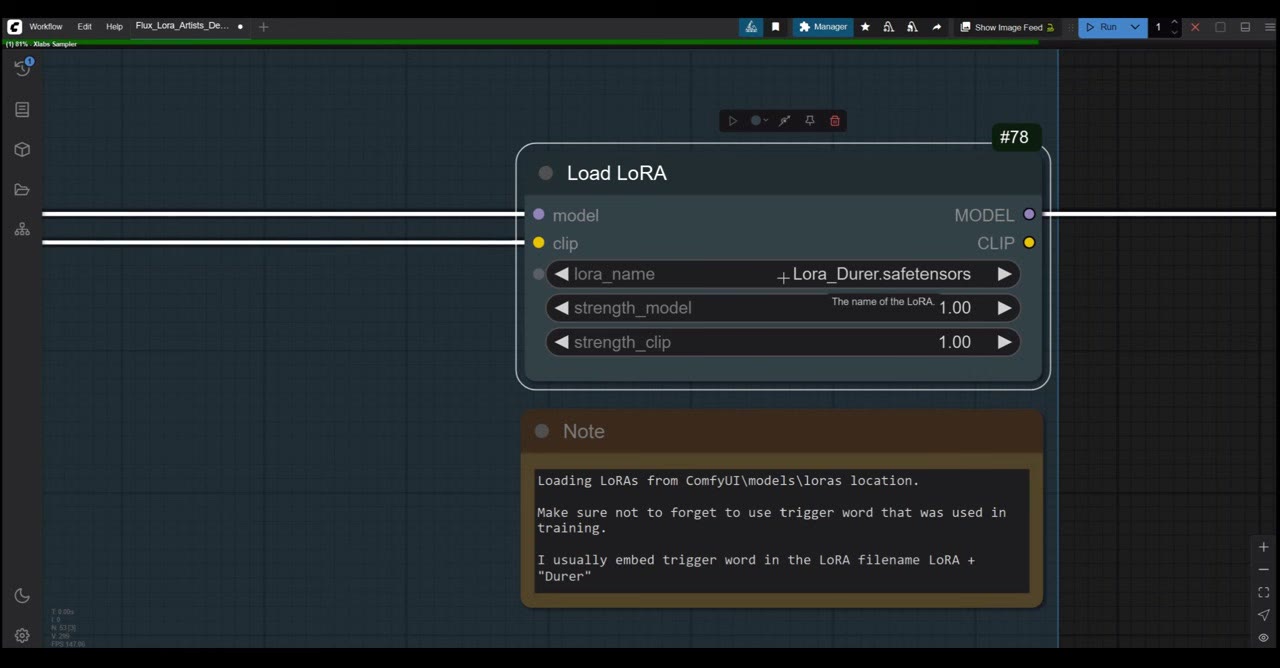
The Empty Latent Image gets the same width and height from the Get nodes.
Prompt
The DualCLIPLoader loads Flux’s two text encoders, CLIP-L and T5 XXL (both in the Model Manager). They turn each piece of your prompt into a direction for the image.
Start the positive prompt with your LoRA’s trigger word, then add context. Flux is designed for natural-language prompts and doesn’t really use negative prompts, so describe what you want rather than what you don’t. Flux Guidance at 3; much higher and the image burns, with harsh contrast.
Sample, decode, compare, save
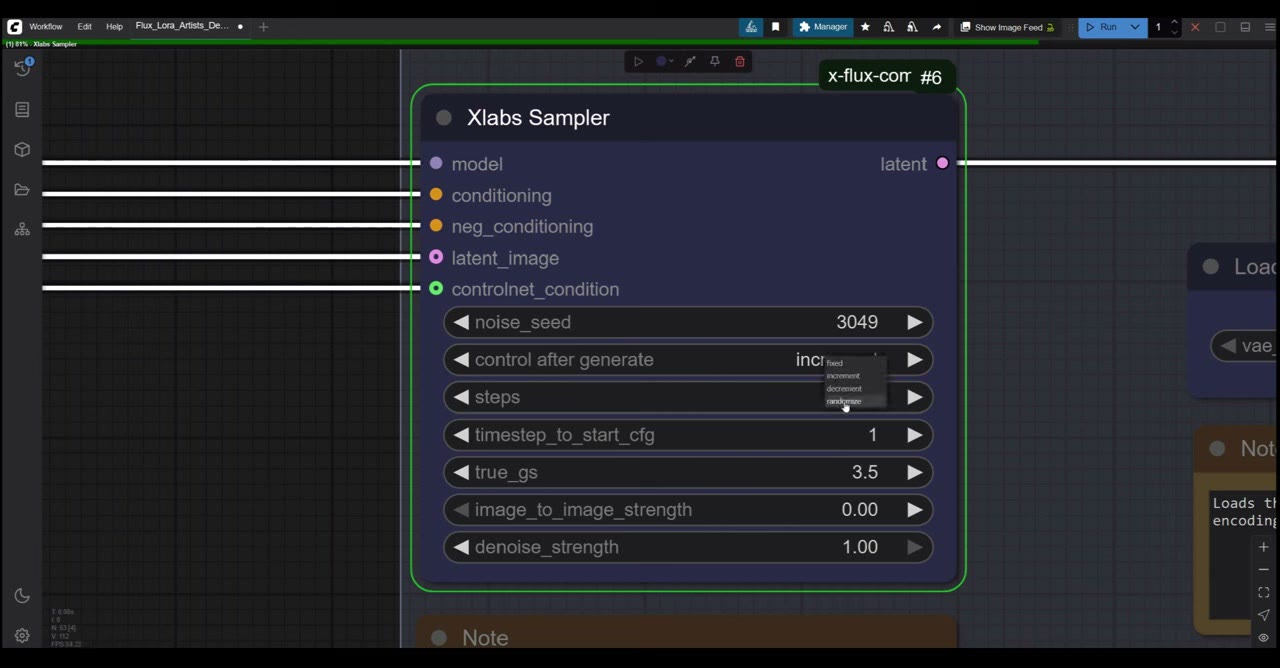
The XLabs Sampler brings it all together: model, prompts, latent and ControlNet.
- Seed on increment, so images are numbered in order, and you can always reproduce one by reusing its seed and settings.
- Steps: 25. People go up to 50, but I get good results at 25; anything past that is overkill.
VAE Decode, with the Flux VAE (about 300 MB), turns the result into pixels. An rgthree image comparer shows the Blender render and the result side by side, and a WAS Image Save node writes the file with your folder and prefix.
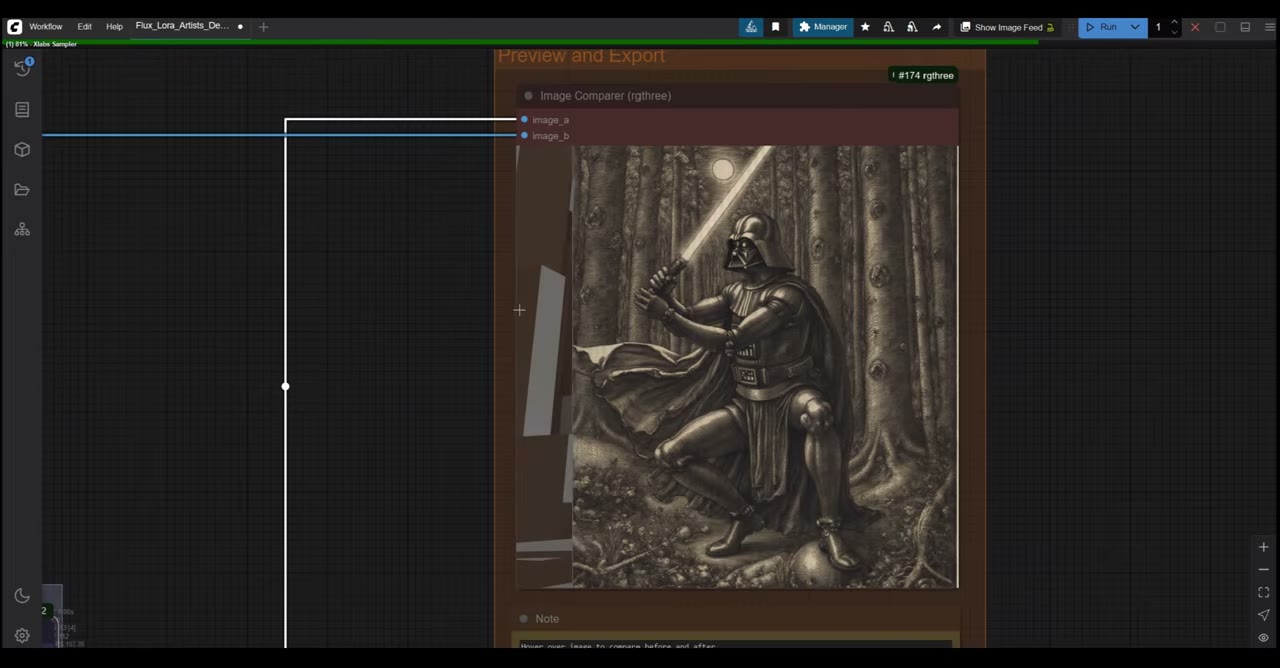
The hands came out decent. Run it ten times and you’ll get a near-perfect one.
Troubleshooting
If a run stalls (mine stopped at 81% while computing the depth map), restart ComfyUI. I have 24 GB of VRAM, and even that isn’t always enough when other programs are using the card. If your GPU is smaller, renting one is the easier route; my introduction to RunPod covers how.
If you try RunPod, my referral link gives new accounts that sign up with Google $5–$500 in credit after their first $10, and I get a small commission.
Watch the video version (21:40)
Everything above is in the video too, if you'd rather follow along on screen.
FAQ
Do I need a detailed 3D model for this?
No. A depth ControlNet works with very rough geometry; even stick figures can work. My scene was built from cubes, spheres and cylinders around a free Mixamo character.
What ControlNet strength should I use?
Between 0.6 and 0.9. I usually use 0.7: it keeps the pose and composition but gives Flux enough freedom to fix bad anatomy.
Can the AI change the character’s body?
Yes, if the ControlNet strength leaves it room. I posed a female Mixamo character and the result is a male figure in armour, with corrected anatomy.

Anton Tenitsky is a 3D artist with 15+ years in computer graphics, working with Nickelodeon, Gameloft, Marvel Rivals and many other clients. More about me