Move the camera, move an object, and a new concept image appears in seconds. This setup captures your Blender viewport and runs it through Stable Diffusion in ComfyUI, live. Controllable AI like this is something I already use in client work.
For the highest quality, Flux is the better option. It isn’t real-time, but it gives stunning results. This guide is about speed: a simple, fast setup you can build from scratch.
In short
- Capture: Mixlab’s Screen Share node grabs part of the Blender window.
- Depth: Depth Anything V2 plus a depth ControlNet that matches your model (SD 1.5 or SDXL).
- Models: SD 1.5 for raw speed; RealVisXL Lightning for much better images at 6 steps, CFG 1.5.
- Blender tips: 80 mm lens, no overlays, square capture area.
- Speed: about 7 seconds per SDXL Lightning image on a 24 GB PC; slower on a 4 GB laptop.
Build the workflow
1. Start from the default template
If ComfyUI doesn’t open with the default image generation template, find it under Workflow → Browse Templates. Colour the positive prompt green and the negative red (right-click → Color), so you can tell them apart.
2. Replace the empty latent with screen capture
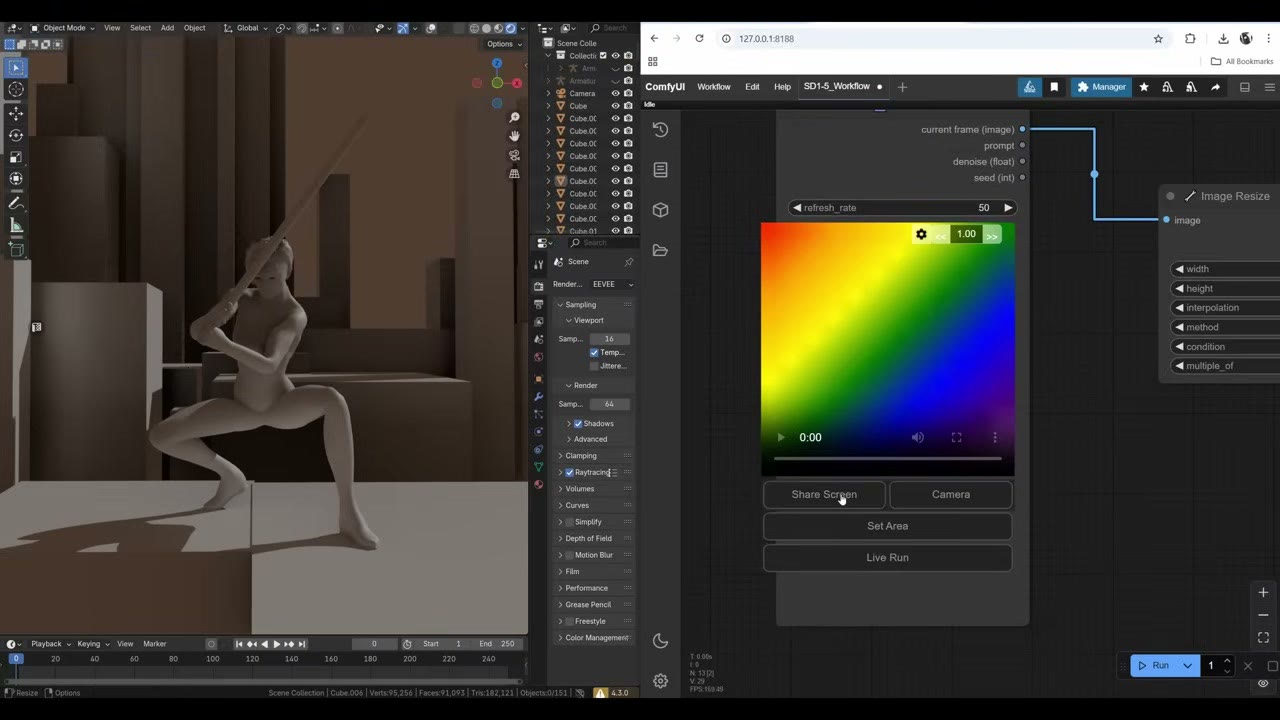
The Screen Share node comes from the Mixlab pack; install it from the Custom Nodes Manager. Its layout always draws a little outside its box. It’s a JavaScript quirk I couldn’t fix, and it doesn’t matter.
Connect its current frame to Image Resize from Essentials, a pack with many useful nodes. Resizing matters because the models were trained on fixed sizes: 512 px for Stable Diffusion 1.5, 1024 px for SDXL and Flux. Matching them gives better results with less glitching.
3. Encode, read depth, apply ControlNet
- VAE Encode compresses the image into latent space, which makes processing much faster. Connect the checkpoint’s VAE, and send the latent to the KSampler.
- Depth Anything V2 reads the depth of the capture. Get the model from the Model Manager (I use the biggest), reload the browser, and add a preview node to check the depth map while it runs.
- Apply ControlNet takes the depth image, both prompts and the VAE, and feeds the KSampler.
- Load ControlNet Model: every model family has its own ControlNets. For SD 1.5, get the ControlNet v1.1 depth model from the Model Manager.
Set up the Blender scene
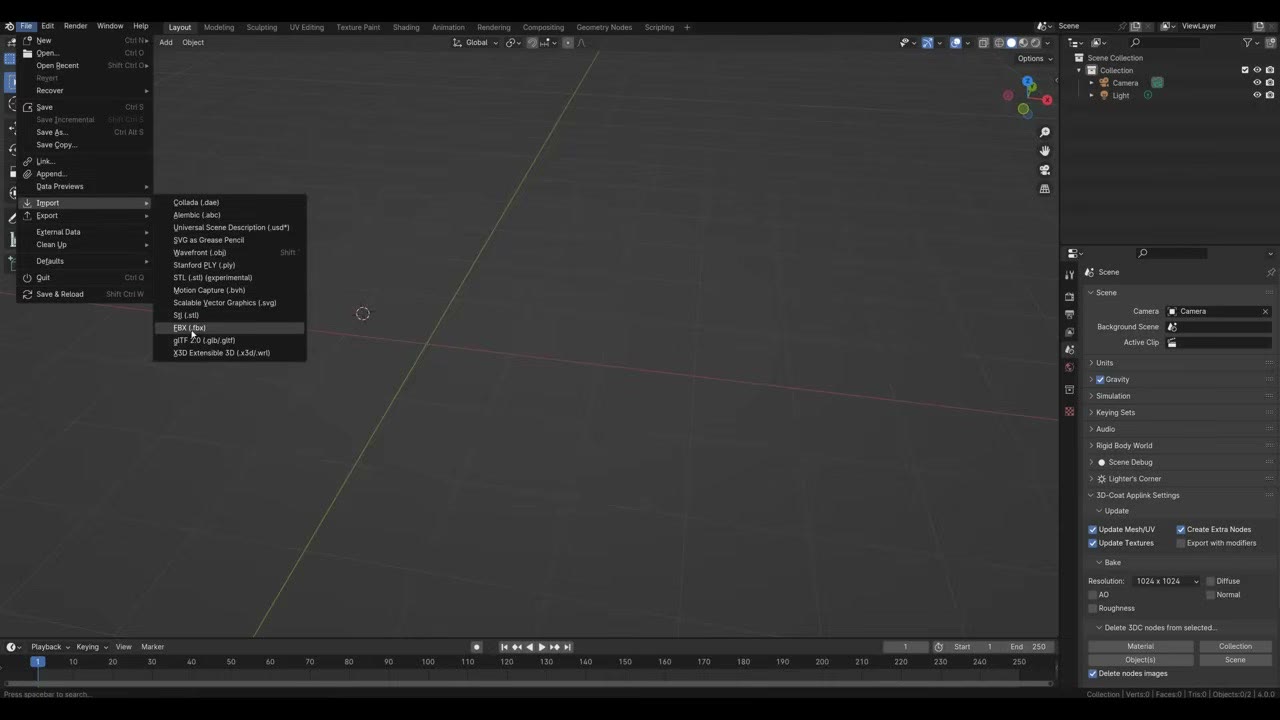
I posed a character from Mixamo, a free library of characters and animations: a crouching sword block from the Great Sword animations, imported into Blender as FBX with the armature hidden. Mixamo’s characters can’t be used commercially in a package I sell, so for that I made my own; for your own renders, Mixamo is the easy start. The character doesn’t need good anatomy. Depth ControlNets cope with very rough shapes.
The rest of the scene is cubes, spheres and cylinders: a cylinder for the lightsaber, and a city made of boxes duplicated and stretched many times. Place the camera, add a light, and use Eevee with ray tracing.
Two tweaks before capturing:
- Set the focal length to 80 mm. Wide-angle distortion makes anatomy look wrong, and AI models don’t like that.
- Hide overlays and panels (press N to hide the side panel). Wireframes or overlays in the capture can be read as part of the image.
Go live
Put Blender on one half of the screen and ComfyUI on the other (Win+Left / Win+Right), or use two monitors. In the Screen Share node, click Share Screen, pick the Blender window, then Set Area and drag out a frame. Aim for a square to match the model; I zoomed out and set it again to get closer.
Click Live Run, then Run. (My first run choked because I’d forgotten to select a checkpoint and ControlNet model; pick them from the lists, not “null”.)
SD 1.5: fast, but rough
With the prompt “a woman holding a red lightsaber in a cyberpunk city at night during rain”, the first plain Stable Diffusion 1.5 result was rather ugly. Two fixes helped:
- Lower the ControlNet strength to about 0.8, and reduce its end percent, so the ControlNet stops guiding before the end and the model has more freedom to finish.
- Use a fine-tuned model. Switching to epiCPhotoGasm, a refined SD 1.5 model, gave a better result.
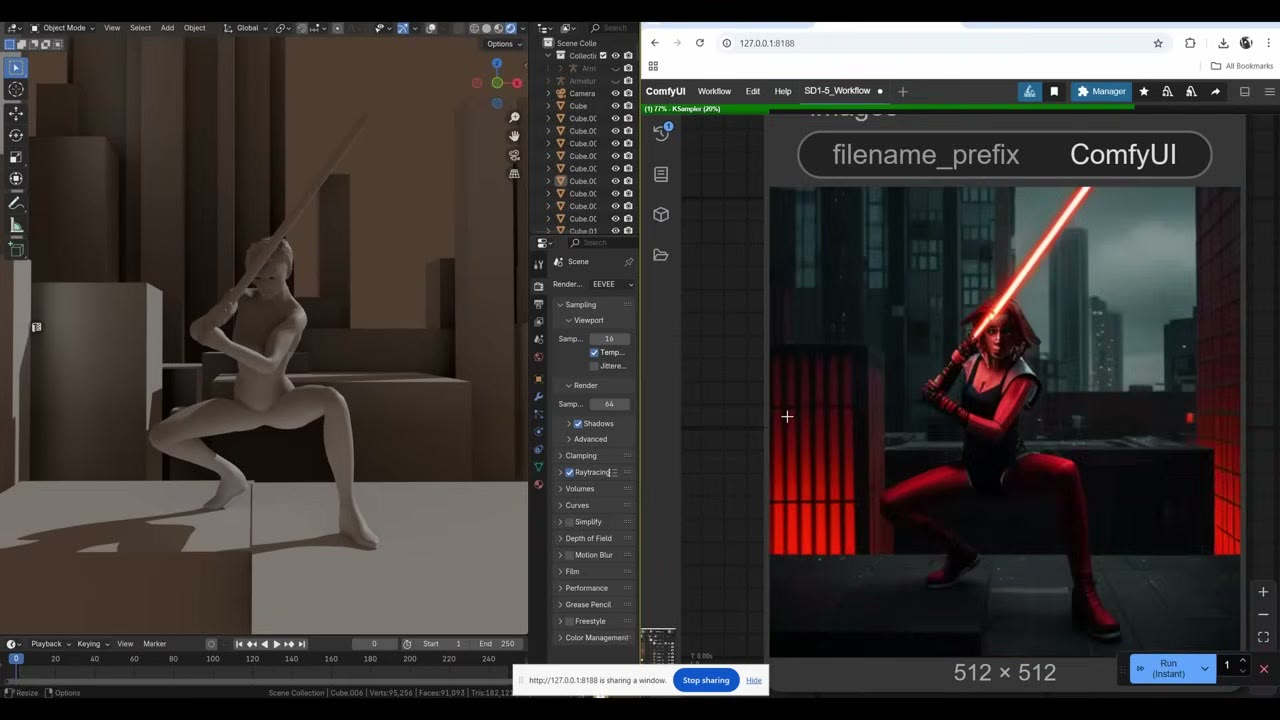
Switch the queue to Run (Instant) and it keeps rendering while you move the camera. There’s a little lag, since it’s still processing the last capture. Plain SD 1.5 looks much worse than a thumbnail would suggest, but it’s incredibly fast, and fine for testing on a low-end system.
SDXL Lightning: much better
Stop sharing first; the node is resource-hungry. Lowering its refresh rate to 50 helps too.
Then upgrade:
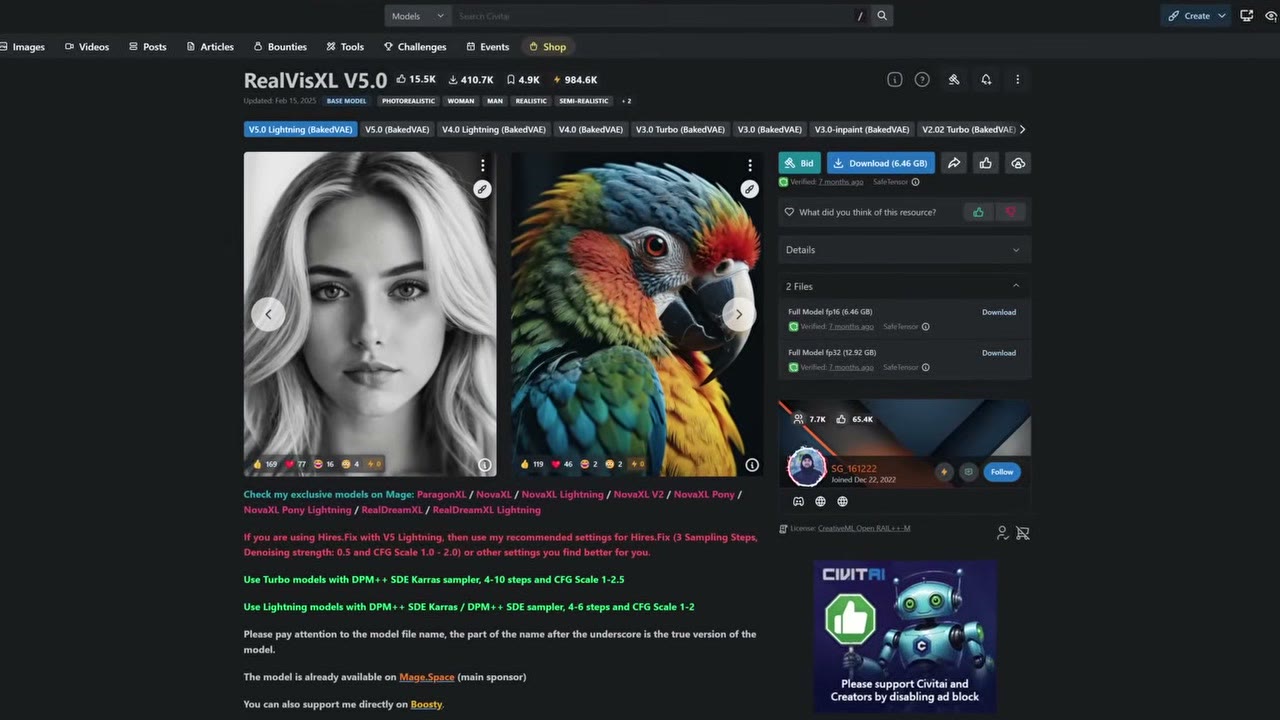
- Checkpoint: RealVisXL in its Lightning version, from Civitai. Lightning models run in far fewer steps.
- Resolution: 1024 × 1024, SDXL’s training size. At 512 you get an inferior image. Change Depth Anything’s resolution too.
- ControlNet: an SDXL depth ControlNet from the Model Manager.
- KSampler: 6 steps, CFG 1.5.
It’s not as fast as SD 1.5. On my 4 GB laptop it’s slower; on a PC with 24 GB it took around 7 seconds. But the image is much, much better. Move the camera, or grab a box and place it somewhere new, and run again.
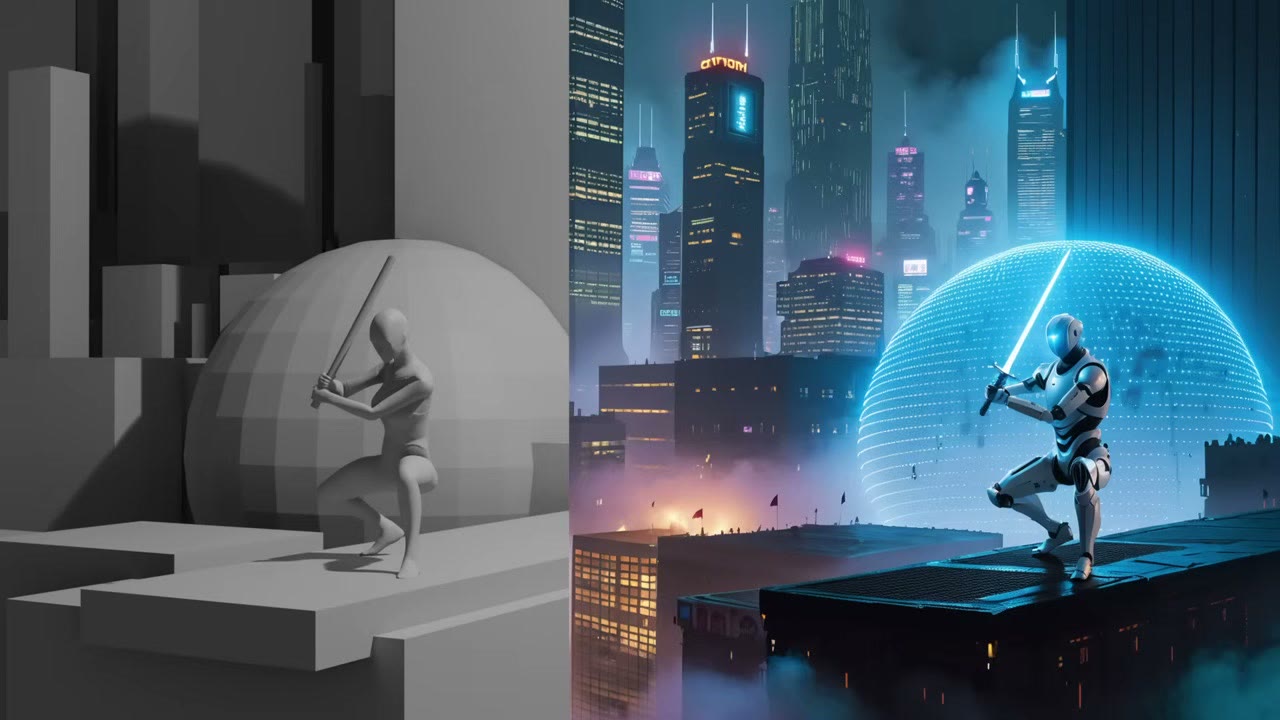
Changing the scene with a prompt
With the same blockout, “medieval night in front of a castle, gloomy day” turned it into a knight. Adding moss, rocks and grass to the prompt and lowering the ControlNet strength gave a more natural scene. The first face was funny; the next run covered it with a helmet, and the castle looked pretty nice.
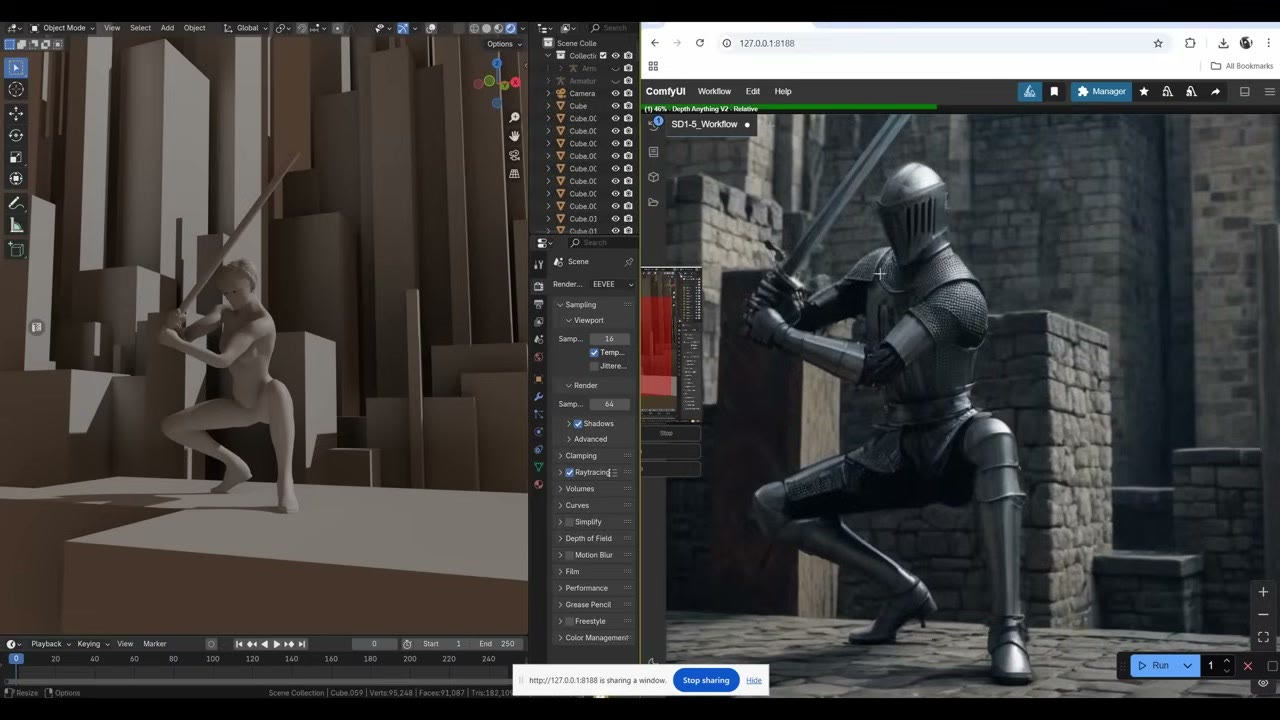
Better geometry gives better results. Swap the boxes for blobby ground meshes or actual castle models in Blender and the renders improve a lot. Still, it’s impressive what an extremely barebones setup can do.
Next steps
For a later version of this setup that designs props (guns, tanks and soldiers), see live sci-fi guns from Blender. For batch rendering a whole folder of screenshots at higher quality with Flux, see the automated 3D-to-concept-art pipeline. The workflows are on my Patreon.
Watch the video version (15:16)
Everything above is in the video too, if you'd rather follow along on screen.
FAQ
Which model is best for real-time AI rendering from Blender?
Plain Stable Diffusion 1.5 is the fastest but looks rough. A fine-tuned SD 1.5 model like epiCPhotoGasm is better. SDXL Lightning (RealVisXL) looks much better and is still fast at 6 steps and CFG 1.5.
Why use an 80 mm lens in Blender?
Wide lenses distort anatomy, and AI models don’t handle distorted bodies well. A longer focal length keeps proportions natural.
Should wireframes or overlays be visible in the captured viewport?
No. The model may interpret them as part of the image. Hide overlays and side panels before capturing.

Anton Tenitsky is a 3D artist with 15+ years in computer graphics, working with Nickelodeon, Gameloft, Marvel Rivals and many other clients. More about me