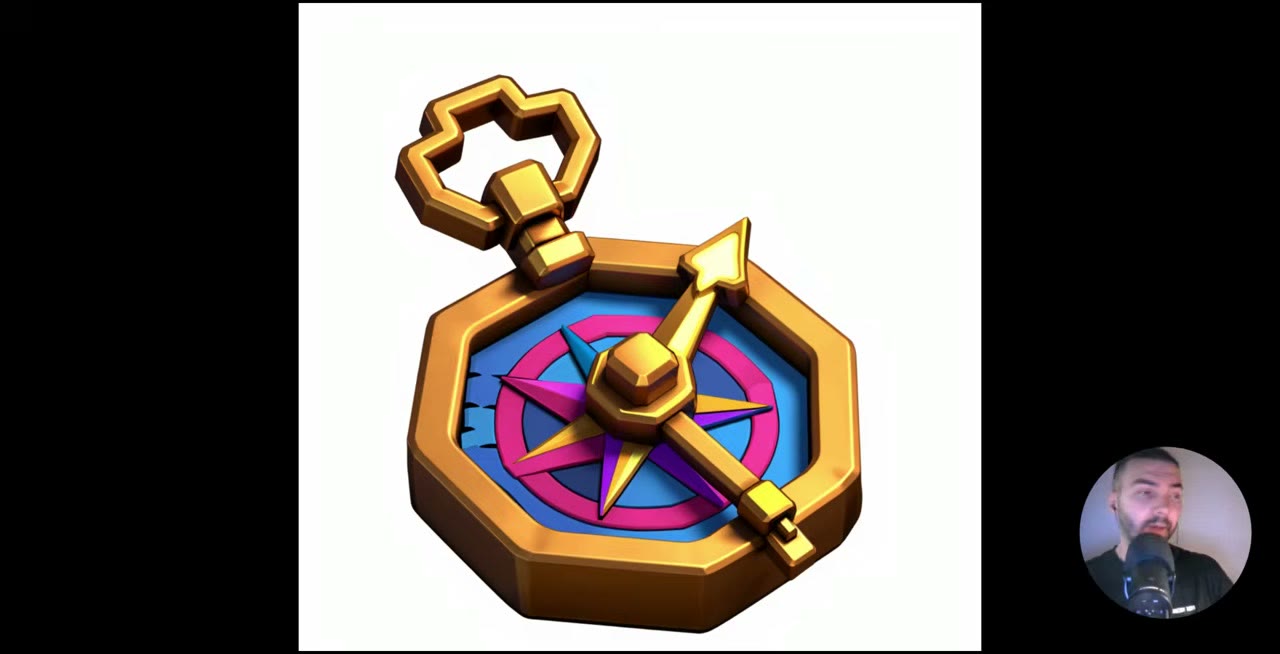
Every game needs hundreds of assets that look like they belong together. Each of them can start as an image and be turned into a 3D model. This guide builds that image base:
- Train a style LoRA on a handful of your own images.
- Generate hundreds of characters and props in that style with Z-Image Turbo in ComfyUI, from a list of prompts that runs on its own.
- Turn the best images into 3D models with Meshy, the simplest 3D generator I’ve used. (For an open-source route, see TRELLIS 2.)
In short
- Style LoRA: 5–10 images, trained on fal for $1.70 at 2,000 steps.
- Generation: about 10 seconds per 1K image on an RTX 5090.
- Prompts: 500 of them, one per line, cycled automatically with my free Prompt Cycler node.
- Selection: generate about 2,000 images, keep the best 300.
- 3D: drop an image into Meshy, generate, then texture. About a minute each.
Step 1: Train a style LoRA
A LoRA is a small add-on model that teaches a big model a specific look. (I go deeper into what LoRAs are in how to train a LoRA on any artist’s style.) Here it’s what keeps hundreds of assets in one style.
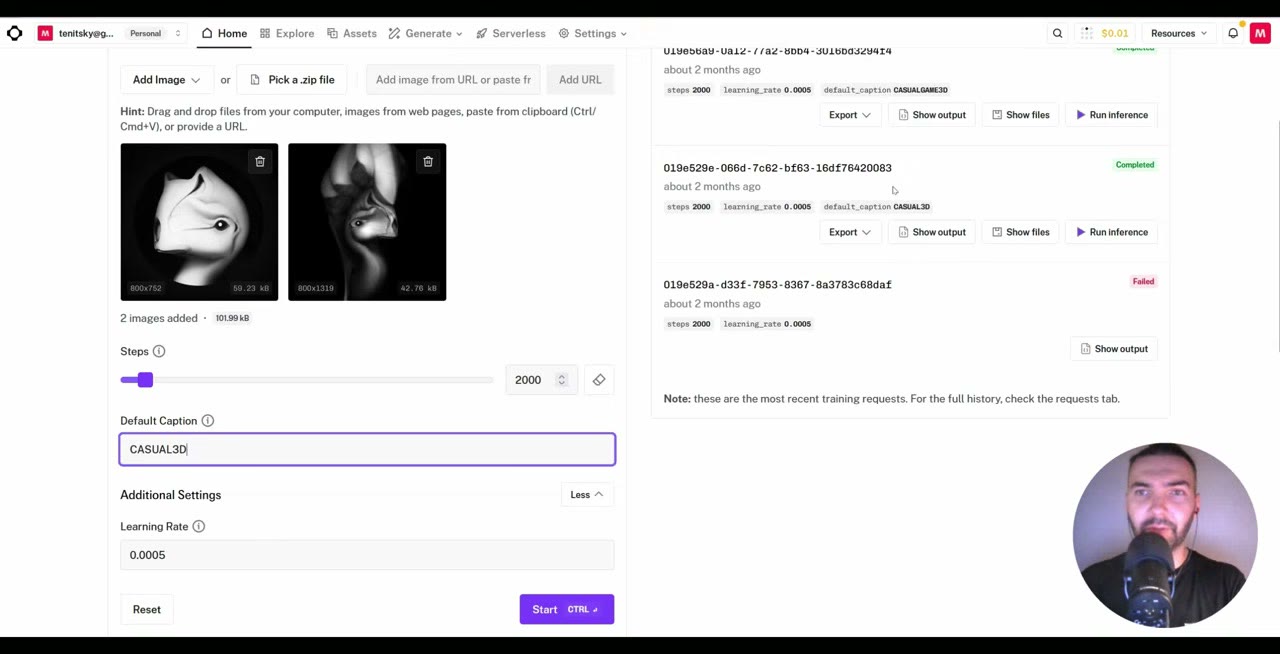
I trained mine on fal with the Z-Image Turbo Trainer:
- Add about 10 images in the style you want. Five is the minimum. I used my own artwork from before I worked with AI.
- Set a trigger word in the default caption field. It must not be an ordinary word, so use a made-up combination of letters and numbers. Mine is
CASUAL3D. When it appears in a prompt, the style switches on. - Leave the steps at 2,000 and click Start. That cost me $1.70.
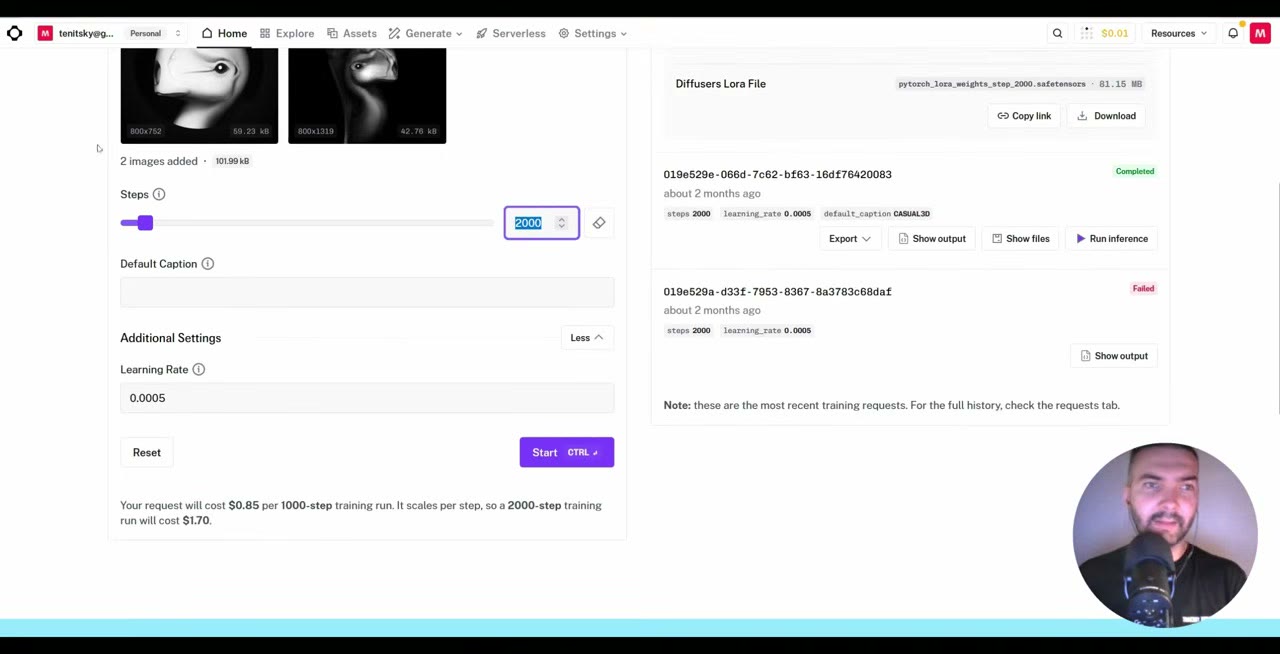
When it finishes, download the .safetensors file. It comes with a generic name like pytorch_lora_weights_step_2000.safetensors, so rename it straight away to something that says what it is, for example Z-Image-Turbo-Casual3D-LoRA.safetensors. Then put it in ComfyUI/models/loras/, or the LoRA loader won’t find it.
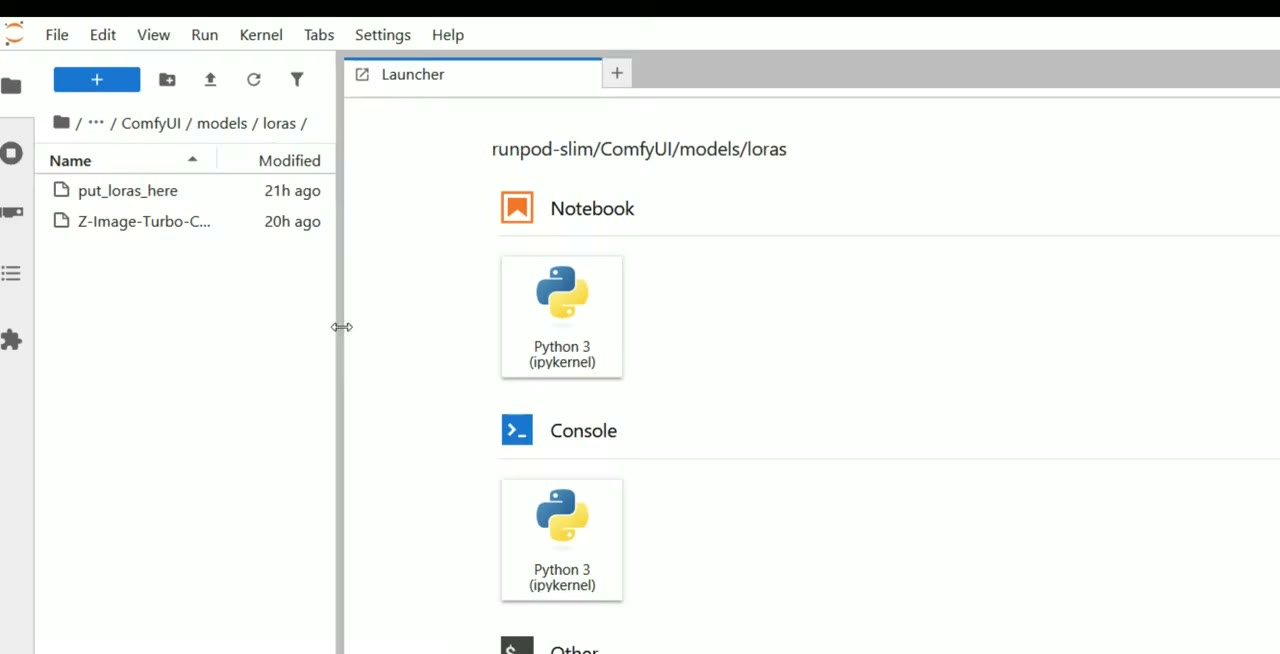
ComfyUI/models/loras.Step 2: Set up ComfyUI
I run this on a RunPod pod. The one-click template, with my LoRA included, is on my Patreon. If you’re running ComfyUI locally, skip to the workflow.
- Create a network volume of about 50 GB, enough for the models and images, about $3.50 a month and billed by the hour while it exists. It means the models (Z-Image Turbo, the Qwen text encoder and the rest) download once instead of every time, which saves about 12 minutes per session.
- Deploy the template on the cheapest GPU (from about $0.26/hr) for the first boot, while it downloads everything. That takes 12–15 minutes.
- Switch to an RTX 5090 on the same volume when you’re ready to generate in volume.
My introduction to RunPod walks through volumes and pods in detail.
Step 3: The generation workflow
The workflow is a standard Z-Image graph with two additions: the LoRA, and a prompt list.
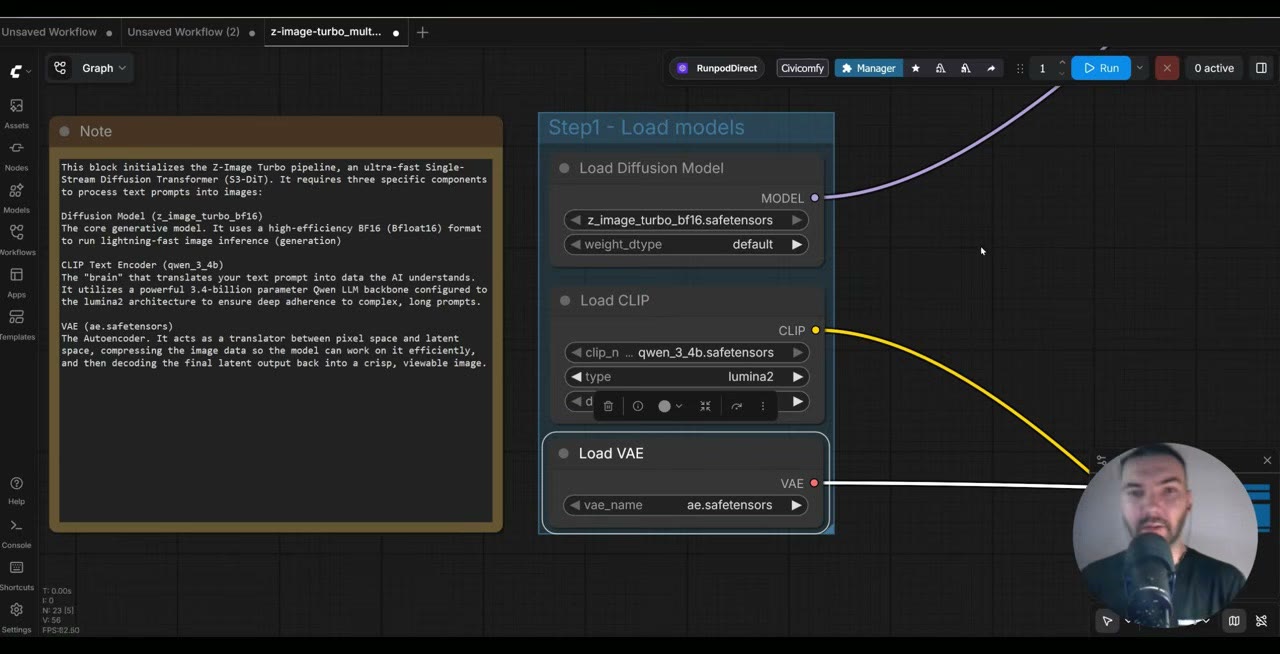
- Load Diffusion Model:
z_image_turbo_bf16. - Load CLIP: the Qwen 3 4B text encoder (type
lumina2), which turns your prompt into guidance for the image. - Load VAE: the VAE that comes with Z-Image Turbo. The VAE (variational autoencoder) turns the result from latent space into pixels.
- Load LoRA: your style LoRA, feeding the sampler’s model input.
The prompt list
The prompts come from my Prompt Cycler node, which is free. Install it from the ComfyUI Manager with “install via Git URL”. It holds a list, one prompt per line, and each run takes the next line.
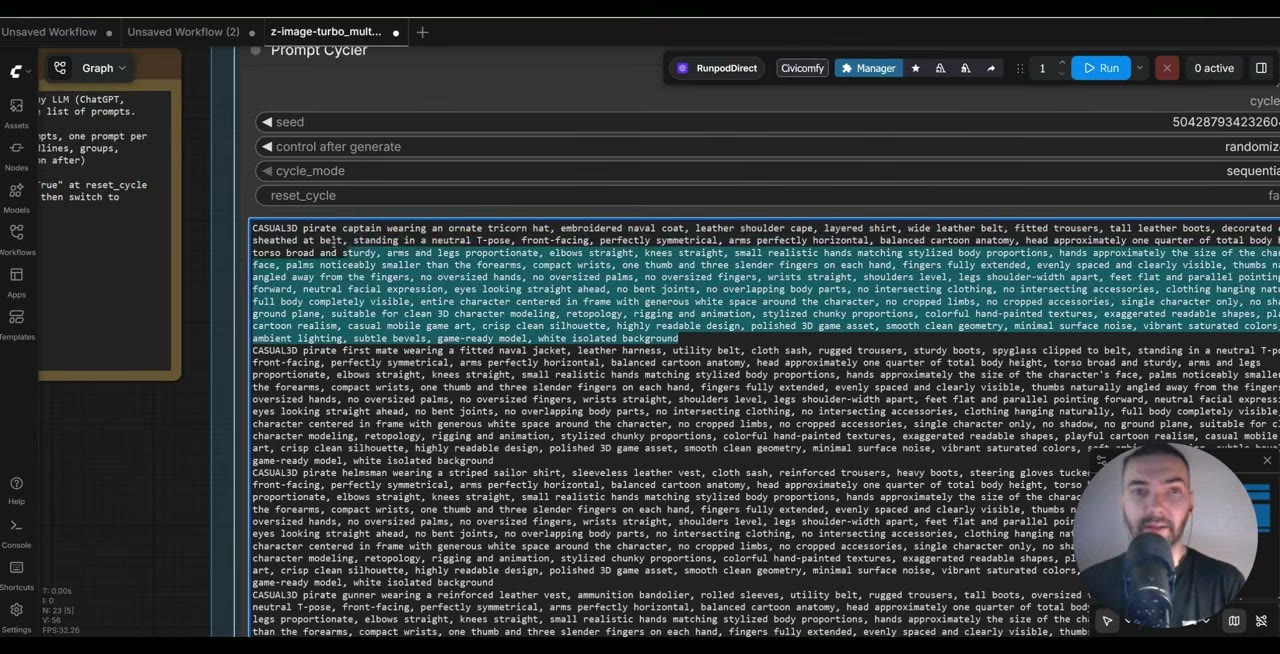
Ask a chatbot (Gemini, ChatGPT or Claude) to write descriptions of the objects you want, one per line, each starting with your trigger word. A line might read: “CASUAL3D pirate captain wearing an ornate tricorn hat…”. My list has 500 prompts. A few things I learned writing them:
- For characters, ask for a T-pose and specify proportions. It makes the 3D step and rigging much easier.
- Mix detailed and short prompts. Less description sometimes gives the model more freedom and a better result.
- Include props, not just characters.
The prompt goes into the text encoder through a string connection. A preview node shows which prompt is running. I leave the negative prompt empty, because Z-Image does well with positive prompts alone.
Resolution and sampler
The Empty Latent Image node sets the size. There’s a note in the workflow listing resolutions that work well with Z-Image; I used 1K. I leave the KSampler at the settings the workflow ships with. Once you have values that work for a model, there’s little to gain from tweaking them.
Saving: the local save trick
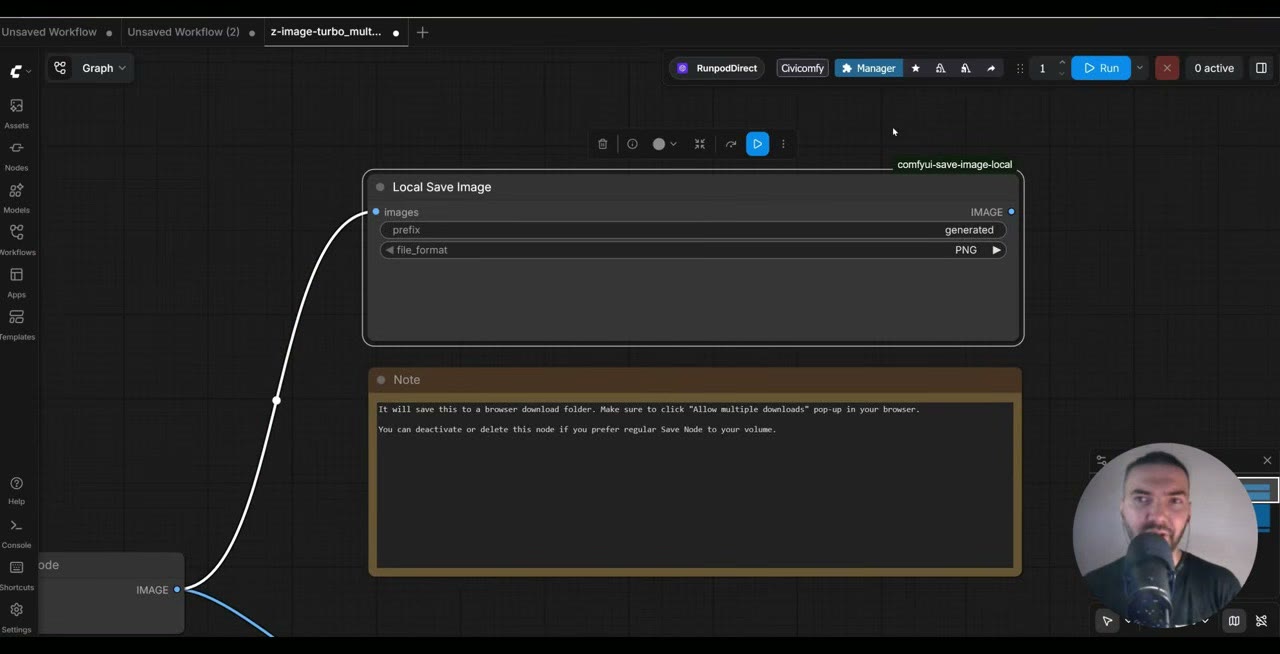
On a pod, the normal Save Image node writes to the network volume, so you’d have to fetch every image through JupyterLab. The workflow also has a Local Save Image node that sends each image straight to your browser’s downloads folder. Allow multiple downloads when your browser asks.
Step 4: Run it, then pick the best
Queue with Run (Instant) and it works through the whole list. On an RTX 5090 each image takes about 10 seconds; bigger GPUs get it down to a couple of seconds. The first image after loading is slower, and occasionally the first run hangs on RunPod. If nothing happens for a long time, restart ComfyUI and try again.
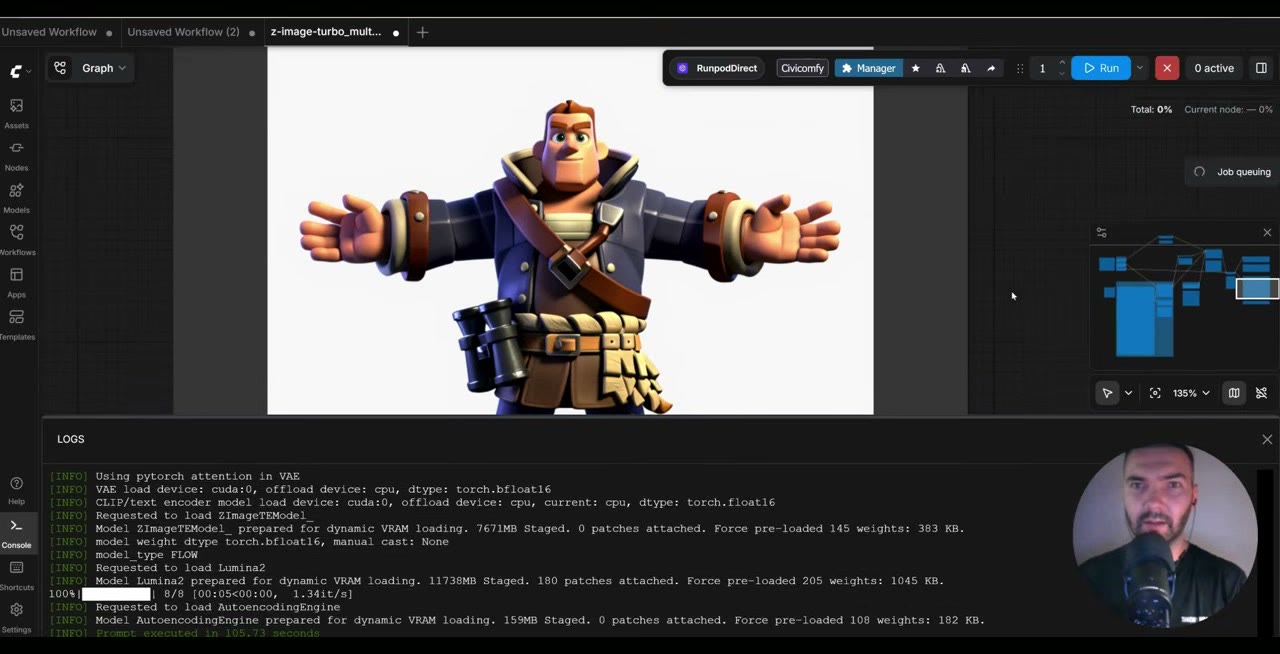
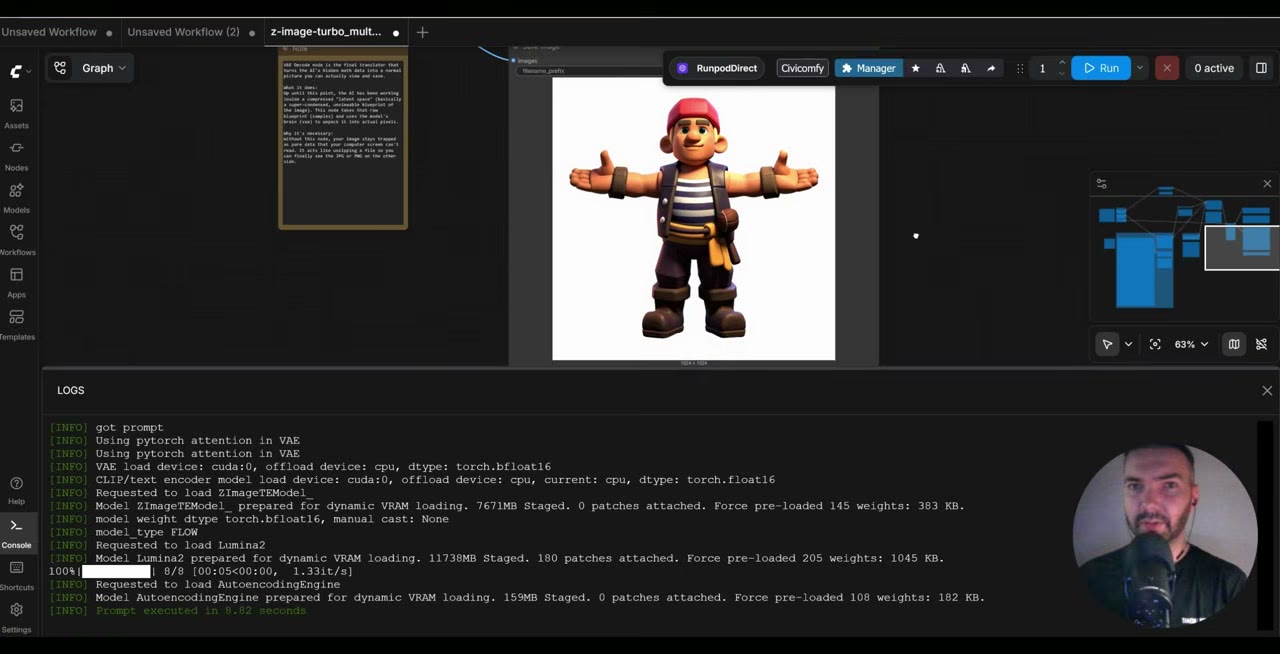
Not every image works. Some have odd fingers, broken parts or props floating in the air. For open-source models the hit rate is good, but plan for selection: generate about 2,000 images and keep the best 300.
Step 5: Turn images into 3D with Meshy
Meshy is the simplest image-to-3D tool I’ve used:
- Open your Workspace and drag in an image.
- Meshy generates a grey model first.
- Click Texture. After about another minute, you have a textured model from the image.
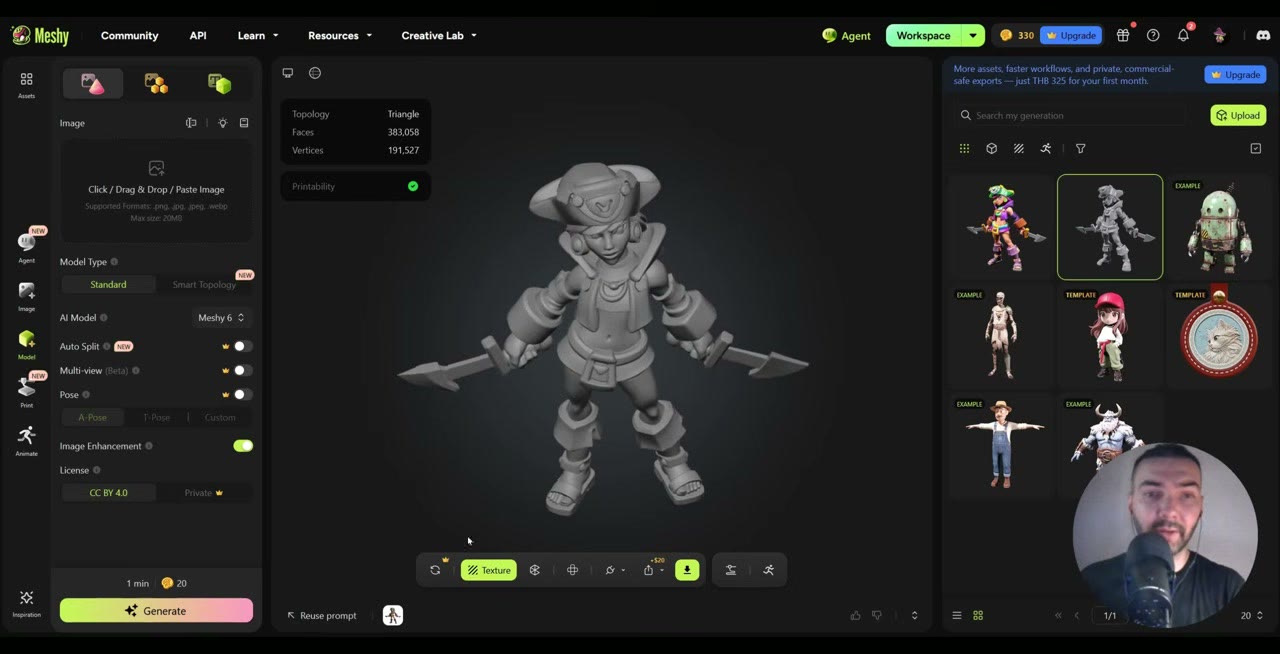
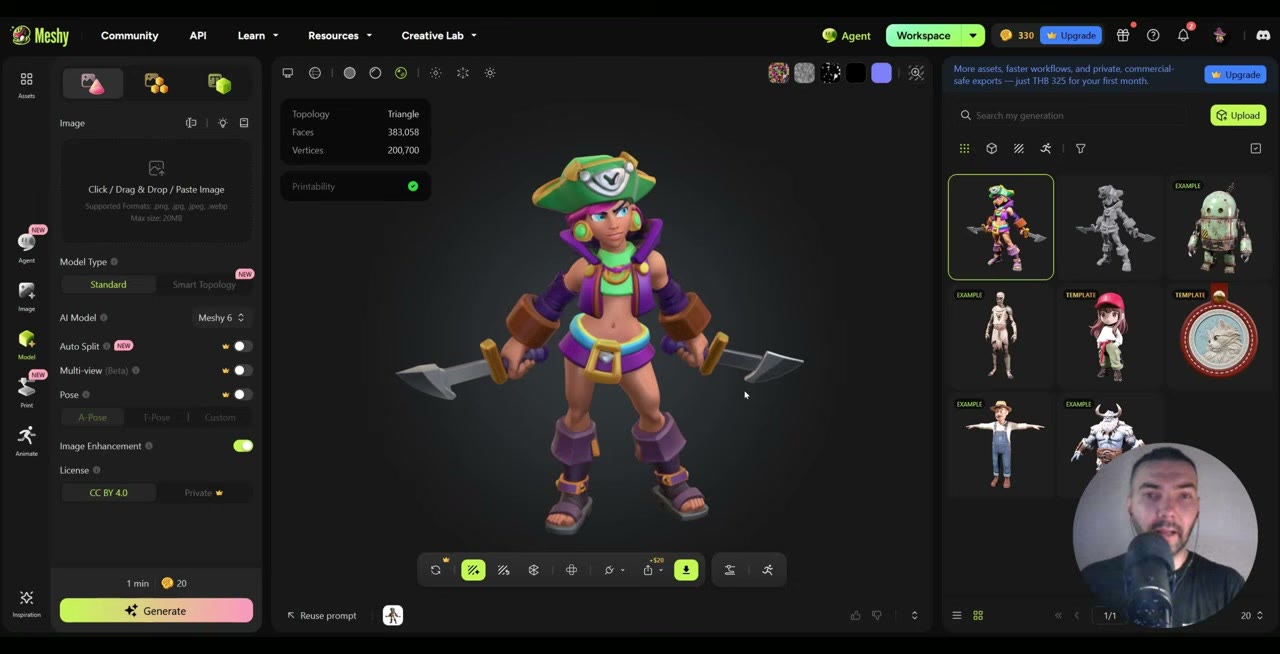
Doing this one image at a time is fine for a few assets. For hundreds, there are two ways to automate it: Meshy has an API you can call from a script, or you can stay fully open source with TRELLIS 2 in ComfyUI. TRELLIS 2’s quality is lower than Meshy’s, but it runs on your own GPU or a rented one, through a whole folder at once.
The Meshy links are referral links, as is my RunPod referral link: new RunPod accounts that sign up with Google get $5–$500 in credit after their first $10, and I get a small commission.
Watch the video version (13:30)
Everything above is in the video too, if you'd rather follow along on screen.
FAQ
How many images do I need to train a style LoRA for Z-Image?
About 10 in the style you want, and at least 5. I used my own artwork from before I worked with AI.
How much does it cost to train a Z-Image LoRA on fal?
At the standard 2,000 steps it cost me $1.70.
How fast is Z-Image Turbo?
About 10 seconds per image on an RTX 5090 at 1K resolution, and a couple of seconds on bigger GPUs. The first image after loading is slower.
How many images should I generate for a game?
Many more than you need. Some come out with odd fingers, broken parts or props floating around. I’d generate 2,000 and pick the best 300.

Anton Tenitsky is a 3D artist with 15+ years in computer graphics, working with Nickelodeon, Gameloft, Marvel Rivals and many other clients. More about me