This is a complete course in one guide: install Stable Diffusion, block out a room in Blender, generate a photoreal medieval room from its depth, project that image back onto the 3D room, and then put a real 3D model inside it, lit and shadowed to match, with a short camera move. The idea is a showroom for a prop. It doesn’t have to be medieval; it can be sci-fi or anything else.
Everything here is free. You need a reasonably recent gaming laptop (three or four years old is fine) with an NVIDIA card.
In short
- Stable Diffusion: AUTOMATIC1111 web UI with epiCPhotoGasm and the ControlNet extension, preprocessor depth_zoe, control weight 0.7.
- Blender: a box room with simple bevelled shapes, an 18–24 mm camera, a Z-depth pass saved as 16-bit PNG and blurred slightly.
- Projection: Background shader, linked materials, subdivided meshes, UV Project from View.
- The prop: a free model from Sketchfab, colour-matched, with a shadow catcher, light linking and bloom.
The lighthouse guide covers the depth-to-render part in more detail. What’s new here is the prop and making it sit in the AI image.
1. Install Stable Diffusion (AUTOMATIC1111)
- Install Python and Git for Windows from the links in the web UI’s README: standard installs, click OK all the way.
- Create a folder on your C: drive, click in Explorer’s address bar, type cmd and press Enter.
- Paste the
git cloneline from the README and press Enter. - Run
webui-user.bat. The first start downloads a lot of packages and can take 10–20 minutes.
Dark mode: right-click webui-user.bat → Edit, add --theme dark to the command-line arguments, save, and run it again.
Models
The web UI may come with Stable Diffusion 1.5. At the time, the newest was Stable Diffusion 3.5 on Hugging Face (you need an account): Medium is best for consumer hardware at about 5 GB; Large and Large Turbo are about 16 GB each.
I used epiCPhotoGasm from Civitai. Put model files in models/Stable-diffusion and click the refresh button next to the model list. Prefer .safetensors files: unlike .ckpt, they can’t contain executable code. Switching models takes a few seconds, or about 40 for a big file.
Images are saved automatically; to change the folder, paste a new path in Settings and click Reload UI.
ControlNet
Extensions → Available → Load from, search for sd-webui-controlnet and click Install. Download the depth model from lllyasviel/ControlNet-v1-1 into the extension’s models folder.
2. Block out the room in Blender 4.3
Blender 4.3 is a little different from earlier versions.
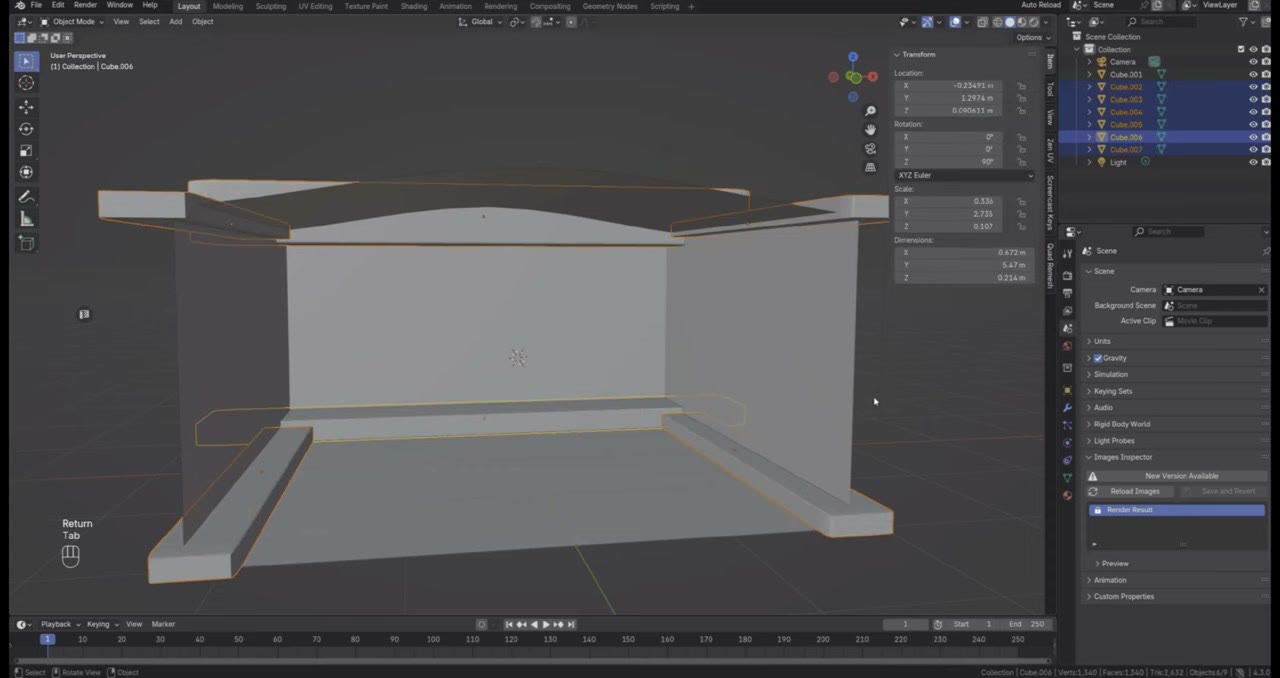
- Shell: Shift+A → Cube, scaled to real proportions (about 2 × 4 m). In Edit Mode, press 3 for face select, delete the top faces, and move it to add depth.
- Arched ceiling: select edges, Ctrl+R for edge loops (scroll for more), then use proportional editing (G, scroll, Z) to push the middle up into an arch. In X-ray mode, select the bottom vertices and press G, Z, 0 to flatten the floor.
- Decoration: a few cubes for beams and columns (G to move, S to scale per axis, Shift+D to duplicate). Keep it minor: give the AI room to think for itself.
- Bevel everything. Select the objects, Tab, Ctrl+B, scroll for segments. If the bevel is uneven, the objects were scaled on one axis: undo, Ctrl+A → Apply Scale, then bevel. Stable Diffusion prefers softer shapes, and they leave wiggle room for the projection later.
Camera
Zero the camera’s rotation values, rotate it with Ctrl to snap, then View → Cameras → Set Active Object as Camera and View → Lock Camera to View. Press Home to fill the screen with the camera view.
Use a wide lens: 24 mm, or even 18, the way real-estate photographers make rooms look bigger.
3. Render a depth pass
- Output Properties: resolution 50%. Lower resolution renders faster in Stable Diffusion.
- View Layer → Passes: enable Z.
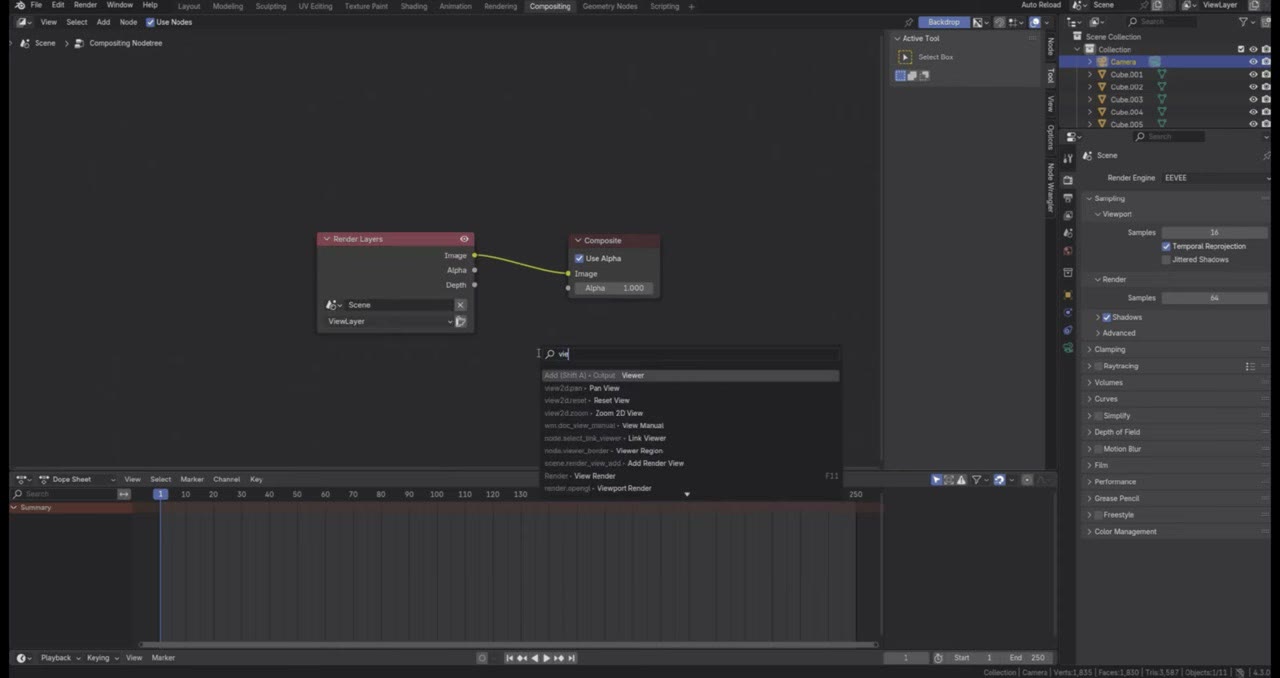
- Compositing tab → Use Nodes, render, add a Viewer and connect Depth. It’s all white at first.
- Insert Map Range and drag its values until there’s enough information for Stable Diffusion to work with.
- Color Management → View Transform: Raw. It gives a better gradient. If Stable Diffusion reads too much darkness as far away, try the Look contrast settings; even detail you can barely see, it can pick up.
- Connect Map Range to the Composite node, render, and save as PNG, 16-bit, 0% compression.
Pro tip: blur the depth map. In Photoshop, or free in Photopea (no login), apply a Gaussian blur of 2–2.5 px and export as PNG. It adds suggestiveness and really helps. Later I blurred it 6–7 px for even better results.
4. Generate the room
In txt2img:
- Drop in the depth PNG, set the size to 960 × 540 (otherwise it renders a square).
- ControlNet: tick Enable, control type Depth, preprocessor depth_zoe. Other preprocessors gave bizarre results.
- Control weight 0.7, which gives more creativity. At 1 it sticks to what it sees and can look ugly.
- Seed 10, fixed, so the same prompt gives the same image.
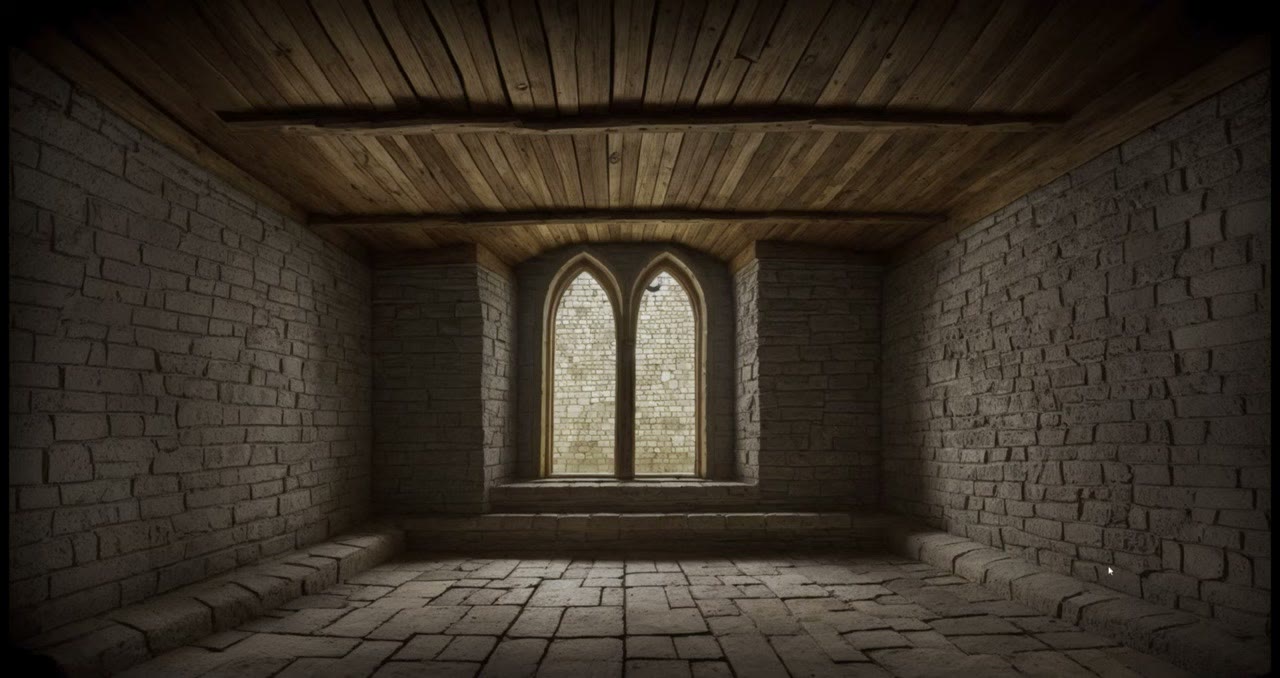
“Medieval room with window in the back” gave a result I didn’t like. The prompt that worked described a dungeon room with a simple gothic window, old broken walls and floor, a wooden ceiling with wooden beams, and a lens length:
- “simple” window, otherwise it made four or five.
- “wooden beams”, or it sometimes skipped the wooden ceiling.
- A lens length made it look more realistic. I don’t know why it helps, but it does.
Watch the preprocessor. At one point it switched itself to depth_midas and gave weird results. If things become strange and uncontrollable, check that first.
Save the settings with the image: in Settings → Saving images, enable writing the generation info, then use the PNG Info tab to send a saved image’s prompt and size back to txt2img. ControlNet isn’t restored; set it again by hand.
Upscaling
Hires. fix doubles the resolution. The Latent and SwinIR 4x upscalers give different results, and both changed a lot of detail; lowering the denoising strength from 0.7 to 0.5 kept more. It needs much more VRAM (I had to restart the computer first) and takes 5–10 minutes instead of seconds.
Krea has a free tier that upscales a handful of images. I wasn’t convinced at 1×, and with the “clarity” method some parts improved and others got worse, losing the warmth. It’s useful if your computer can’t upscale; taking a 1000 px render to 2K, it did a nice job.
What 200–300 generations taught me
- Put a window in the prompt. Without one, the lighting looked fake; with one, very natural.
- “Mossy floor” gives moss; mentioning a castle put a castle in the background.
- A frame kept appearing; adding “frame” to the negative prompt eventually removed it.
- Mountains in the prompt put mountains outside the window. “White sky” painted the walls white.
- ControlNet weight between 0.5 and 0.8 changed the results the most. Blurring the depth map 5–15 px, or adding monochromatic noise, also helps: inconsistent edges give it room. That would flicker in an animation, but here only one image is needed, and the animation comes from Blender.
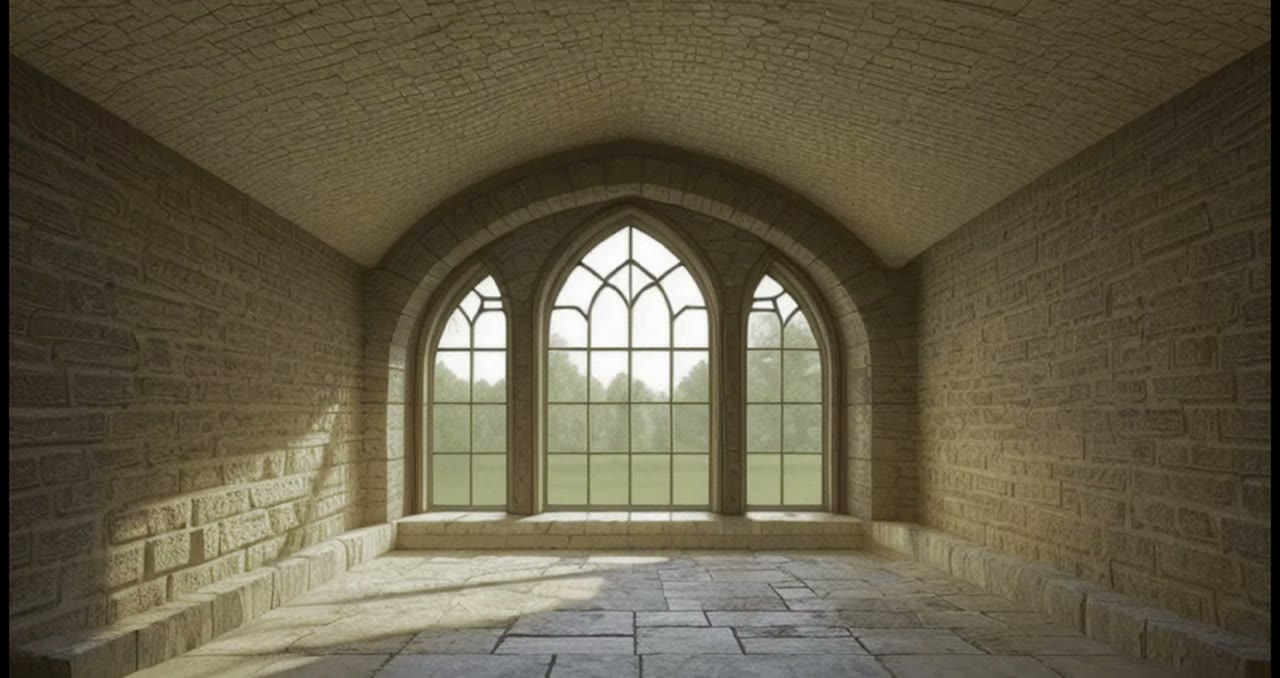
I could have combined variants in Photoshop, and retouching is always an option, but for this I wanted to show a straight export.
5. Project the image onto the room
- Create a material, select all the room objects with the textured one last, and Ctrl+L → Link Materials.
- Change the surface to a Background shader: no shading, no specularity, no shadows. The lighting is already in the AI image.
- In the Shading tab add an Image Texture with your render, into the Background colour.
- Change the view transform from Raw to AgX, or the image looks very dark.
- Subdivide the meshes several times, set the view to the camera, select everything and UV → Project from View.
The back window was wobbly because there wasn’t enough geometry behind it. I deleted the back faces and used a stretched box instead, then projected again.
6. Add a real 3D prop
I use Sketchfab to find models: the 3D preview is very good, and several museums upload scans that are free to use. Check the licence at the bottom of each page. I found a statue of Saint Andrew in the public domain. You need an account to download.
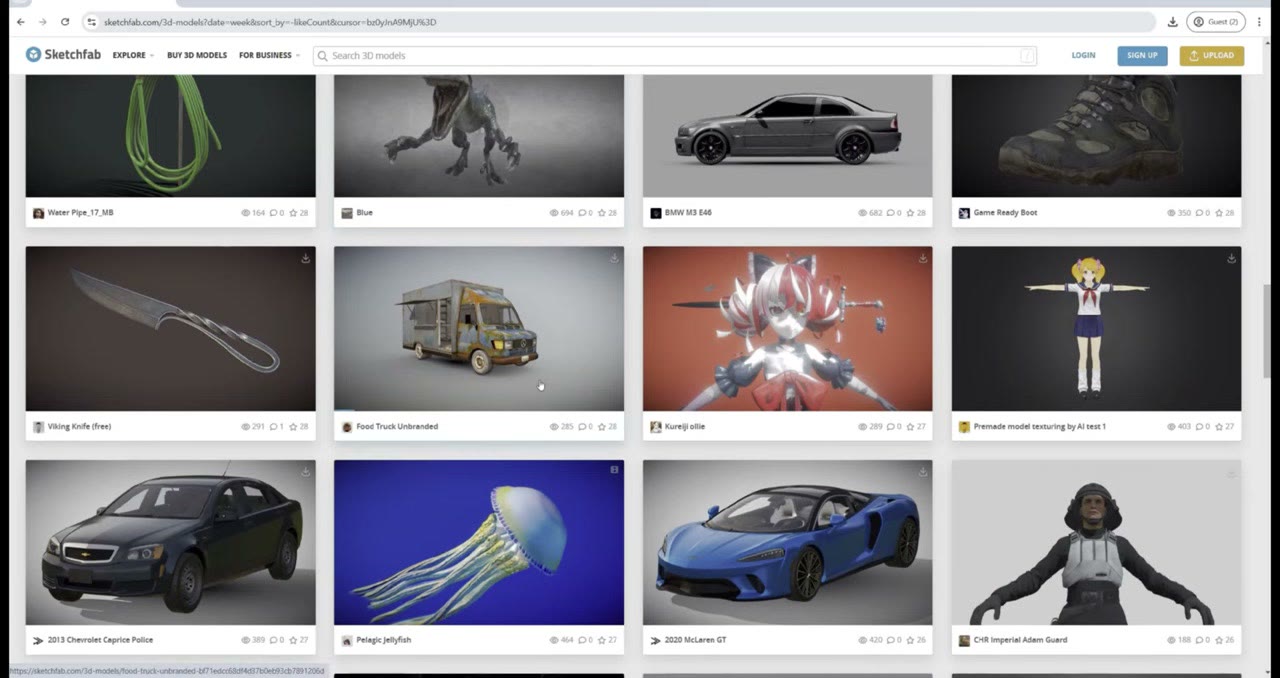
- Download as OBJ (it includes the textures), unzip, and File → Import → OBJ. Move, rotate and scale it into place.
- In the Shading tab add three Image Texture nodes: colour → Base Color, roughness (non-colour) → Roughness, normal (non-colour) → a Normal Map node → Normal.
- Match the colour: add Hue/Saturation after the colour texture. Shift the hue slightly towards the room’s warm, pinkish light, and lower saturation and value. It takes a while to find the combination that makes it belong.
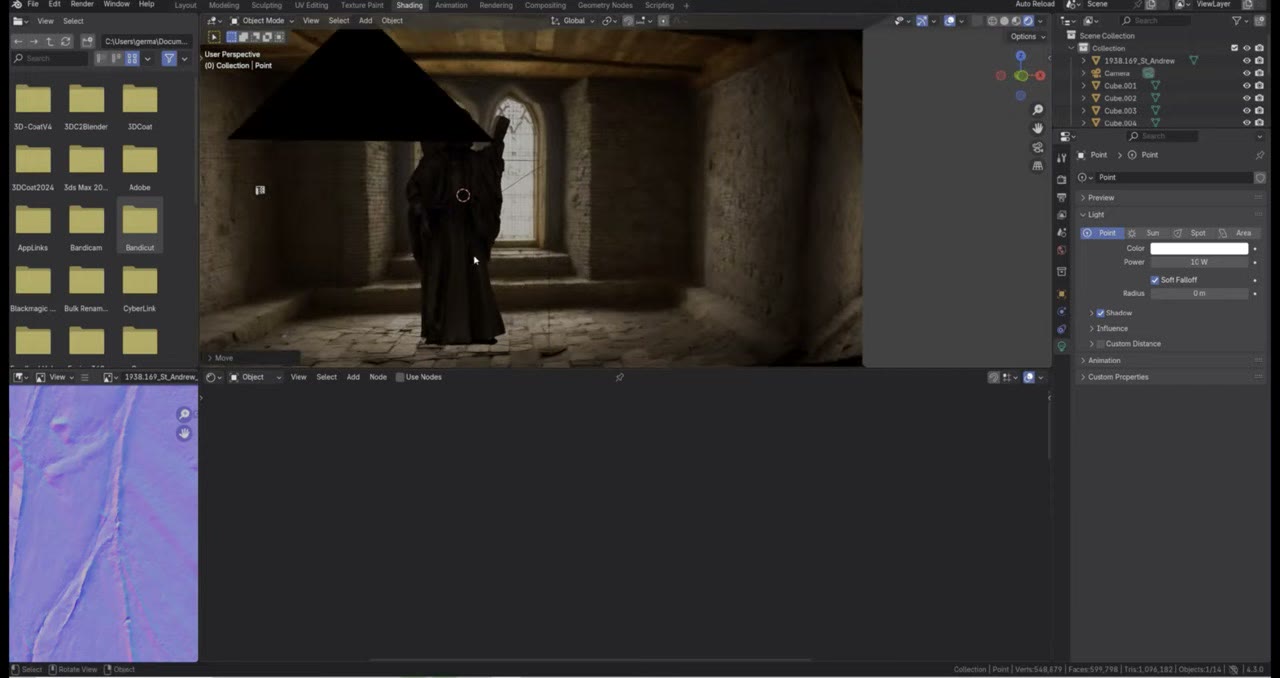
7. Light it to match the room
With Eevee, add lights that mimic the AI image:
- Key: a light where the window is. I switched the point light to an area light for a broader highlight; it also creates a rim light from behind.
- Fill: a second, much duller light from the front, to fake the room’s bounce light.
- Face: the scene’s default point light, moved onto the face (place the 3D cursor with Shift+right-click, then Shift+S → Selection to Cursor). Mine ended at about 11 W.
- Colour: make the lights slightly yellow-pink like the room; the colour picker can sample the background.
8. A shadow catcher
Without shadows the statue looks fake. Add a plane under it and give it this material:
- Transparent BSDF and Diffuse BSDF into a Mix Shader (factor 0 = transparent, 1 = diffuse).
- A second Diffuse BSDF (white) → Shader to RGB → the Mix factor. Swap the mix inputs if the shadow comes out inverted.
- In the material settings, change the render method from Dithered to Blended.
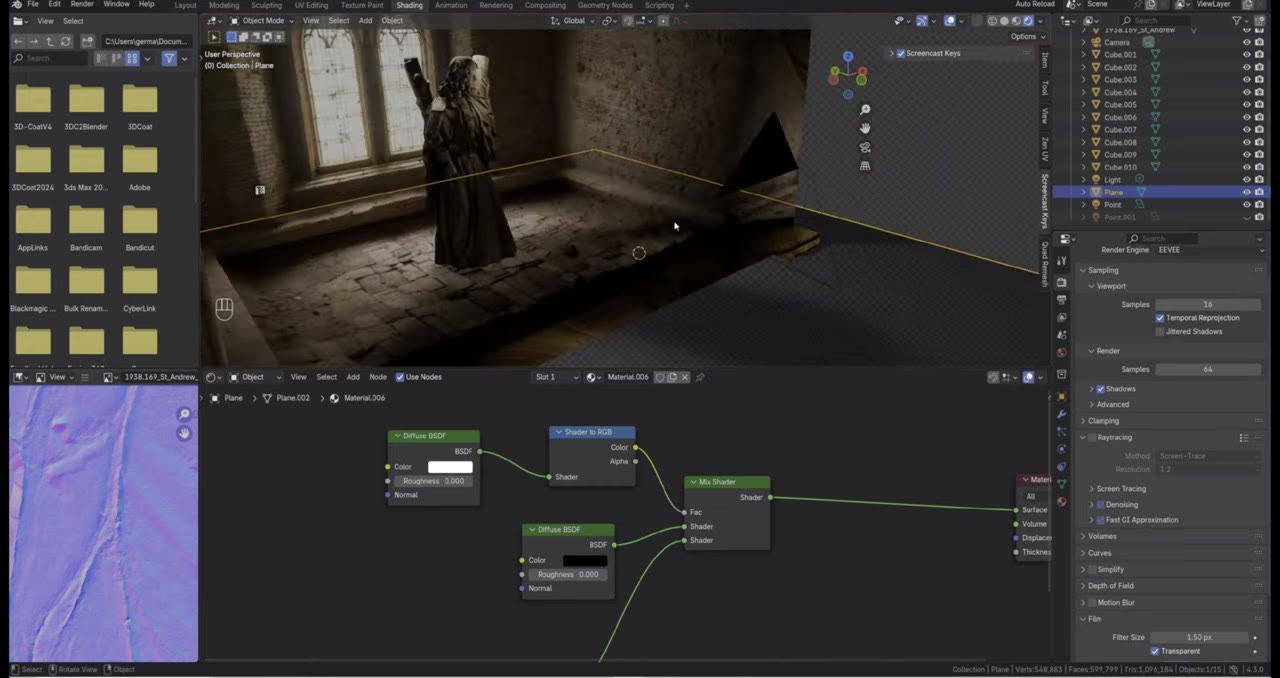
To hide the plane’s edge, rotate it slightly on X and move it until it meets the geometry. Moving the main light also changes how visible the gradient is.
Light linking (new in Blender 4.3) stops some lights from brightening the shadow: in the light’s Object → Shading → Light Linking, click New, drag the shadow-catcher plane in and untick it. I did it for the key light and the face light, and the shadow got much darker. It’s a trick, but hiding things like this is very common in production.
World colour also changes the shadows. Pure black removes the grey ambient light; white brightens everything. I used a darker, slightly brownish colour to match the room.
9. Bloom and a softer look
Blender 4.3 changed bloom. In the Compositing tab add a Glare node, set it to Bloom, and connect the render through it to the Viewer and Composite. To preview it in the viewport, set the compositor in the Shading popover to Always. Lower the threshold to taste. Bloom affects the AI background too, which adds dimension and immersion.
Back in the statue’s material, a Brightness/Contrast node with a little less contrast gives the softer, slightly washed-out look of the background. Press M on the node to mute it and compare.
10. Animate the camera
- Split the view, press Numpad 0, and lock the camera to view.
- Turn on auto keying, move the camera, and it keys itself. Go to frame 60 and move close to the statue’s face. Rotation wasn’t keyed the first time, so right-click → Insert Keyframe on the rotation too.
- Keyframe the focal length for a zoom into a portrait lens.
- Depth of field: enable it in the camera, focus on the object or set the focus distance (0.1 m close up, about 2 m at the start) and keyframe it. Lower the f-stop for more blur.
- I stretched the move to frame 250 to slow it down, reduced the glare a little, and lowered the face light.
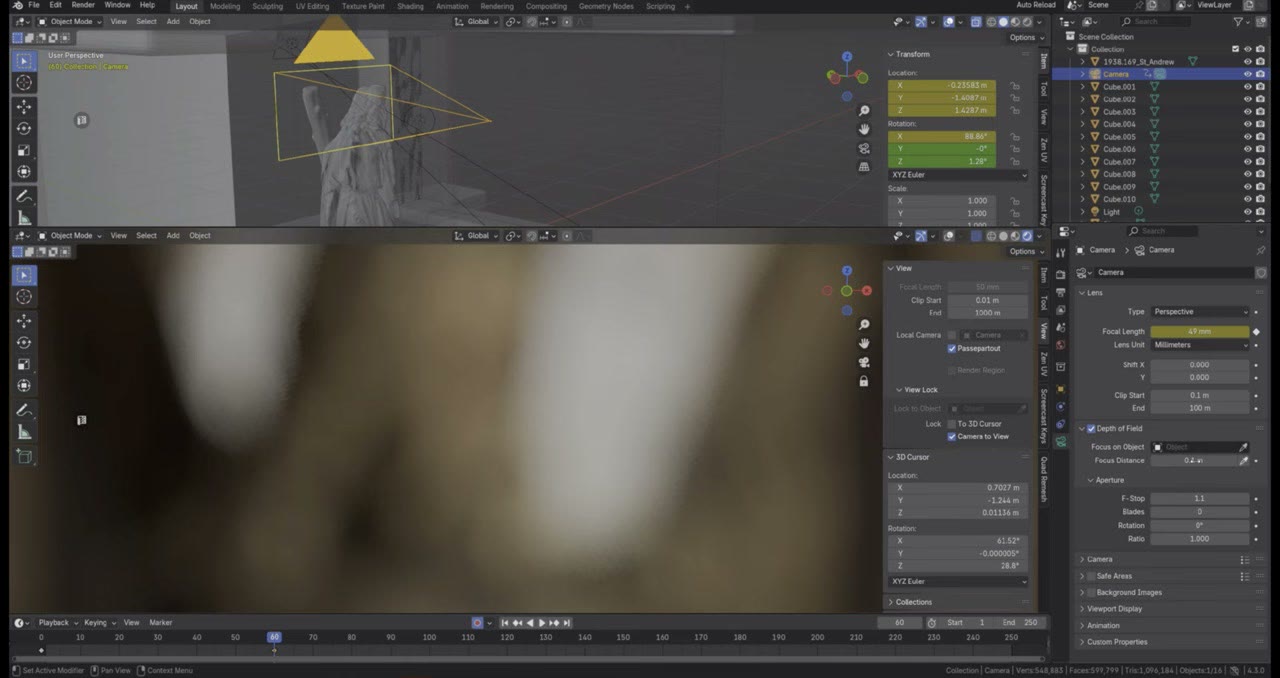
For speed I rendered straight to an MPEG video rather than a PNG sequence. Save before rendering.
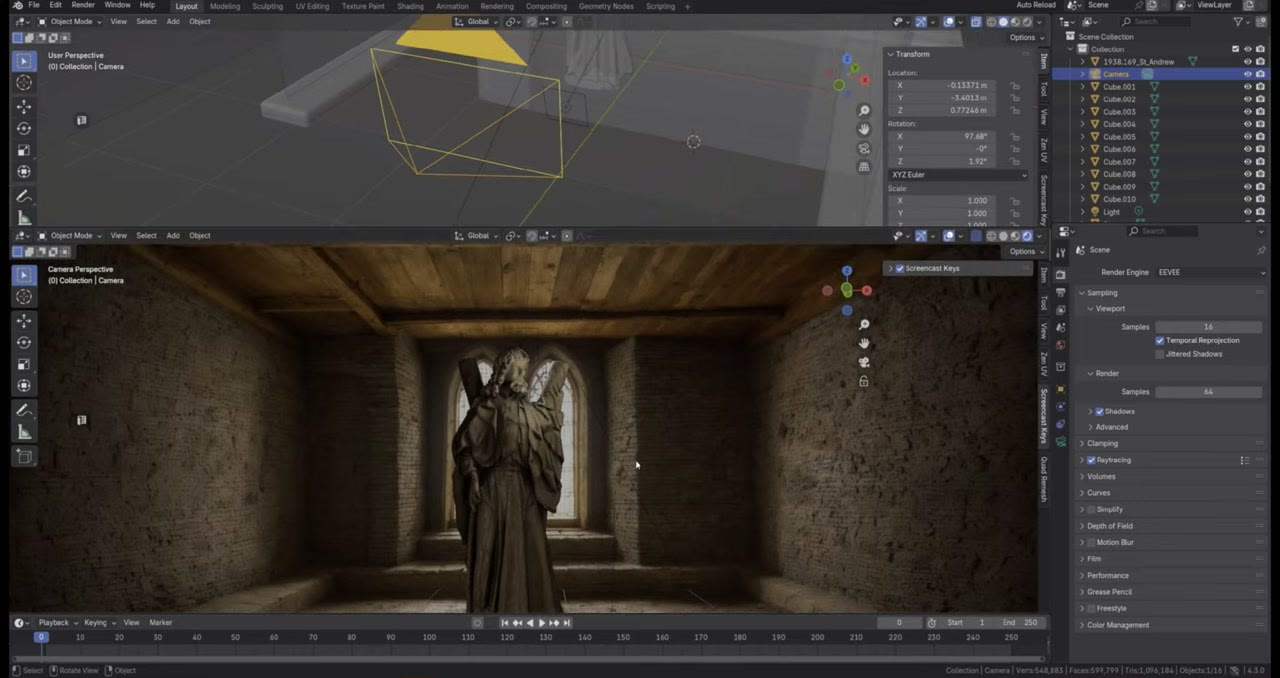
I made other versions the same way: an Egyptian-themed room with another Sketchfab prop, and a room from a different period with a simple chair in the middle.
Watch the video version (48:21)
Everything above is in the video too, if you'd rather follow along on screen.
FAQ
How do I make a 3D model look like it belongs in an AI-generated background?
Colour-match its textures with a Hue/Saturation node, light it with warm lights that mimic the room (key, rim and a dull fill), add a shadow catcher so it casts shadows on the projected floor, and soften it with a Brightness/Contrast node and bloom.
Why does the camera projection look skewed?
The geometry is too low-poly. Subdivide the meshes several times and project the UVs from the camera view again.
Does blurring the depth map help Stable Diffusion?
Yes. A Gaussian blur of a few pixels (I used 2–7) gives it more room to interpret. Blurring a lot, or adding noise, can help a single image but would flicker in an animation.
Which Stable Diffusion 3.5 model fits a consumer GPU?
Medium, at about 5 GB. Large and Large Turbo are about 16 GB each.

Anton Tenitsky is a 3D artist with 15+ years in computer graphics, working with Nickelodeon, Gameloft, Marvel Rivals and many other clients. More about me