IC-Light relights a photo from a text prompt or a light mask. It does more than move the light: it also does a really nice retouching job, close to professional level, and you can feed it any rough photo of yourself, your family or a landscape. It runs in ComfyUI on almost any gaming laptop, at home, for free, without uploading your photos anywhere.
IC-Light is by lllyasviel, the author of ControlNet (IC-Light on GitHub). There’s also an IC-Light v2, which gives better results, but when I made this it was only available as a paid, non-commercial service on its own website, not in ComfyUI. Here I use v1.
In short
- Nodes: ComfyUI-IC-Light (Kijai), KJNodes, Essentials, rgthree. Model: iclight_sd15_fc.
- Graph: checkpoint → Load And Apply IC-Light → KSampler; prompts and VAE → IC-Light Conditioning → KSampler; your photo, resized and VAE-encoded, as the foreground.
- Prompt the light: “daylight”, “foggy morning”, “neon light”, “spotlight”.
- Keep the face: Detail Transfer from the original image.
- Light masks replace the empty latent; soften them or the image burns.
New to ComfyUI? Start with ComfyUI node basics. The workflow and my light masks are free on my Patreon.
Install
- Manager → Custom Nodes Manager, search IC-Light. There are two packs, from Kijai and IC-Light Native by huchenlei. Both are useful; I install both, and use Kijai’s here.
- Also install KJNodes (Kijai’s utility nodes). Restart and reload the page.
- Manager → Model Manager, search IC-Light. There are three models; you only need one:
- FC (foreground conditioned): the one I use.
- FBC (foreground and background).
- FCON: according to the documentation, slightly worse than FC.
- After the download, just refresh the page (Ctrl+R); no restart needed.
Build the workflow
Start from the default workflow and switch the checkpoint to epiCPhotoGasm. Rename the prompts “Positive” and “Negative”, and colour them green and red.
- Load And Apply IC-Light: the checkpoint’s model goes through it into the KSampler. It picks up the FC model automatically.
- IC-Light Conditioning: connect the positive prompt, the negative prompt and the VAE; its positive and negative outputs go to the KSampler.
- The foreground: Load Image with your photo → Image Resize (Essentials) → VAE Encode → the conditioning’s foreground input.
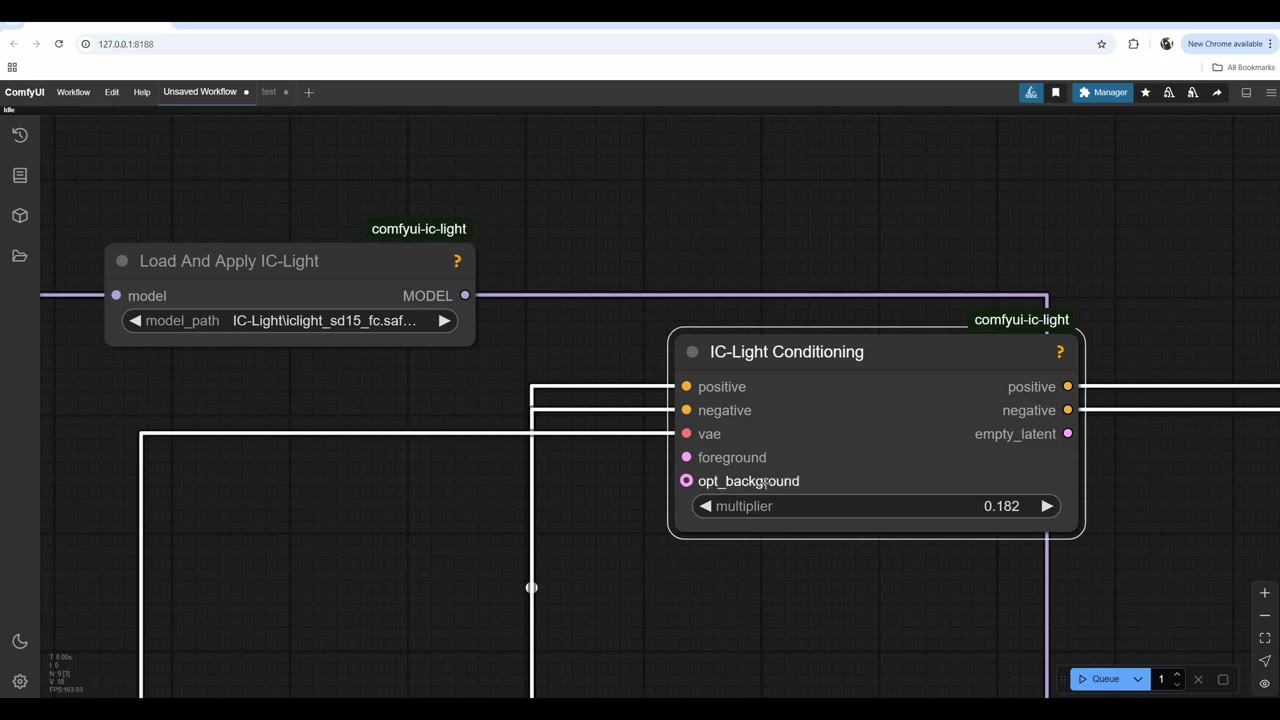
The conditioning node also has an opt_background input. I tried background images and they never looked good, so I stopped; describe the background in the prompt instead. It has an empty_latent output too, the same as an Empty Latent Image node. I keep a separate Empty Latent Image, because that input is where light masks go later.
Type a lighting in the positive prompt, such as daylight or foggy morning, and press Ctrl+Enter. Each run is slightly different; raise the batch count to see many variations. Some will be horrible, some fine to work with. Cherry-pick.
Compare, and keep the face with Detail Transfer
Add rgthree’s Image Comparer with the result as image A and the resized original as image B. Drag the slider and you’ll see it changes the face slightly. That’s the retouching side: it “improves” you. You’re not exactly the same afterwards, which is more often bad than good.
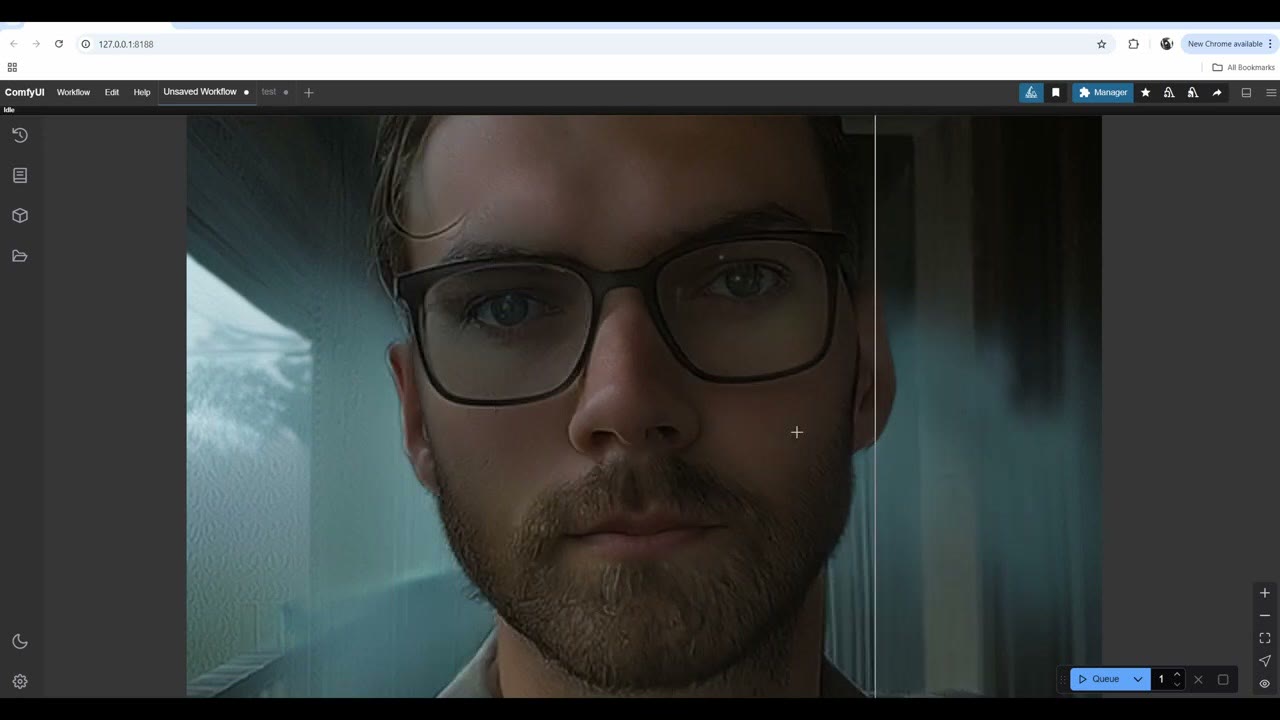
To bring the detail back, add Detail Transfer: the relit output into target, the original image into source. It works like a high-pass, unsharp-mask trick in Photoshop, and it can be too much; lower the blend factor to control it.
Fix the seed while you tune
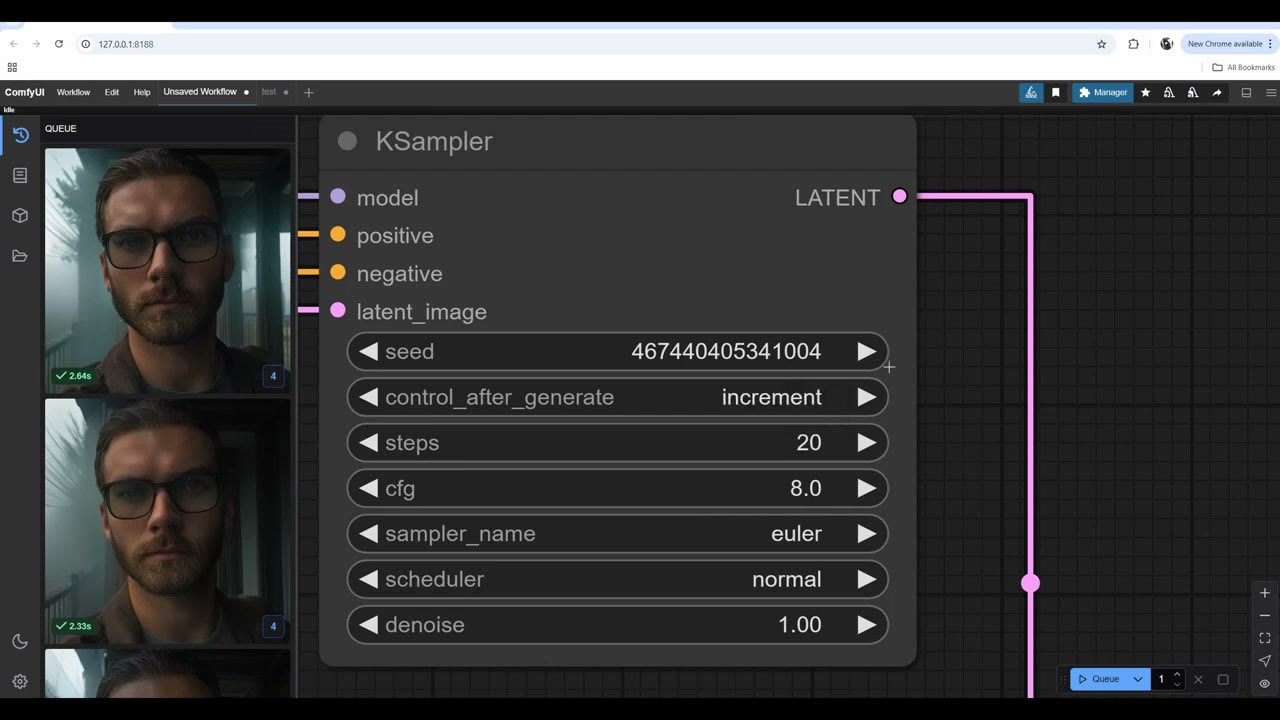
With the seed on randomize, every change re-runs everything and gives a new image. Switching to fixed doesn’t freeze the current image either, because the next seed has already been set. What I do instead: set the seed to increment, starting from 1, so each image has a known number. Go back to the number you liked (say 3), run it, then switch to fixed. Now when you change the Detail Transfer settings, only that node re-runs, in a few seconds.
Light masks
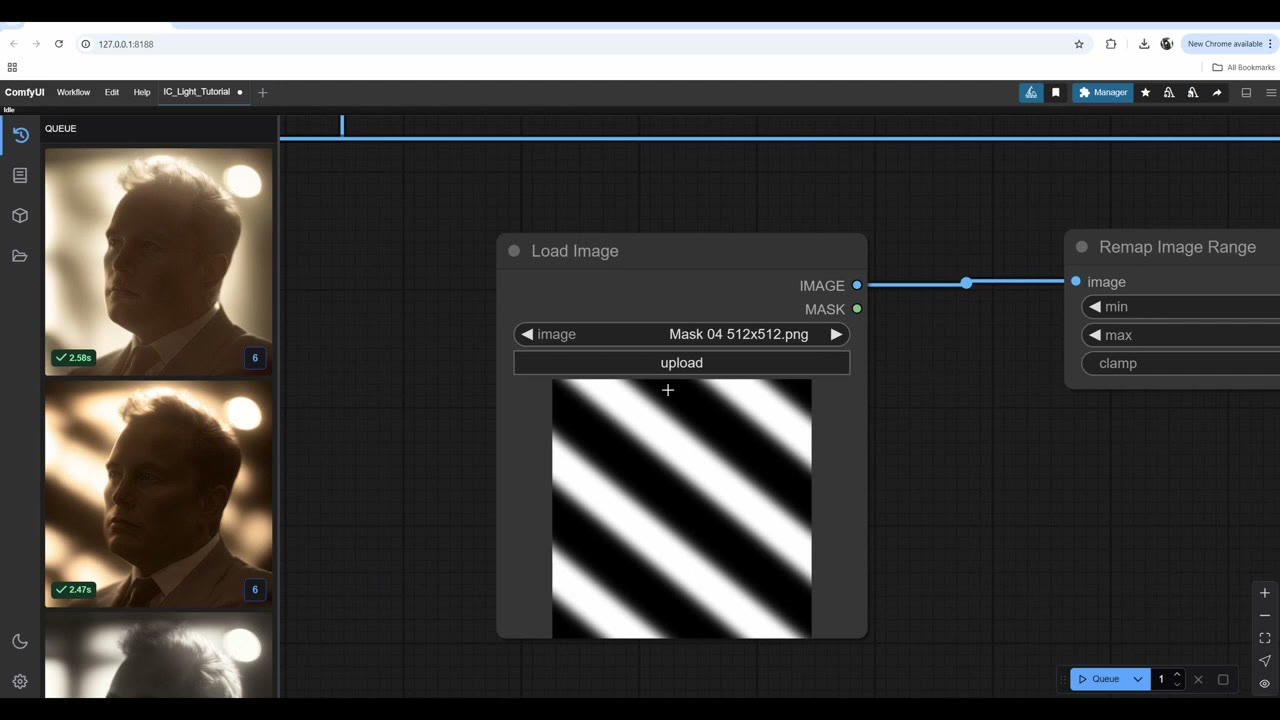
Instead of an empty latent, give the KSampler a light mask: a black-and-white image where white is light. Load the mask, VAE Encode it, and connect it to the KSampler’s latent_image. I drew a set of masks (round, stripes, diagonal lines and others); they’re on my Patreon.
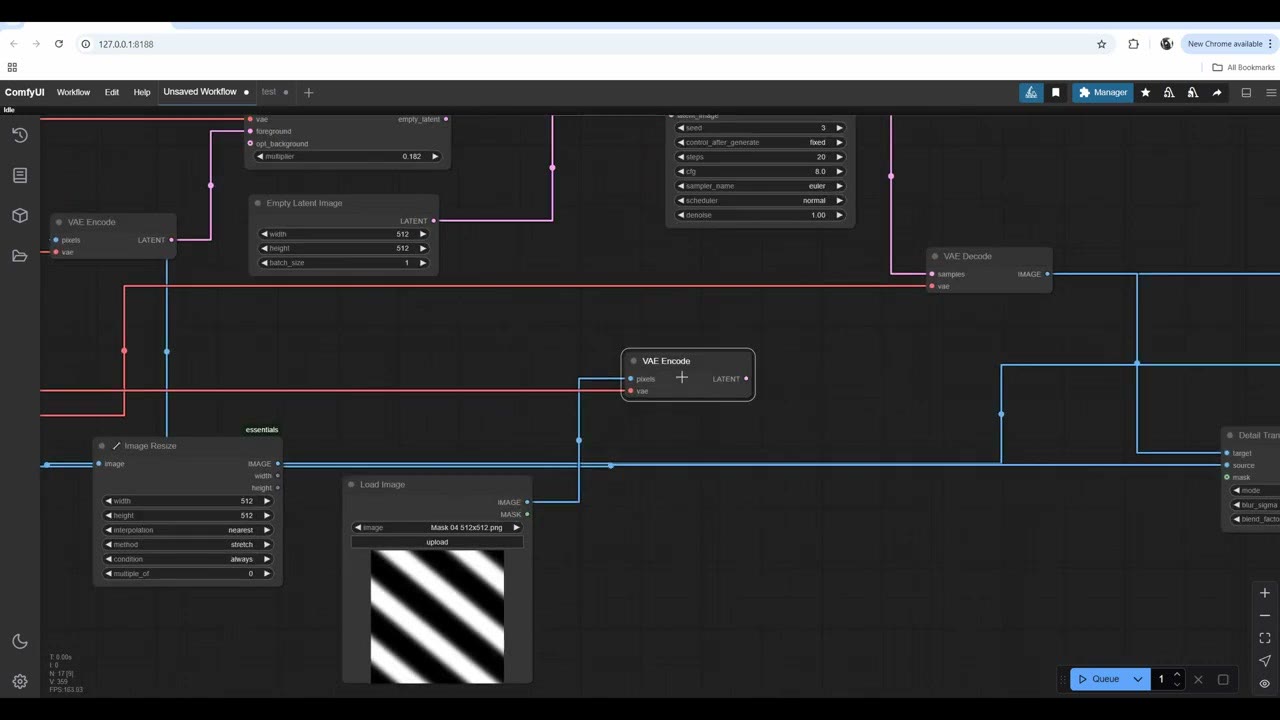
Hard masks burn the image. A pure black-and-white mask gives super high contrast, and a round mask produced a very strong light that also hit the eyes. To soften it, add Remap Image Range between the mask and VAE Encode, with a preview: raise the minimum and lower the maximum. I went down to about 20 percent. It’s not real-time like Photoshop; you run the graph to see even the preview.
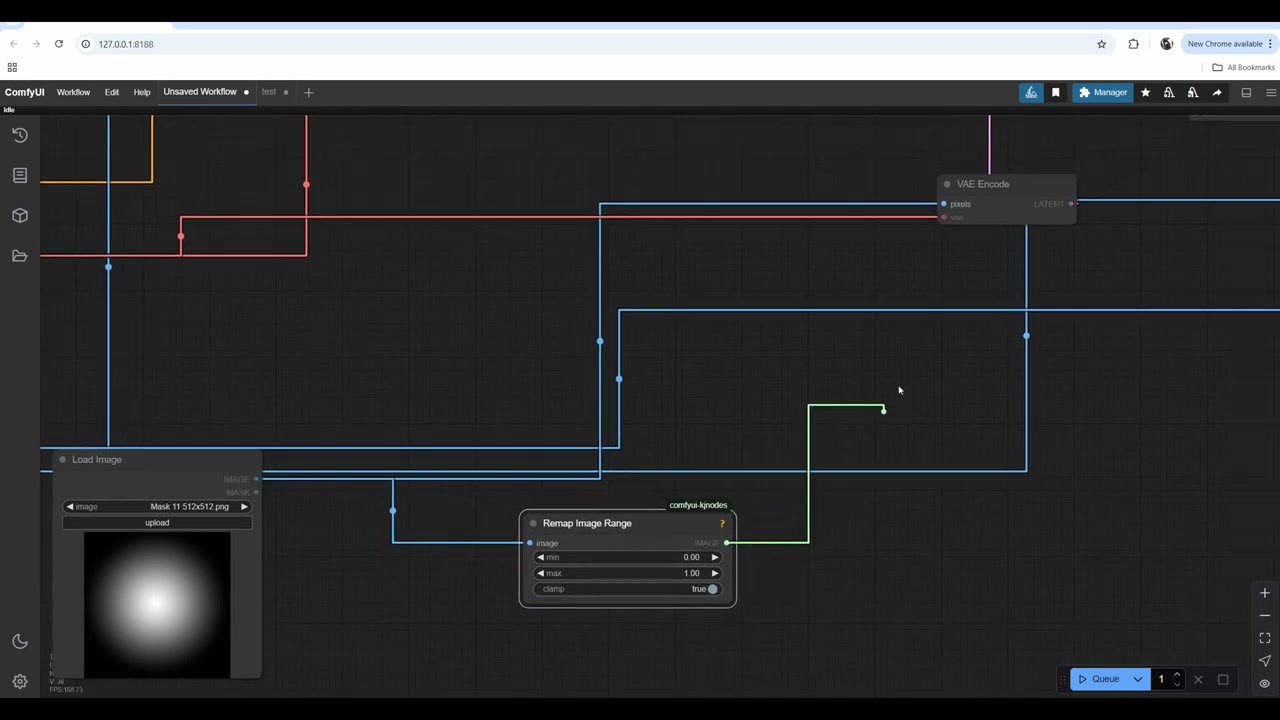
With masks, the prompt matters a lot. “Spotlight” gave harsh light; “neon light” gave neon. I usually queue six or eight at a time. (Clicking the number on a preview node shows all the previews from earlier runs, a newer ComfyUI feature; update ComfyUI now and then.)
Multiplier: IC-Light Conditioning’s default 0.182 is good. At 0.155 it got dimmer; at 0.25 it burned the image almost into a stylised look.
Black-and-white results
Sometimes it returns black-and-white images and I don’t know why. Putting “black and white” in the negative prompt made the saturation go crazy. Trying the Photon model also produced plenty of black-and-white images at first. My 4 GB laptop made them much more often than my 24 GB PC, which mostly gives colour. A prompt like “50% saturated” can help. In the end I mostly cherry-picked rather than prompting a lot; I keep prompts minimal.
Higher resolution
SD 1.5 and IC-Light are trained on 512 × 512. You can still feed a 1024 × 1024 image, as long as the mask is the same size (use a resize node). The result was a bit burned and more stylised, but higher quality. That can be worth it, because upscalers sometimes soften skin in a plastic way.
Paint the light by hand
You can also paint a light mask directly:
- Right-click Load Image → Open in Mask Editor, and paint where the light should fall (I tried a 1950s noir look on a face).
- Convert Mask to Image, then into VAE Encode.
- If the result is blurry, check the sizes: when the mask doesn’t match the 512 × 512 image exactly, it breaks everything.
- Soften it: Mask Blur (Essentials) before converting to an image (I used 66), then Remap Image Range at about 30 percent with the whites lowered.
Groups and landscapes
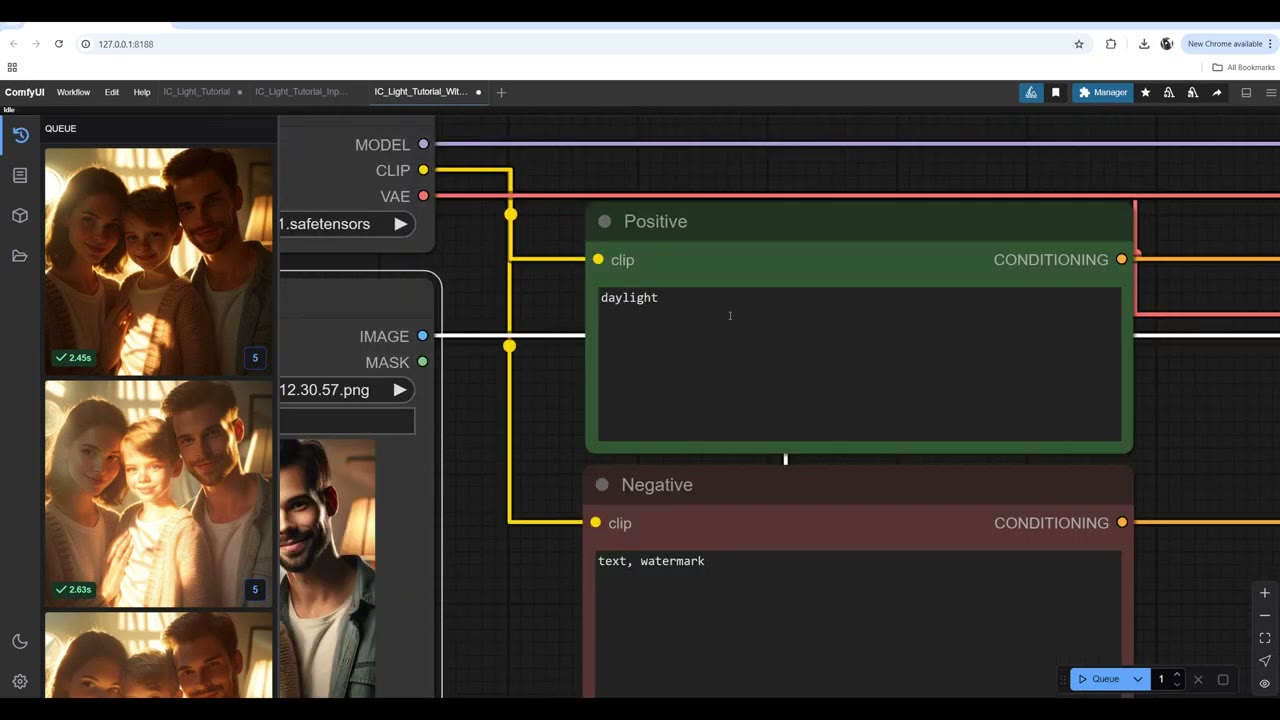
IC-Light also works on several people. On a generated family photo, “daylight” gave interesting results. A beam-of-light mask on the child, or “beam of light” in the prompt, created some crazy light beams; the multiplier may need adjusting.
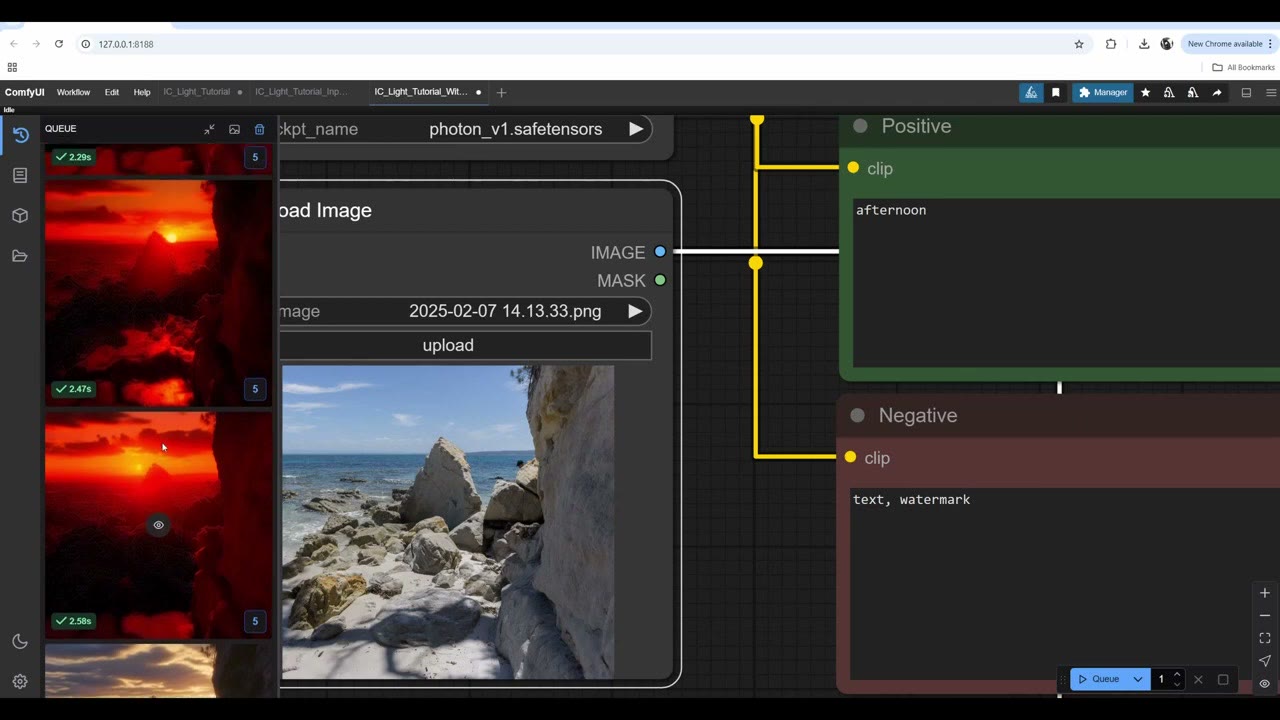
On a landscape photo from Australia, “daylight” gave interesting results, “sunset” made it far too red and scary, and “afternoon” sometimes replaced the sea with a landscape that wasn’t there, but sometimes did a good job. You have to play with the prompts.
Upscaling the result
A relit 512 px image can go to 8K with my free upscaling workflow. The result wasn’t always amazing; I often found the 512 relit image better. But if you need the resolution, it still gives a decent result.
Watch the video version (19:19)
Everything above is in the video too, if you'd rather follow along on screen.
FAQ
Can I use IC-Light v2 in ComfyUI?
Not when I made this. IC-Light v2 was only available as a paid, non-commercial service on its own website. This guide uses IC-Light v1, which runs locally.
Which IC-Light model should I download?
The FC (foreground-conditioned) model is all I use. The FBC model also takes a background; I tried background images and they never looked good, so I describe the background in the prompt instead.
Why are my relit images burned out or black and white?
Hard black-and-white light masks burn the image: soften them with Remap Image Range and a mask blur. Black-and-white results came up often on my 4 GB laptop and rarely on my 24 GB PC; a “50% saturated” style prompt can help.
What multiplier should I use in IC-Light Conditioning?
The default 0.182 works well. 0.155 got dimmer; 0.25 burned the image almost to a stylised look.

Anton Tenitsky is a 3D artist with 15+ years in computer graphics, working with Nickelodeon, Gameloft, Marvel Rivals and many other clients. More about me