Status: Tested on RunPod. I rendered batches with this template on RunPod on an RTX A5000, an RTX 5090 and a B200. The numbers in this guide come from those runs.
Give this workflow one portrait and a folder of voiceovers (20, 50 or 2,000 of them) and it renders a talking-head video for every file, one after another, without you touching it. It can run for days.
It’s built on MiniMax H3, an open-weights video model that ComfyUI supports natively. Compared with my earlier LTX-2.5 avatar setup, it was about 30% faster, about 30% cheaper and gave cleaner joins between chunks.
In short
- Cost: about 20 minutes of finished 768 × 768 video for $2–3 of GPU time, roughly $0.13 per finished minute on an RTX 5090.
- GPU: 32 GB of VRAM is the safe pick. 24 GB works but can stall hours into a job.
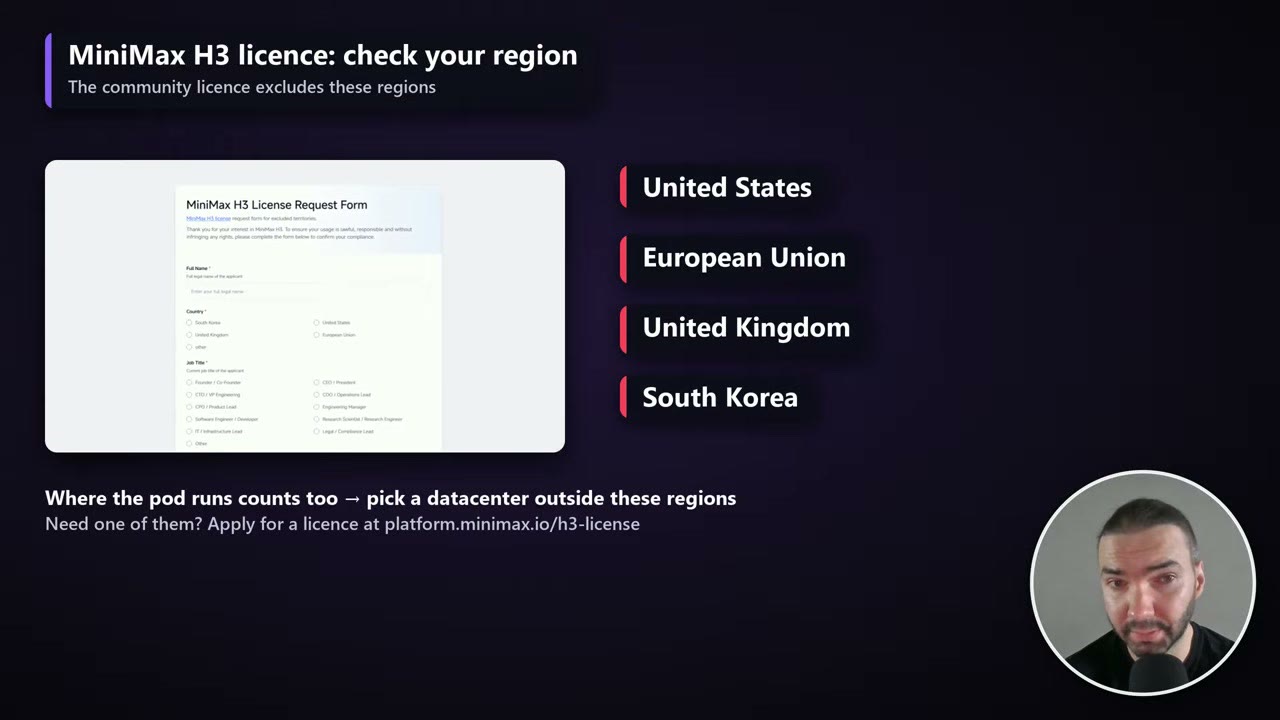
- Licence: not licensed in the US, EU, UK or South Korea, and that includes where your pod runs.
- How it works: the voiceover is cut into chunks of up to 10 seconds at the pauses, each chunk starts and ends on your portrait, and the chunks are stitched back together with your original audio.
- Free template on GitHub, or one click on RunPod.
Check the licence first
The MiniMax H3 community licence excludes the United States, the European Union, the United Kingdom and South Korea. It covers where the model runs as well as where you are, so pick a RunPod data center outside those regions. If you need one of them, MiniMax grants licences on application.
The licence also has an acceptable use policy. Among other things, it bars impersonating real people without their consent, and any commercial product built on it has to display “MiniMax H3”. Read it before using this for client work.
What you need
- A portrait, ideally on a plain, evenly lit background. Signs, screens and text in the picture tend to animate.
- Voiceovers as
.wav,.mp3,.flac,.m4a,.aac,.oggor.opus. Each file becomes one video, named after the file. If you need voiceovers, my Qwen3-TTS template makes them with open models. - A GPU with 32 GB of VRAM, such as an RTX 5090. You can run it locally if you have one; the setup script lists every model and node.
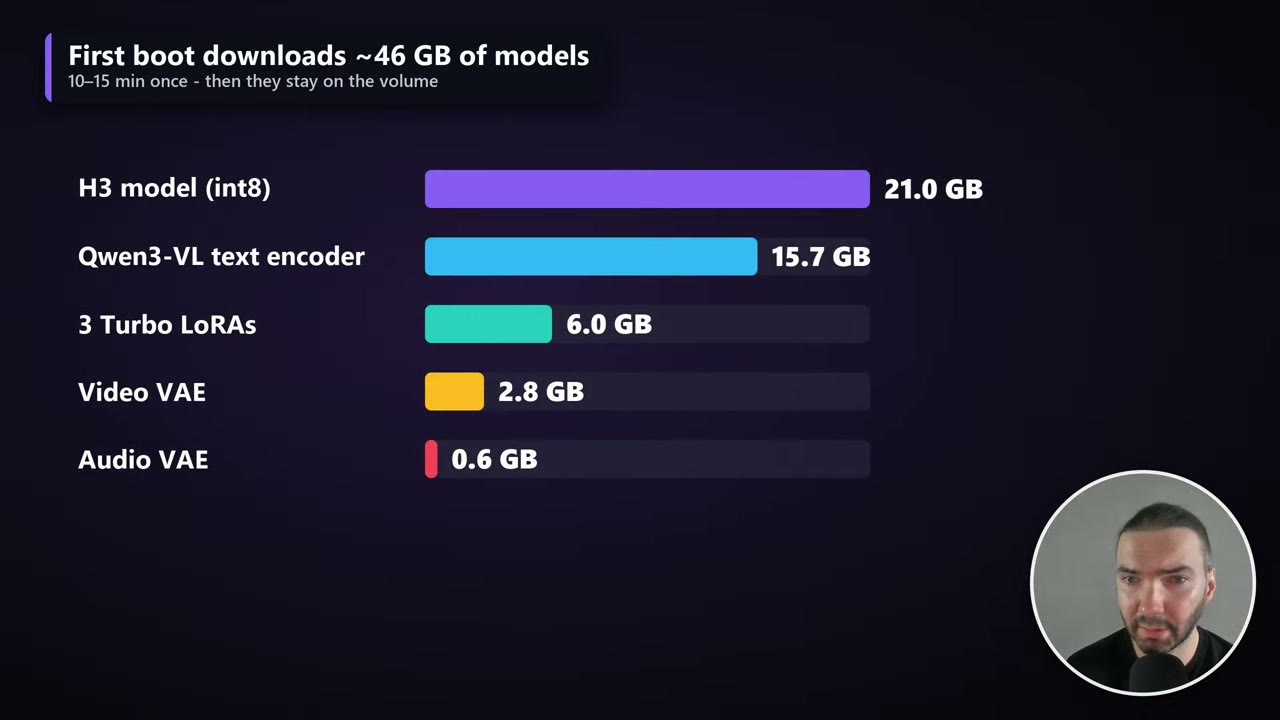
- About 100 GB of storage. The models alone are about 46 GB.
Which GPU
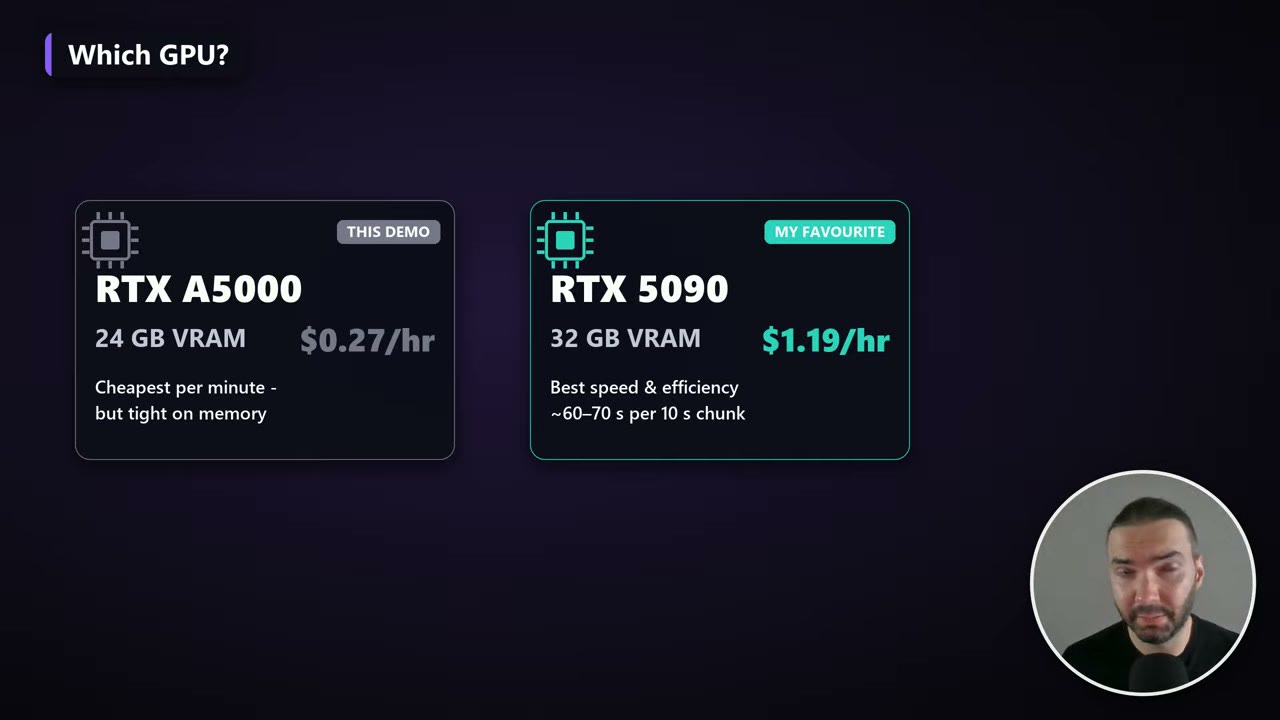
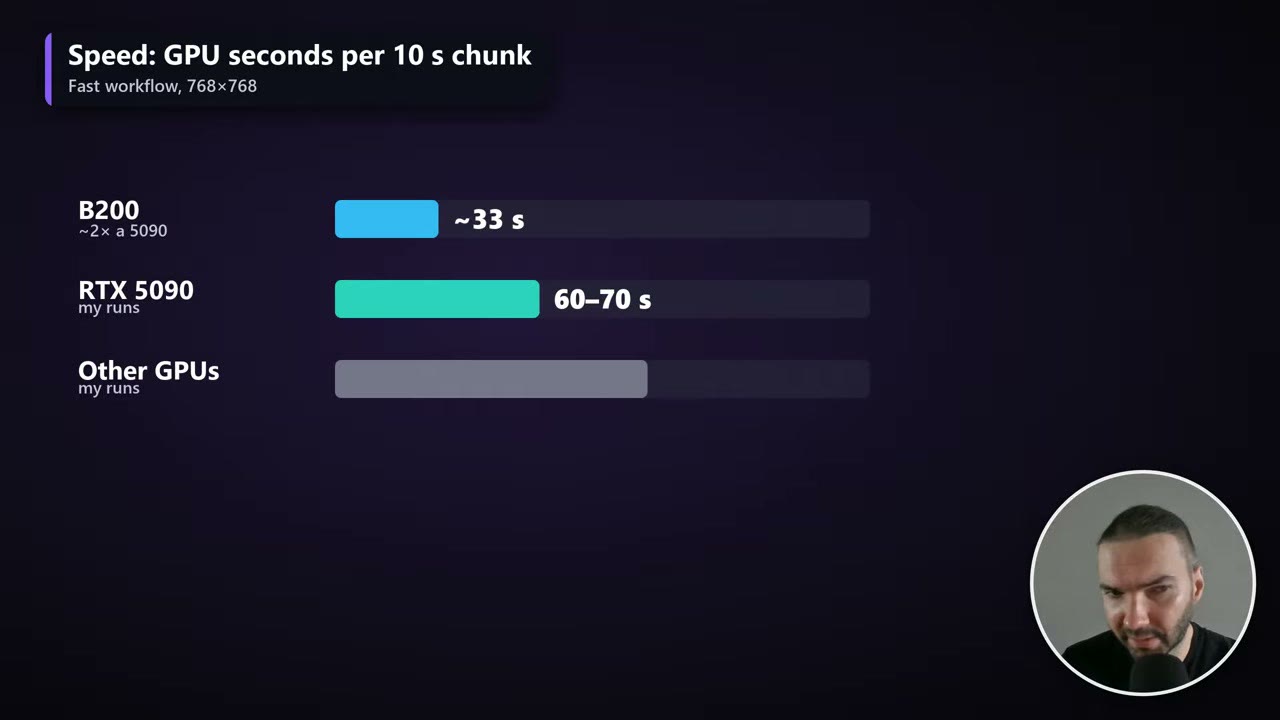
I ran this on three GPUs. These are the times for the Fast workflow:
| GPU | VRAM | Price (Oct 2026) | GPU time per chunk | 20-minute video |
|---|---|---|---|---|
| RTX A5000 | 24 GB | $0.27/hr | ~118 s for a 7 s chunk | ~5.4 h, ~$1.50 |
| RTX 5090 | 32 GB | $1.19/hr | 60–70 s per 10 s chunk | ~2.2 h, ~$2.60 |
| B200 | 180 GB | $7.99/hr | ~33 s per 10 s chunk | ~1.1 h, ~$8.70 |
The RTX 5090 is my pick: the best balance of speed and cost. The B200 was about twice as fast but about six times the price per hour, so it only makes sense when a deadline matters more than the bill. The A5000 is the cheapest per minute of video if you can wait.
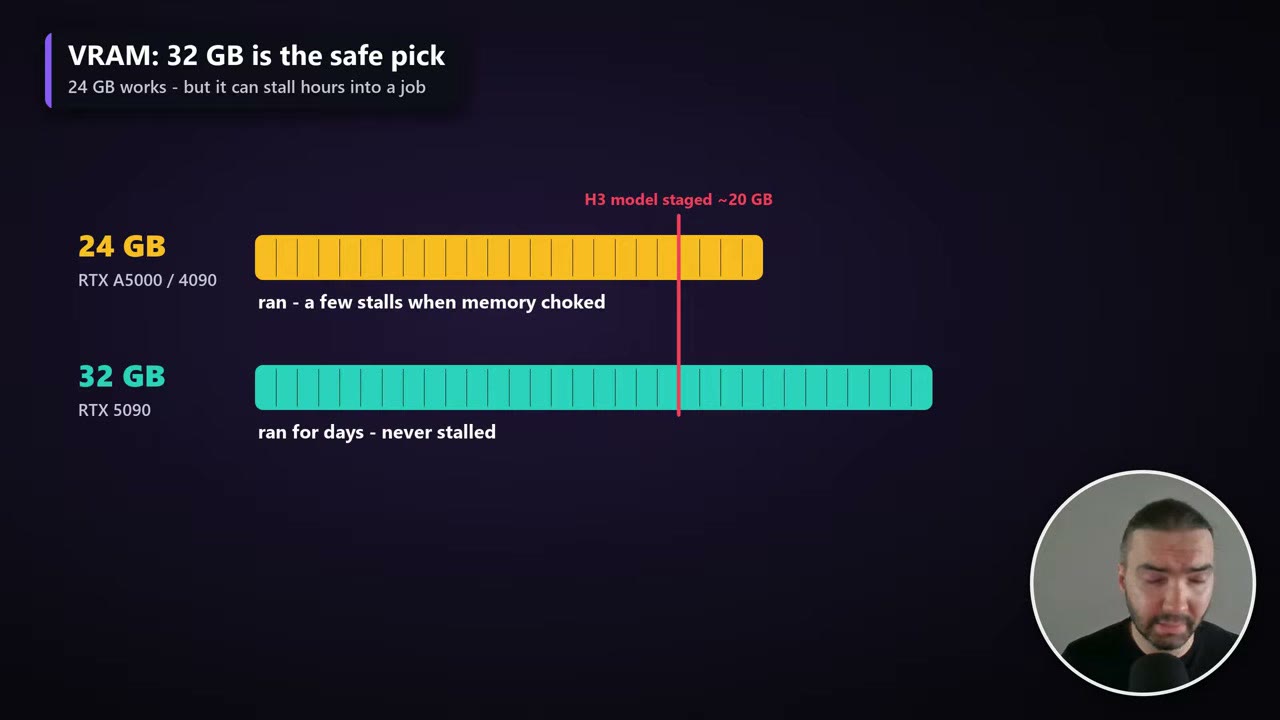
The VRAM is the real constraint. With 24 GB the job runs, but long batches can stall a couple of hours in. With 32 GB I ran single jobs for days.
These prices are RunPod’s list prices in October 2026. RunPod raised prices recently; my “$2–3 per 20 minutes” was measured at the older rates (the B200 was about $6.50/hr at the time).
Set up the pod
If you haven’t used RunPod before, my introduction to RunPod covers accounts, network volumes and pods in detail. The short version for this template:
- Create a network volume in a data center outside the excluded regions. The template README recommends 100 GB; I used 80 GB, which fits the default models with room for renders. Storage costs $0.07/GB a month on standard storage and $0.14 on high-performance, so 80 GB is $5.60 or $11.20 a month. It’s billed for as long as the volume exists, not charged up front.
- Deploy the template with the volume attached. Under Additional filters → CUDA Versions, select 13.0: the template runs on the CUDA 13 image and needs a host with a recent driver.
- Wait for the first boot. It downloads about 46 GB, which takes 10–15 minutes. Follow it in the logs. ComfyUI sometimes says “ready” before it is, and JupyterLab can say “initializing” when it’s actually ready, so try opening it.
Upload portraits and voiceovers
Open JupyterLab (port 8888) from the pod’s Connect menu. It’s your file browser.
- Put portraits in
ComfyUI/input/. - Put the voiceovers for a batch in
ComfyUI/input/batch_audio/. The template creates this folder on first boot.
Running several pods at once? Make a folder per batch (batch_audio_1, batch_audio_2 and so on) and point each pod’s workflow at its own folder.
After uploading, reload ComfyUI in your browser. Its file dropdowns only update on a reload.
Pick a workflow
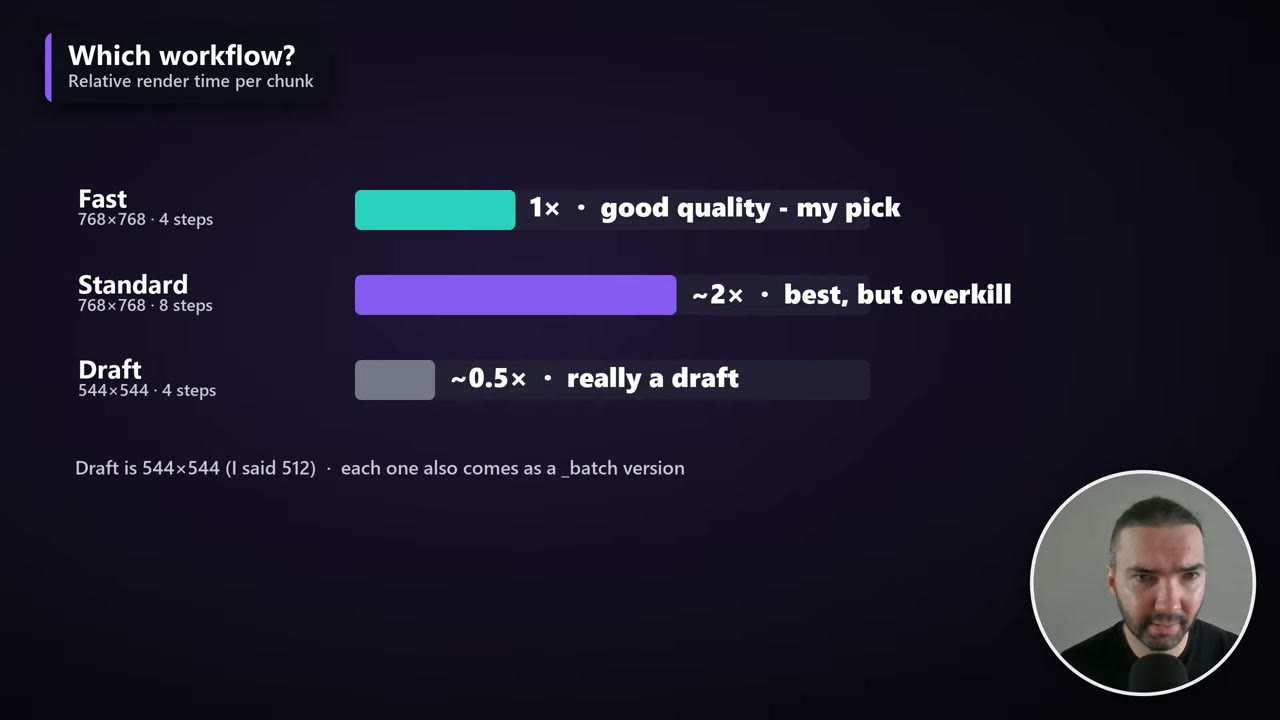
Open ComfyUI (port 8188), then the Workflows sidebar. There are three quality levels, each as a single-file workflow and a _batch version that renders a whole folder:
| Workflow | Resolution | Steps | Render time | When to use it |
|---|---|---|---|---|
| Fast | 768 × 768 | 4 | 1× | Good quality; my pick |
| Standard | 768 × 768 | 8 | ~2× | The best quality, but overkill for most jobs |
| Draft | 544 × 544 | 4 | ~0.5× | Only for testing timing and framing |
The workflows are meant for long jobs: that’s where renting a GPU saves money. For a single test clip, the overhead isn’t worth it.
How it works
Understanding three ideas makes the settings make sense.
Every chunk starts and ends on your portrait. H3 pins the first and last frame of each generation to the image you give it, so the face can’t drift away over a long video. The person returns to the same neutral expression at every join, which reads naturally for a talking head.
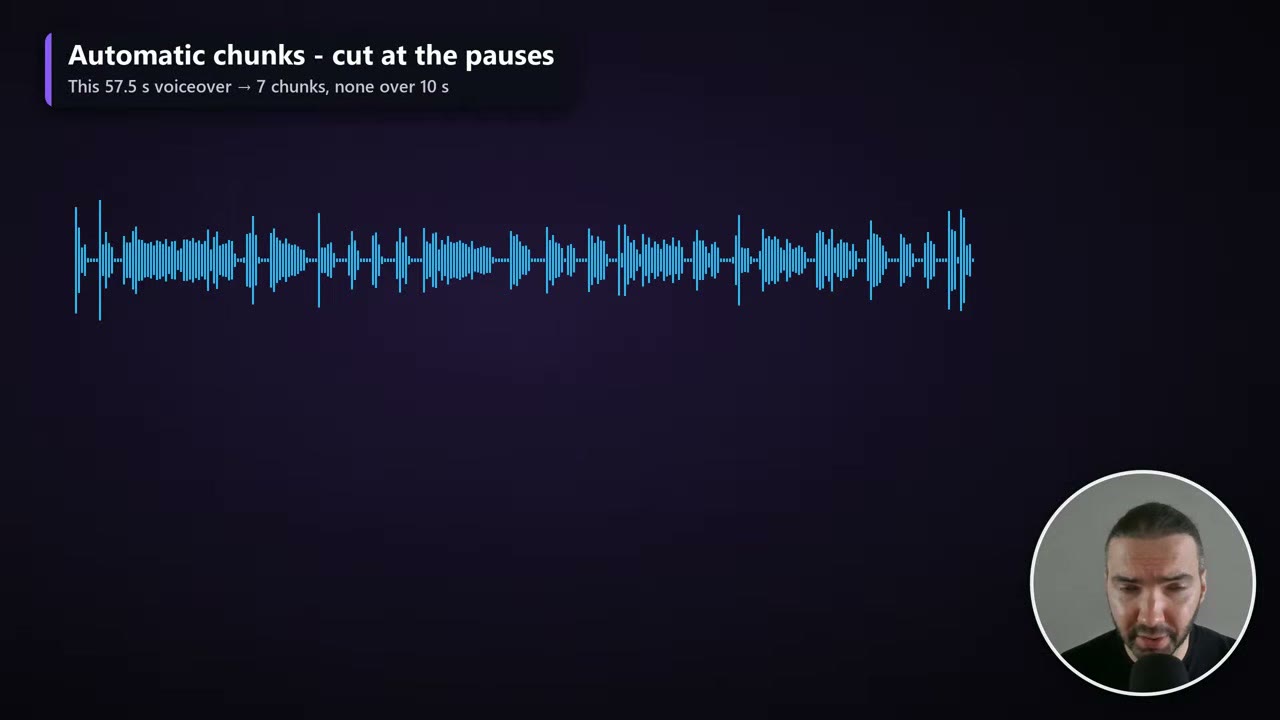
The voiceover is cut at the pauses. One H3 generation tops out at about 15 seconds (362 frames at 24 fps), and the further a chunk gets from its anchor frames, the more the background and framing drift. So the template cuts your audio into chunks of up to 10 seconds, always in a pause. A 57.5-second voiceover became 7 chunks, none longer than 10 seconds.
The picture follows your audio. Each chunk’s slice of the voiceover is fed to H3 as a guide, so the model animates the mouth to your sound instead of inventing speech. The finished video uses your original audio track, not the model’s reconstruction.
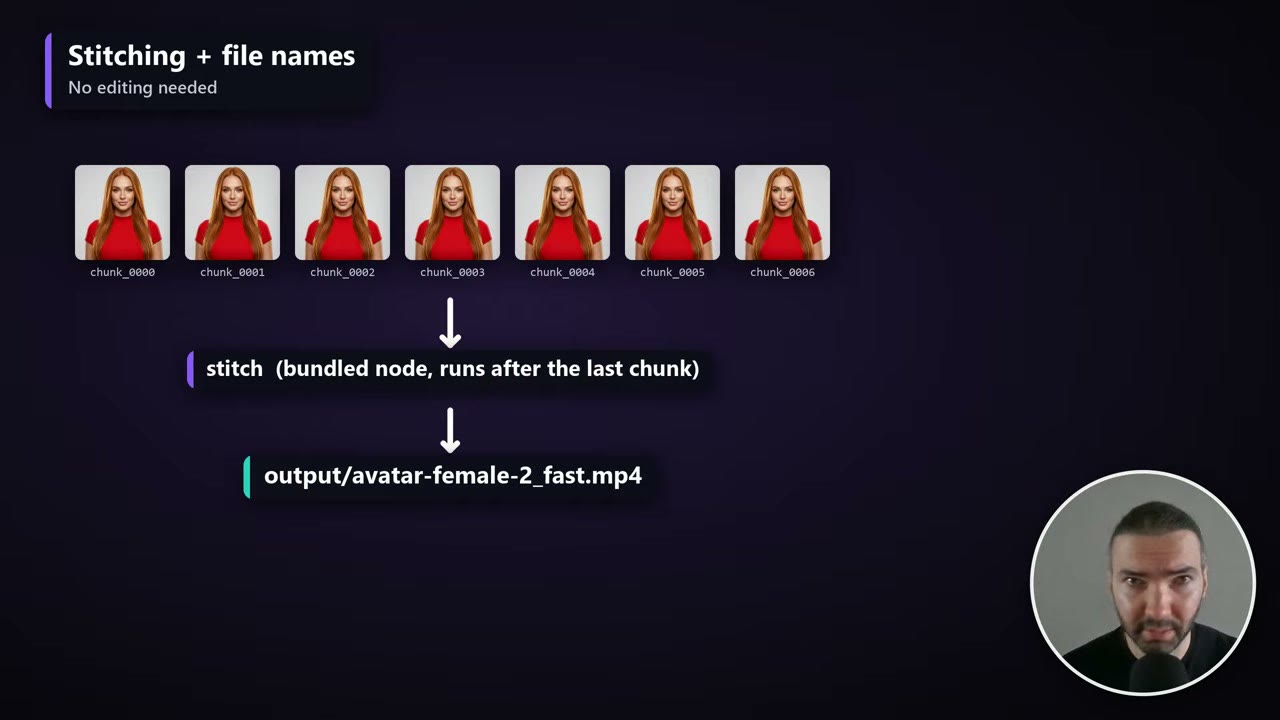
The joins are close to seamless, cleaner than LTX-2.5, where the noise pattern visibly shifts at each join. H3 has its own quirk: occasionally it zooms in on the face for no reason, even when the prompt doesn’t ask for it. Check the first chunk for that before committing to hours of rendering.
Describe the look, or it will change
This is the setting that matters most. The Talking-Head Prompt node has two fields: the subject and the background, both describing what’s already in your portrait.
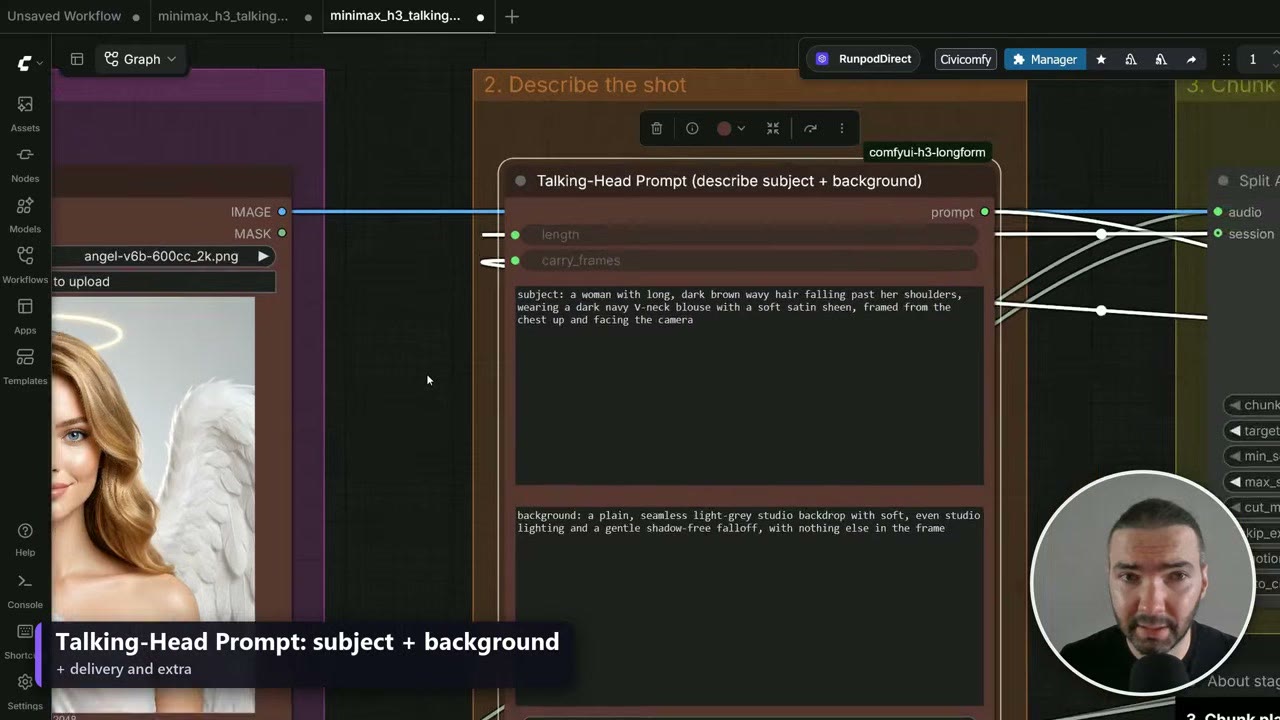
Only the first and last frames are anchored; everything in between is generated, and the model fills whatever the prompt leaves open. If you don’t describe the clothing, it can change in the middle of a chunk.
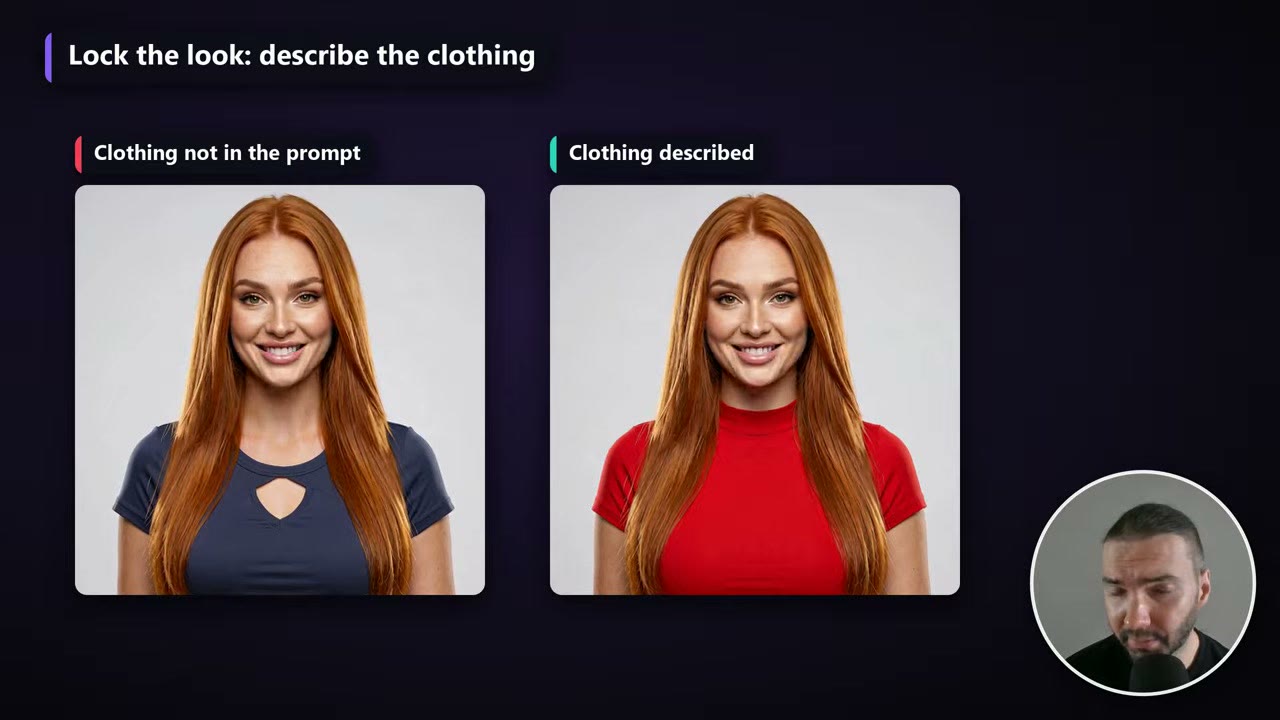
A few rules that worked for me:
- Describe the hair and clothing in plain words: for example, “a woman with long, light, wavy hair falling past her shoulders, wearing a white toga”.
- Keep the background simple and say so: a plain backdrop, soft even lighting.
- Don’t overwrite it. Too much description can make the result stiff or burnt. Aim for a few concrete words per field. A chatbot can tighten your wording if you get stuck.
The template’s prompt already rules out text, captions and logos, and it avoids words like “presenter” that pull the model towards TV graphics.
Run the batch
Set the resolution if you need something other than square, then queue with Run (Instant). Each run renders the next unfinished chunk, so it keeps going until every file in the folder is done, then stops on its own.
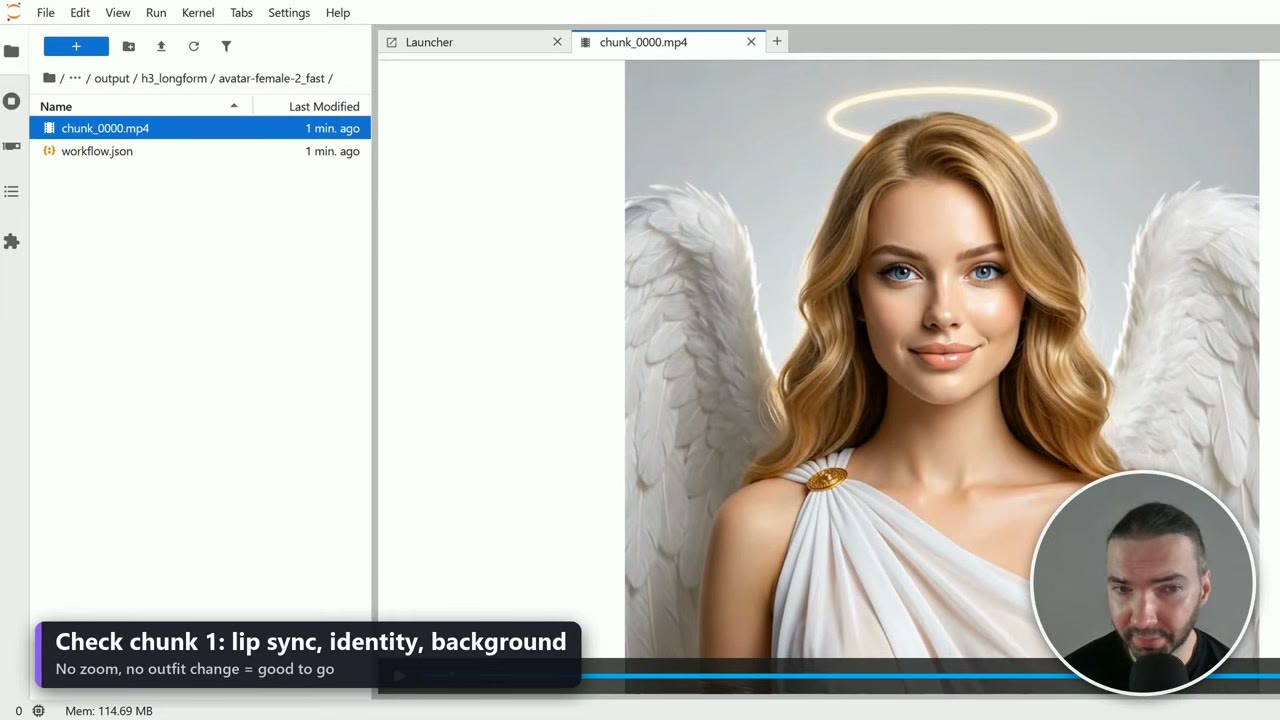
Test one chunk first. The first chunk includes model loading, so it’s slower (212 seconds in my run, against 118 for the second on the A5000). Open it in JupyterLab under output/h3_longform/<voiceover name>/chunk_0000.mp4 and check three things: lip sync, the face, and the background. No zooming, no outfit change: good to go.
Resuming is automatic. If the pod stops at chunk 150 of 300, queue again and it carries on from 151, on the same pod or a new one attached to the same volume. A finished video is skipped too. To render one again, change name_suffix on the output-name node or delete its folder under output/h3_longform/. During testing I had to clear old chunks this way when I reused a file name.
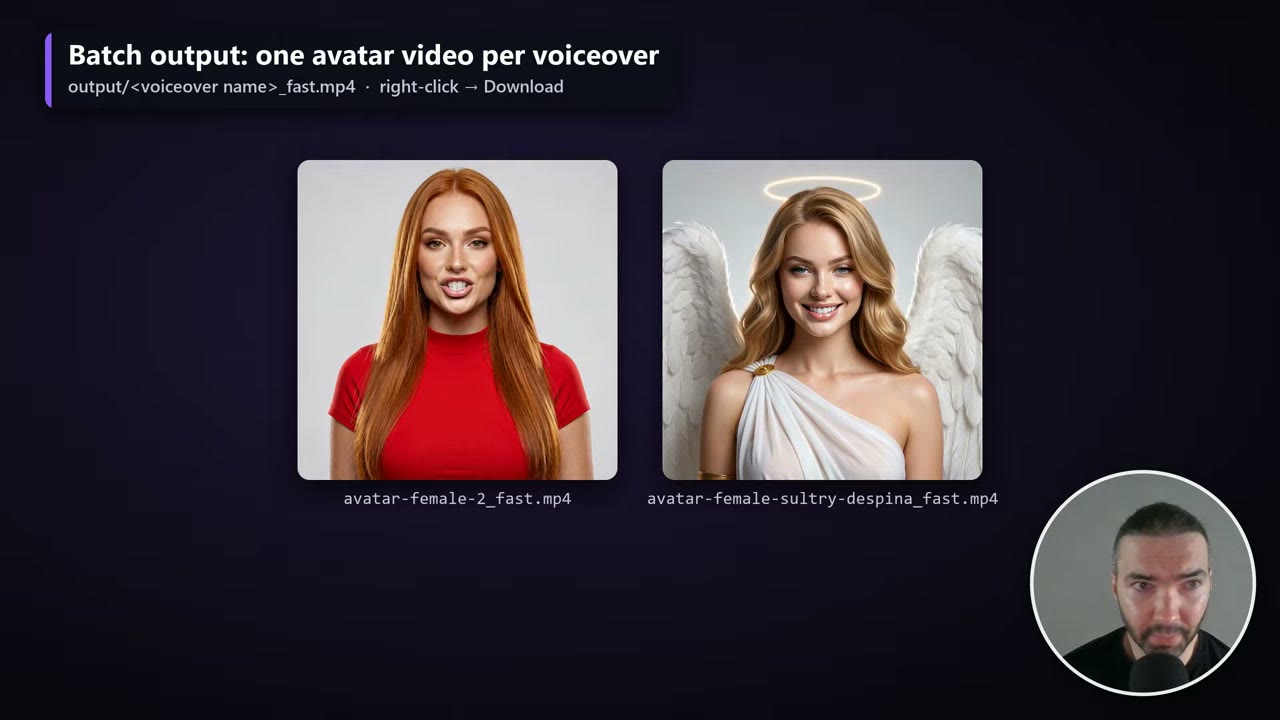
When a video is done, it’s saved as output/<voiceover name>_fast.mp4 (the suffix matches the workflow). Right-click it in JupyterLab to download.
Optional: motion carry
The template has an experimental setting on the Split Audio Chunk node, motion_carry, that starts each chunk from the last few frames of the previous one instead of the portrait. It can smooth the joins further, but it’s off by default and the README notes it hasn’t been tested on a GPU yet. If you try it, queue chunks in order and use a fresh session name.
When you’re done
Stop the pod: your files stay on the volume, and you can restart later on any GPU in the same data center. When the project is finished, delete the volume too, or it keeps billing. RunPod won’t delete a volume while a pod is still attached, so terminate those pods first.
Mistakes to avoid
- Running it in an excluded region. Check the data center, not just your own location.
- Skipping the clothing description. The outfit can change mid-chunk.
- An over-written prompt. A few concrete words beat a paragraph.
- Going straight to a 10-hour batch. Check the first chunk.
- Wrong CUDA version. Filter for CUDA 13.0 when you deploy.
- Forgetting the volume. Stopped pods cost little; a forgotten volume bills every month.
The template's RunPod link, and my RunPod referral link, give new accounts that sign up with Google $5–$500 in credit after their first $10, and I get a small commission.
Watch the video version (14:43)
Everything above is in the video too, if you'd rather follow along on screen.
FAQ
How much does a MiniMax H3 talking-avatar video cost to render?
In my runs, about 20 minutes of finished 768 × 768 video cost $2–3 of GPU time, roughly $0.10–0.15 per finished minute on an RTX 5090. That was at RunPod’s older, cheaper rates; check current prices before a big job.
How much VRAM does MiniMax H3 need?
32 GB is the safe choice. 24 GB works, but long jobs can stall hours in when memory runs out. On an RTX 5090 with 32 GB it ran for days without a stall.
Can I use MiniMax H3 in the United States or the EU?
Not under the community licence, which excludes the United States, the European Union, the United Kingdom and South Korea, including where the pod runs. MiniMax grants licences for those regions on application.
How long can one MiniMax H3 generation be?
About 15 seconds (362 frames at 24 fps). The template renders 10-second chunks cut at pauses and stitches them, so the voiceover itself can be any length.
What happens if the pod stops halfway through a batch?
Queue it again. Finished chunks and finished videos are skipped, and the job carries on from the next unfinished chunk, on the same pod or a new one attached to the same network volume.

Anton Tenitsky is a 3D artist with 15+ years in computer graphics, working with Nickelodeon, Gameloft, Marvel Rivals and many other clients. More about me